Coffee Cupping Explained: How to Cup Coffee at Home (Step by Step)
Cupping is how coffee buyers, roasters and cafes taste and compare coffee. The good news: you can do it at home with a kettle, a scale and a few spoons. Here's exactly how, plus how to taste, what to write down and the mistakes to avoid.
We choose products independently. We may earn a commission through links on this page; your price stays the same. Affiliate policy
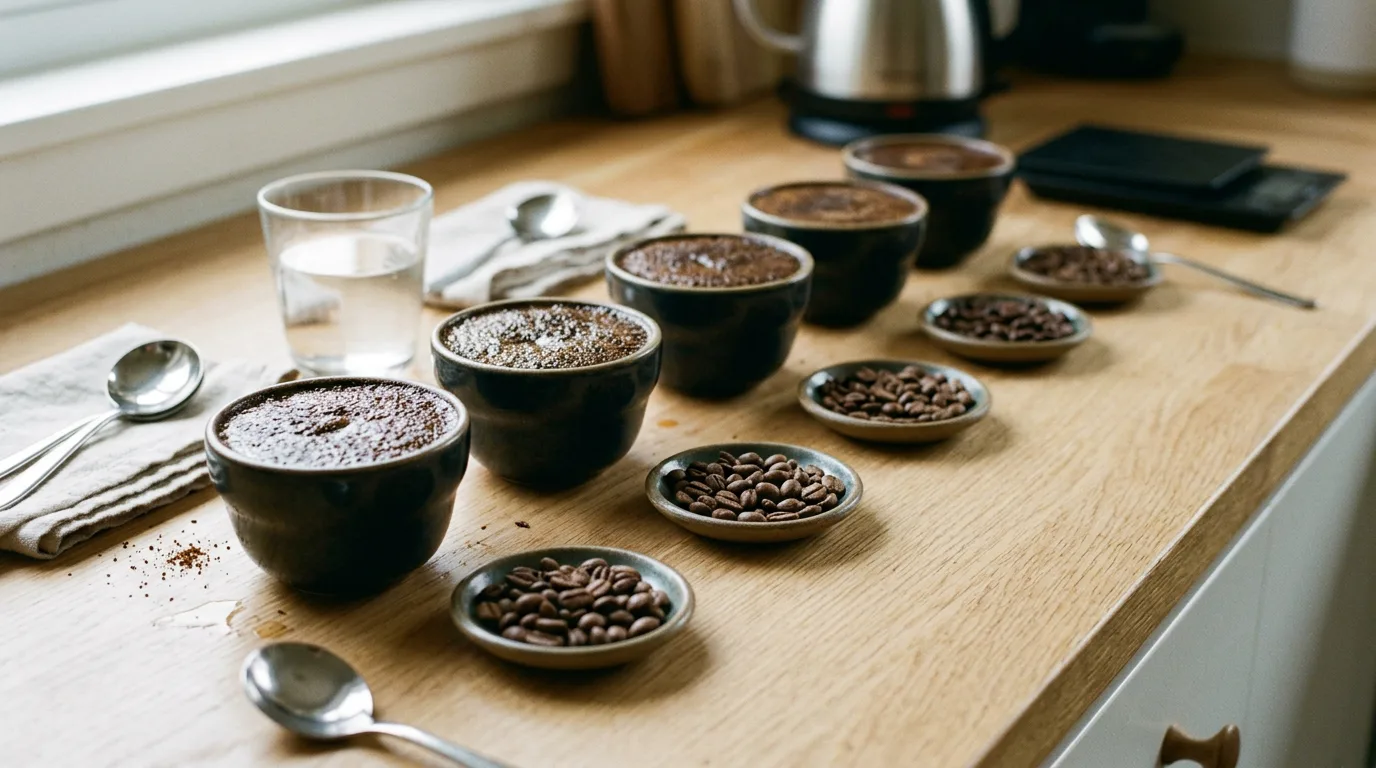
Cupping is a simple, standardized way to brew several coffees the same way and taste them side by side. It's how the coffee industry judges and compares coffee.
At home: grind 12 g of coffee (medium-fine) into a cup, add 200 g of hot water, wait 4 minutes, gently break the crust and skim off the grounds, let it cool for 10+ minutes, then taste each coffee with a spoon, slurping gently.
The magic is in the comparison. Differences in sweetness, acidity, body and flavor that you'd never notice in one cup become obvious when coffees sit next to each other.
Why I wrote this
The first time I joined a cupping at a roastery, I was intimidated. Rows of bowls. Professionals slurping loudly. Scoresheets. Everyone seemed to know a secret language.
Then the roaster told me something that stuck: "Cupping is just making the same coffee five times and paying attention."
She was right. Strip away the rituals and cupping is the simplest, fairest way to compare coffees. There's no special brewer, no pouring technique to master and no expensive gear. If you can boil water and use a kitchen scale, you can cup.
Cupping removes the guesswork that comes with everyday brewing, so the only thing left to taste is the coffee itself. And it's the single best thing I've ever done to improve my palate.
I now cup at home almost every week, with ordinary mugs and a kitchen scale. This guide shows you exactly how I do it.
What you'll learn
- What cupping is and why the coffee industry relies on it
- The basic equipment, most of which you already own
- How to choose coffees for an interesting comparison
- The exact ratio, grind and timing to use
- How to break the crust, skim and taste properly
- What to write down, and what to ignore
- Common mistakes, and a full step-by-step checklist
What coffee cupping is
Cupping is a structured way of brewing and tasting coffee. It's used throughout the coffee industry to evaluate quality, compare coffees and understand what makes each one different.
The central idea is simple:
Why comparing is so powerful
When you taste a single coffee, it's hard to say exactly what makes it special. Is it sweet? Compared with what?
Put several coffees next to each other and the differences jump out. One is clearly sweeter. Another is brighter. A third is heavier. Your brain is much better at comparing than at judging in isolation.
That's why comparative tasting is one of the most effective ways to train your palate.
How professionals use cupping
Almost every coffee you've bought was cupped many times before it reached you.
| Who | Why they cup |
|---|---|
| Coffee buyers | Evaluate lots before deciding what to purchase |
| Importers | Check that arriving shipments match the approved samples |
| Roasters | Check roast consistency and the quality of their products |
| Cafes | Compare coffees when deciding what to serve |
| Producers | Understand how harvest and processing changes affect quality |
Professional protocols
Professional cupping follows detailed standards. The Specialty Coffee Association's classic cupping standard, for example, specifies precise ratios, roast levels, grind, water and timing, so that cuppers anywhere in the world taste coffee the same way.
Professionals also score coffees. On the widely used 100-point scale, coffees scoring 80 or above are generally considered specialty grade.
You don't need any of that at home. The goal isn't to reproduce every professional procedure. It's to prepare several coffees consistently and compare them in a relaxed, enjoyable way.
Our tip: Many specialty roasters host public cuppings, sometimes free. Joining one is a great way to see the process in person before trying it at home.
Equipment you need
Most of what you need is already in your kitchen. No special equipment required.
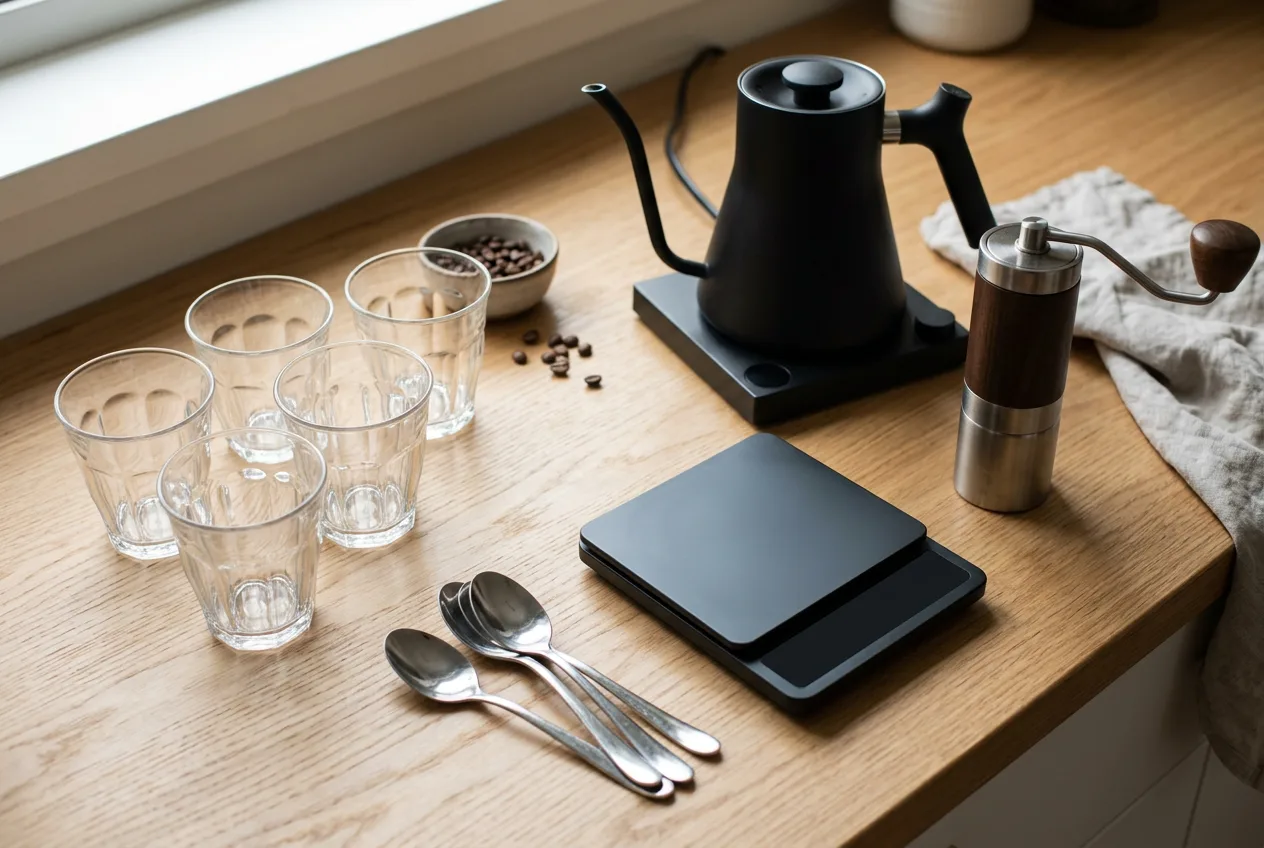
Kettle
Any kettle works. You don't need a gooseneck, because cupping doesn't involve careful pouring.
What matters more is water quality. Use fresh, cold water that tastes clean. Water with off-flavors or lots of minerals will change how every coffee tastes. My guide to water chemistry for coffee explains why.
Digital scale
You'll weigh both coffee and water, so a scale is important. Ideally use one that reads to 0.1 gram. That precision makes your samples consistent, and fair comparisons depend on it.
Grinder
You'll grind each coffee fresh. Ideally, use a grinder that doesn't hold on to old grounds, because leftover coffee from one sample can contaminate the next.
If your electric grinder retains a lot, a hand grinder can be easier for small amounts.
Spoons
Professional cupping spoons are deep and round, but any soup or dessert spoon works. Have several on hand so you can rinse between coffees.
Cups
Professionals use small cupping bowls. At home, use whatever you have: small ceramic bowls, heatproof glasses, sugar bowls or regular mugs.
About 8 to 9 fluid ounces per cup is convenient. Ideally use five or six cups of the same size and shape. If they're different sizes, that's fine, as long as you know each one's capacity.
Coffee samples
You don't need full bags. About 20 grams of each coffee is usually enough for a session.
Choosing coffees to compare
The coffees you pick make or break the session. For a first cupping, choose four or five that offer some variety. Three is enough to be interesting, and even two can reveal real differences.
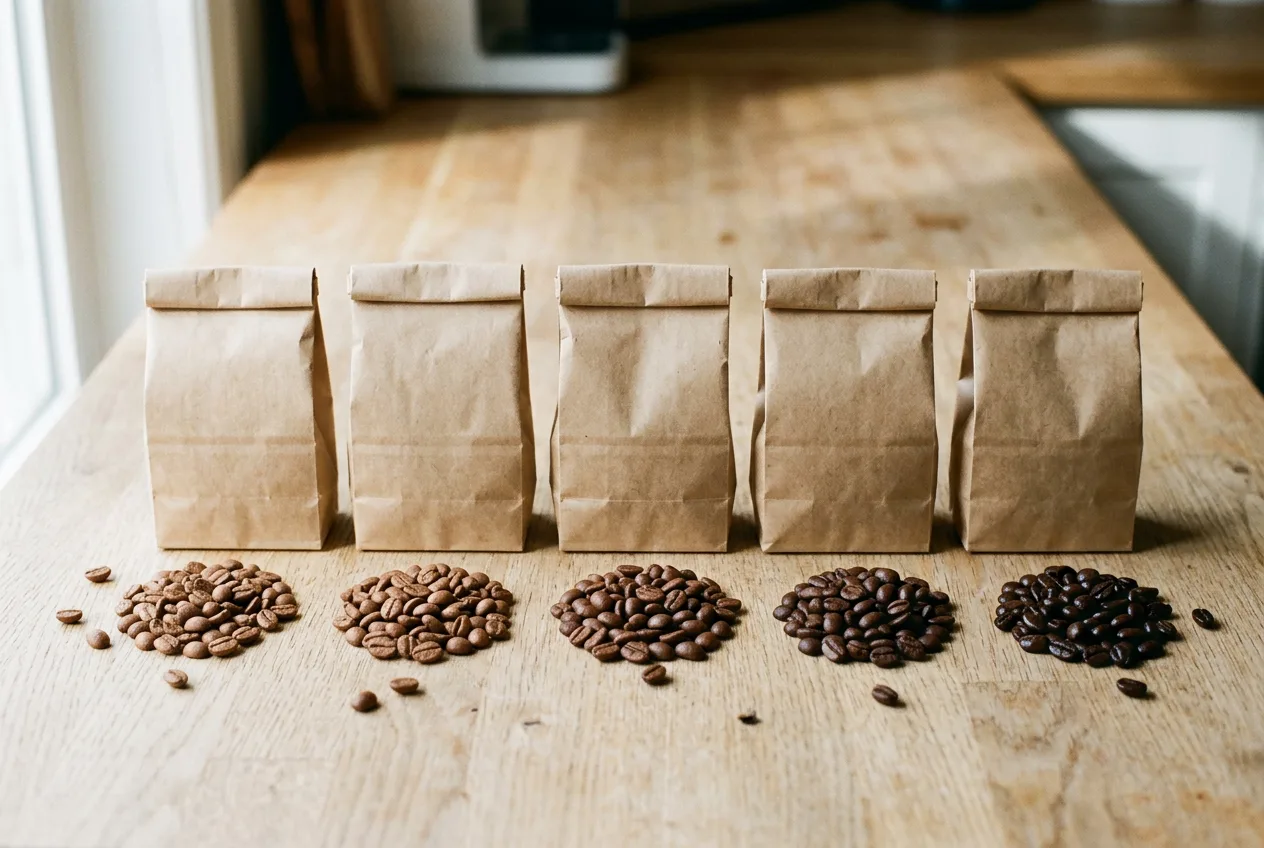
Good comparison themes
| Theme | Example lineup | What you'll learn |
|---|---|---|
| Origins | Ethiopia, Colombia, Brazil, Sumatra | How growing region shapes flavor |
| Processing | Washed vs natural vs honey from one country | How processing changes fruit and body |
| Roast level | Light, medium and dark of similar coffees | How roasting shifts acidity and bitterness |
| Freshness | Same coffee at 1 week and 6 weeks after roasting | How staling flattens aroma and sweetness |
| Price | Supermarket vs specialty | Whether the price difference shows up in the cup |
Getting small samples
There's no need to buy several full bags. Ask a local coffee shop for small amounts, or swap beans with friends who also love coffee. Many roasters also sell sample packs.
Don't read the tasting notes first
It's tempting to read every bag before you start. Try not to. Printed flavor notes shape your expectations and send you hunting for specific flavors.
Focus on your own experience instead. You might simply find that one coffee is sweeter, another more acidic, and another heavier. Those observations are valuable even if you can't name specific flavors yet.
Why cupping uses immersion brewing
Cupping uses a simple immersion method: the coffee steeps in water for a fixed time, a bit like a French press without the plunger.
It removes your technique from the equation
With pour-over, pouring speed, pattern, agitation and timing all affect the cup. That makes it hard to know whether a flavor comes from the coffee or from how you poured.
Immersion takes most of that out. Every coffee gets the same water, the same time and no fancy technique.
It's efficient
Brewing five pour-overs one after another takes time and attention. Five immersion cups can be prepared at once. The same method works for five, ten or even more coffees.
The four basic steps
- Grind the coffeeDirectly into its own cup.
- Add hot waterWeighed onto each cup.
- Steep for about 4 minutesUndisturbed.
- Break the crust and skimThen let it cool and taste.
Grind size and brewing ratio
Grind
Use a grind toward the finer end of medium-fine, a bit like coarse sand. Most importantly, use the same grind setting for every coffee, so extraction differences don't muddy the comparison.
Ratio
The home cupping ratio I use is 60 grams of coffee per 1,000 grams of water, about 2.1 ounces of coffee per 35.3 ounces of water.
That's a little lighter than many immersion recipes. A slightly weaker cup is easier to taste comfortably, especially across several coffees.
For an 8–9 oz cup
Leave room for the bloom
Don't fill the cup to the brim. Grounds swell as they soak up water, and foam forms on top. The expanded coffee takes up roughly three to four times the volume of the dry grounds.
A cup that looks half empty before brewing can be almost full a minute later.
Scaling for different cups
| Cup size | Coffee | Water |
|---|---|---|
| Small (~6–7 oz) | 10 g | 160 g |
| Standard (~8–9 oz) | 12 g | 200 g |
| Large (~12–14 oz) | 20 g | ~330 g |
If your cups are different sizes, either use the smallest one as the reference and make every sample that size, or scale each recipe to its cup. Both work, as long as the ratio stays the same.
How this compares with the professional standard
The SCA's classic professional cupping standard uses 8.25 g of whole-bean coffee per 150 ml of water, which is about 55 g per liter. It also specifies a light, quick roast made specifically for cupping and tasting within a day of roasting.
My home ratio of 60 g per liter is close, and slightly easier to scale with kitchen cups. Either works perfectly for comparing coffees at home.
Weighing and grinding the coffee
- Weigh beans into each cupWeigh whole beans directly into the cup they'll be brewed in. It keeps everything organized. For 12 g, anything from 11.9 to 12.1 g is close enough.
- Purge the grinderBefore grinding a new coffee, grind a few beans of it and throw the grounds away. This clears out leftovers from the previous coffee.
- Grind back into the cupPour the weighed beans into the grinder and grind them back into the same cup.
- Reweigh the groundsSome grinders hold back a little coffee. Reweigh and top up if needed so every cup has the right amount.
- Hide the bagsPut packaging and tasting notes away so they don't influence you. Keep a simple record of which cup is which, for example by writing letters on the bottom.
Our tip: Ask someone else to set up the cups and label them on the bottom. Tasting "blind" is surprisingly fun, and much more honest.
Setting up your tasting table
Before you add any water, organize everything. Once the timer starts, things move quickly.
- All prepared cups together in a row, each easy to identify
- A kettle of fresh water
- The digital scale
- Several clean spoons
- A timer
- A notebook and pen
- A glass of drinking water
- One or two extra cups for rinsing spoons and discarding liquid
Once everything is in place, boil the water.
Using a scale for the water is especially useful if your cups are different sizes. One cup might need 200 g of water and another 330 g. Weighing each one prevents accidental differences in strength.
Brewing step by step
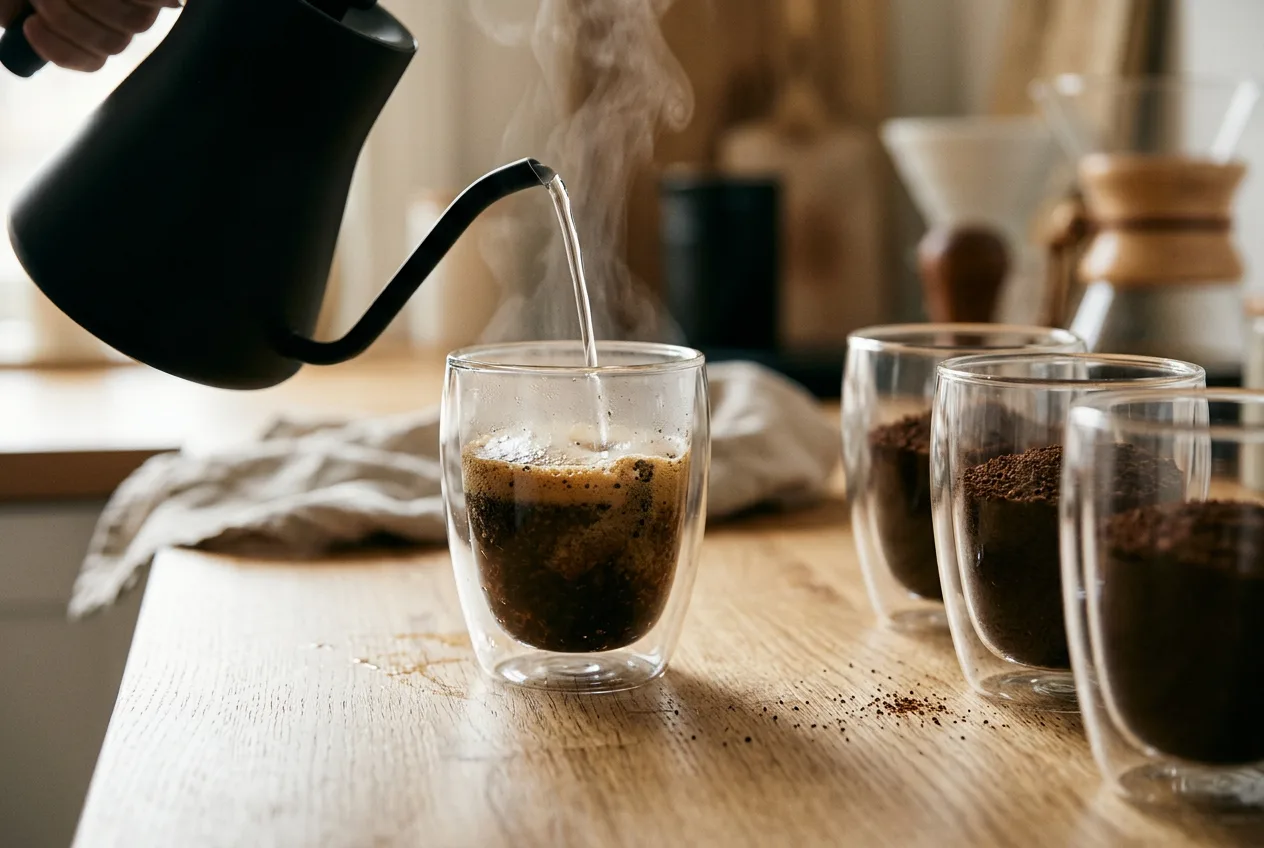
- Tare the cupPlace the first cup on the scale and set it to zero.
- Pour the waterSlowly add the right amount of hot water for that cup, just off the boil. Make sure all the grounds get wet.
- Repeat for every cupWork steadily through the row at a similar pace.
- Watch the bloomAs soon as water hits the grounds, they foam up and a crust forms on top.
- Start the timerOnce all cups have water, start a 4-minute timer.
- Leave them aloneDon't stir during the steep. Let the grounds and water work naturally.
Using the same steeping time for every cup is what makes them comparable. Four minutes is a solid, consistent starting point.
Before the four minutes are up, lean in and smell each cup. This is the "wet aroma" stage, and the crust traps a surprising amount of fragrance.
Breaking the crust and skimming
After about four minutes, each cup has a crust of floating grounds and foam. You need to break it before tasting.
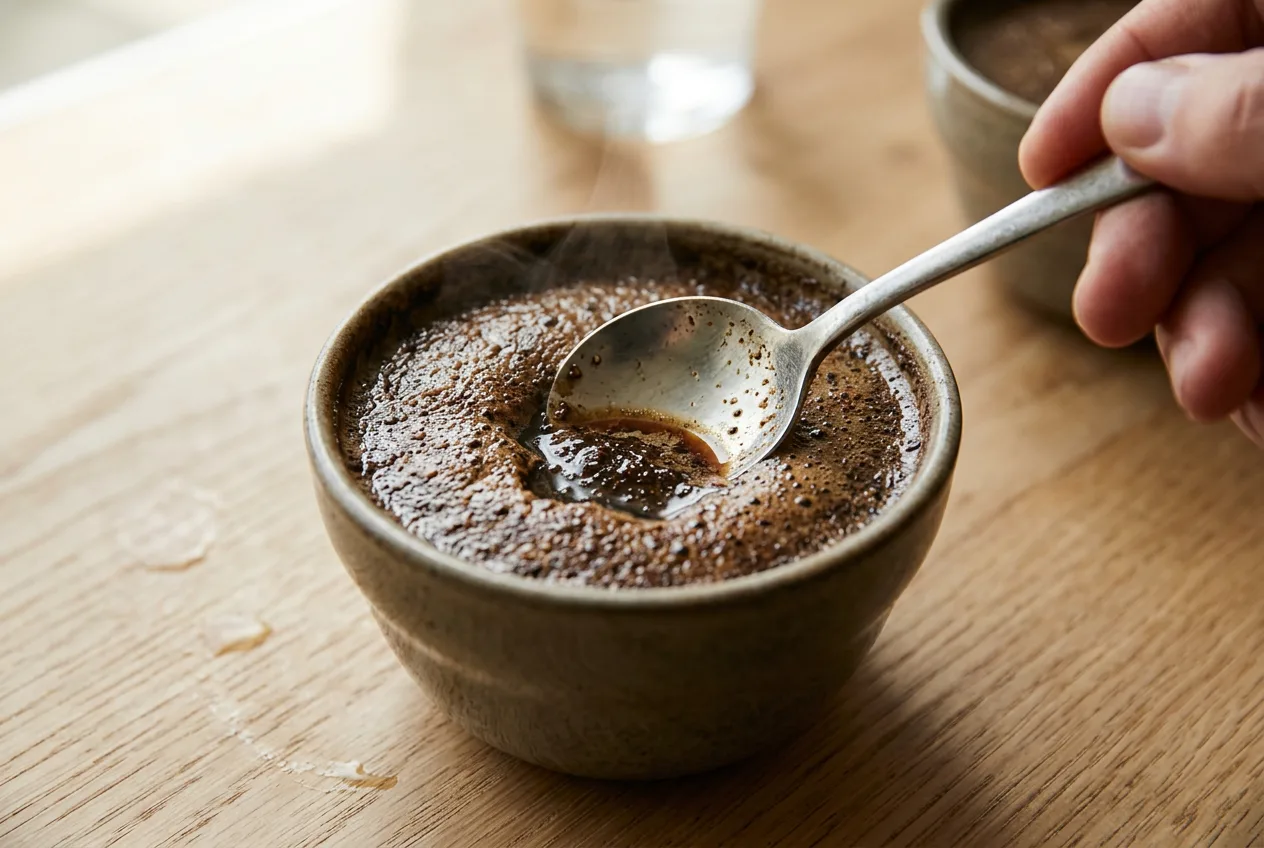
Break the crust
Take a clean spoon and gently push through the surface, stirring about three times. Most of the floating grounds will sink to the bottom.
Keep your nose close as you do it. Breaking the crust releases a burst of aroma, and it's often the most fragrant moment of the whole session. Professionals call this the "break."
Be gentle. You're settling the grounds, not whisking them.
Skim the surface
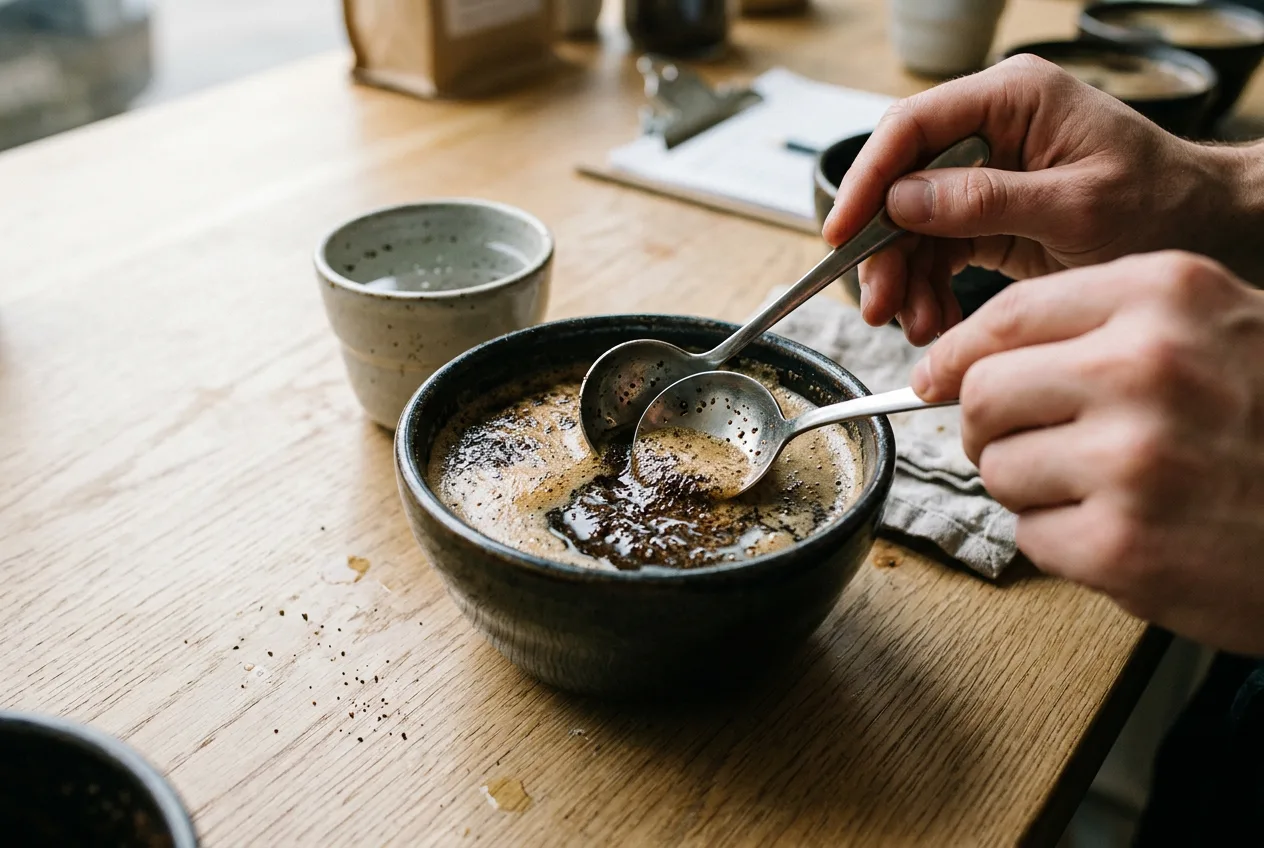
Using two spoons, scoop off any remaining foam and floating grounds. Rinse the spoons in your rinse cup between cups.
The goal is a fairly clean surface with most grounds settled at the bottom.
Do the same for every cup. Consistency matters more than speed.
Letting the coffee cool
Right after brewing, the coffee is too hot to taste well. Very hot coffee can burn your tongue and hides many flavors.
Temperature has a big effect on taste. As coffee cools, sweetness, acidity, aroma and balance all become easier to notice.
So wait at least another 10 minutes after skimming before you start tasting.
Use the time well
- Tidy the area and empty the rinse cup
- Line up clean spoons
- Open your notebook and write the cup labels
- Drink a glass of plain water to clean your palate
Don't rush this stage. Patience makes the tasting far more rewarding.
How to taste with a spoon
The spoon lets you take a small amount of coffee without lifting and drinking from each hot cup, and it keeps the samples clean.
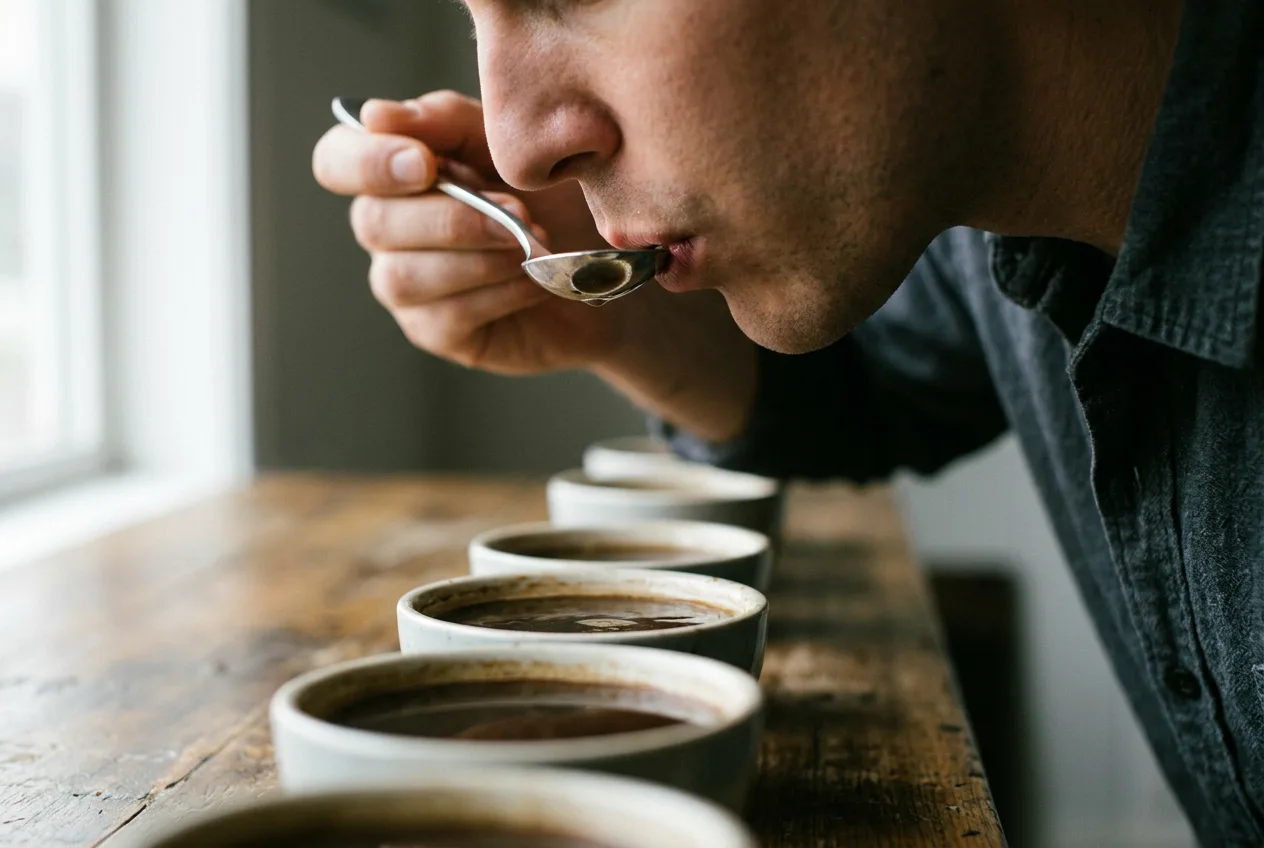
Slurp gently
Take a small spoonful and slurp it with a little air. Slurping sprays the coffee across your whole mouth and pushes aroma up to your nose. Flavors become much more noticeable.
You don't need to make a loud noise or perfect a special technique. A gentle slurp is plenty. Focus on what you taste, not on how you sound.
Rinse between coffees
Rinse the spoon in clean water before moving to the next cup, so flavors don't carry over.
Spit or swallow?
Professionals often spit, because they may taste dozens of cups in a day. At home with four or five coffees, swallowing small amounts is fine. If caffeine bothers you, keep a spare cup to spit into.
Our tip: Work along the row, then back again. Going A, B, C, D, then D, C, B, A helps your palate spot differences you'd miss going only one way.
Comparing the coffees
Comparison is the heart of cupping. Taste one, then another, then go back to the first.
Ask simple questions
| Question | What it reveals |
|---|---|
| Which tastes sweetest? | Sweetness and ripeness |
| Which has the most noticeable acidity? | Brightness and liveliness |
| Which feels heaviest or lightest? | Body and mouthfeel |
| Which has the strongest aroma? | Aromatic intensity |
| Which tastes most balanced? | How well everything fits together |
| Which has the cleanest finish? | Clarity and absence of off-notes |
| Which do you like most? | Your personal preference |
You don't need complicated flavor words. "Fruity," "chocolatey" or "delicate" is enough to start. If you want more specific vocabulary, my guide to the coffee flavor wheel shows how to narrow impressions down.
Quality vs preference
Try to separate what you like from what you can identify. A coffee can be interesting and complex without being your favorite. And a coffee you love might not be the most complex on the table.
Both observations are useful.
Taste again as it cools
Don't judge each coffee just once. Keep coming back as the cups cool toward room temperature. Coffee changes a lot during that time.
How cupping coffee typically changes as it cools
Bar length shows how much detail most tasters can pick out at each stage. A simplified guide.
A coffee that seemed sharp or intense while hot may turn soft and sweet as it cools. Another may reveal flavors that weren't obvious at first.
Cooling also exposes flaws. A coffee that tastes fine hot but turns dull, papery or harsh when cool often has a quality problem. That's one reason professionals keep tasting until the cups are nearly cold.
Keeping simple tasting notes
Notes help you remember the differences, especially when you look back weeks later. They don't need to be professional.
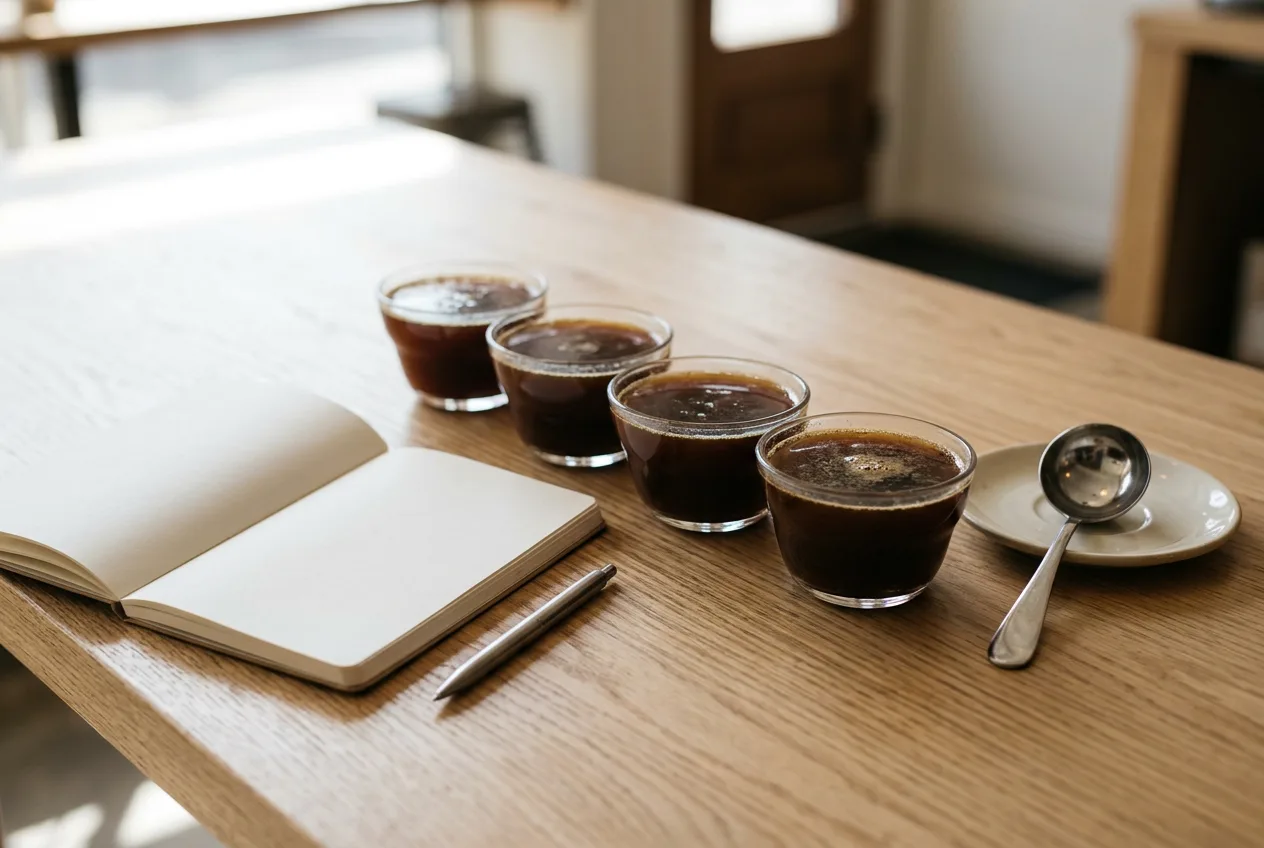
What to record for each coffee
- Cup label (A, B, C...)
- General aroma
- Sweetness
- Acidity
- Body or mouthfeel
- Main flavor impressions
- Overall preference
Example notes from one of my sessions
| Cup | My notes | Revealed afterward |
|---|---|---|
| A | Sweet and smooth, light body, noticeable fruit, pleasant aftertaste | Washed Colombian |
| B | Stronger and heavier, chocolate-like, low acidity, rich mouthfeel | Natural Brazilian |
| C | Bright and lively, noticeable acidity, lighter overall, clean finish | Washed Kenyan |
| D | Floral aroma, tea-like body, lemon, very delicate | Washed Ethiopian |
These notes aren't technically perfect, and they don't need to be. They capture real differences in plain language.
Don't force specific flavor words. If something tastes pleasant but you can't say why, just write that. Honest, simple notes are more useful than fancy terms that don't match what you taste.
Optional: a simple score
If you like numbers, give each coffee a score out of 10 for overall enjoyment. It's not a professional score, just a quick way to rank your favorites and spot patterns over time.
Your first session: a ready-made plan
If you're not sure where to start, here's the exact lineup and timeline I suggest for a first cupping. It's designed to show big, easy-to-spot differences.
The lineup
| Cup | Coffee | Why it's in the lineup |
|---|---|---|
| A | Washed Ethiopian, light roast | Floral and citrus, light body: the "bright" end |
| B | Washed Colombian, medium roast | Balanced and sweet: the middle ground |
| C | Natural Brazilian, medium roast | Nutty and chocolatey, heavier body |
| D | Sumatran, medium-dark roast | Earthy and spicy, low acidity: the "deep" end |
These four sit in very different parts of the flavor spectrum, so even a first-time cupper will notice clear differences.
The timeline
| Time | What you do |
|---|---|
| 0:00 | Weigh, grind and label the cups. Smell the dry grounds. |
| 0:15 | Boil water and pour 200 g onto each cup. |
| 0:15–0:19 | Steep 4 minutes. Smell the crust. |
| 0:19 | Break the crust and skim each cup. |
| 0:19–0:30 | Let it cool. Tidy up and drink some water. |
| 0:30–0:50 | Taste, compare, and keep tasting as it cools. Write notes. |
| 0:50 | Reveal the coffees and compare your notes with the bags. |
Under an hour, start to finish, and you'll learn more about coffee than from weeks of drinking one bag at a time.
Troubleshooting a cupping session
| Problem | Likely cause | What to try next time |
|---|---|---|
| Everything tastes the same | Coffees too similar, or tasting while too hot | Choose more varied coffees and wait longer |
| All cups taste bitter | Grind too fine or water too strong | Grind a little coarser, check your ratio |
| All cups taste weak and sour | Grind too coarse or water not hot enough | Grind finer, use water just off the boil |
| Gritty, muddy mouthfeel | Not enough skimming, or stirring the bottom | Skim more carefully, sip from the top |
| One cup tastes odd | Grinder contamination or a dirty cup | Purge the grinder and use clean cups |
| Palate feels tired | Too many coffees or no water breaks | Cup fewer coffees and sip water often |
Cupping vocabulary
Common mistakes to avoid
| Mistake | Why it matters | Fix |
|---|---|---|
| Inconsistent coffee amounts | Different strengths skew the comparison | Weigh every sample |
| Guessing the water | Same problem, from the other side | Weigh the water onto each cup |
| Ignoring grinder retention | Old grounds contaminate the next coffee | Purge between coffees |
| Changing the grind setting | Extraction differences hide real differences | Same setting for every coffee |
| Tasting right away | Too hot to taste properly | Wait 10+ minutes |
| Reading flavor notes first | Expectations bias your palate | Hide bags until you're done |
| Not rinsing spoons | Flavors carry between cups | Rinse after every taste |
| Tasting only once | Misses how coffee changes as it cools | Keep tasting as it cools |
| Overcomplicating it | Takes the fun out of it | Start with simple observations |
How professionals score coffee
You don't need to score coffee at home, but knowing how professionals do it helps you understand those "88 points" you sometimes see on specialty bags.
For decades, the most widely used system has been the SCA's 100-point cupping form. Cuppers rate a set of attributes, each on a scale, and the total becomes the coffee's score.
| Attribute | What the cupper judges |
|---|---|
| Fragrance / aroma | Smell of the dry grounds and the wet coffee |
| Flavor | Overall taste and aroma together |
| Aftertaste | How long and how pleasant the finish is |
| Acidity | Quality and brightness of acidity |
| Body | Weight and texture |
| Balance | How well everything fits together |
| Uniformity | Whether every cup of the same coffee tastes the same |
| Clean cup | Absence of off-flavors |
| Sweetness | Pleasant sweetness across cups |
| Overall | The cupper's holistic impression |
Professionals usually cup several cups of each coffee to check uniformity, and points are taken away for defects.
What the scores mean
The SCA has more recently introduced a newer evaluation approach that separates describing a coffee from judging how much the cupper likes it. Either way, a score is one trained person's assessment on one day. It's a useful guide, not a guarantee that you'll love the coffee.
Home cupping experiments worth trying
Once you're comfortable with the basic method, cupping becomes a tool for answering your own coffee questions.
Is my coffee still fresh?
Cup a bag you've had for six weeks next to a freshly roasted bag of the same coffee. Most people are shocked by how much aroma and sweetness fade. It's the best argument I know for buying smaller bags and storing them well.
Does my water matter?
Cup the same coffee twice, once with tap water and once with filtered or bottled water. Keep everything else identical. Water differences often show up more clearly in cupping than in everyday brewing.
Light vs dark roast
Cup a light, medium and dark roast side by side. You'll see exactly how roasting trades acidity and fruit for body and roasty bitterness. My guide to coffee roast levels explains what's happening.
Does the expensive coffee justify the price?
Cup a supermarket coffee against a specialty coffee blind. Sometimes the difference is huge. Sometimes it's smaller than you'd expect. Either way, you'll learn something about what you value.
Same farm, different process
If you can find washed and natural versions of the same coffee, cup them together. It's the clearest possible demonstration of how processing shapes flavor. My guide to coffee processing methods goes deeper.
Hosting a cupping with friends
Cupping is even better as a group. Different people notice different things, and comparing notes is half the fun.
- Keep it smallFour to six people and four or five coffees is a comfortable size.
- Make extra cupsPrepare two cups of each coffee so people aren't waiting in line.
- Give everyone a spoon and a rinse cupPersonal spoons keep it hygienic. Never put a spoon back in a shared cup after tasting from it without rinsing.
- Taste in silence firstAsk everyone to write their notes before discussing, so the loudest opinion doesn't steer the group.
- Reveal at the endShare the origins and the roaster's notes only after everyone has compared impressions.
Plain crackers or unsalted bread between rounds help reset everyone's palate, and they keep the caffeine from hitting too hard on an empty stomach.
Put out some plain crackers and water, and you have a surprisingly memorable evening for the price of a few bags of coffee.
Can you cup espresso blends?
Yes, and roasters do it all the time. Even coffees made for espresso are usually cupped first, because cupping shows the raw character of the beans without the intensity and pressure of espresso.
Just keep two things in mind:
- Espresso roasts can taste heavier in a cupping bowl than lighter filter roasts. That's normal. Judge them against each other rather than against a light-roast Ethiopian.
- Cupping won't tell you everything about how a blend behaves as espresso. Crema, body under pressure and how it pairs with milk only show up when you actually pull a shot.
A good routine is to cup two or three espresso coffees side by side to shortlist a favorite, then pull shots of the top one or two. If you're dialing those in, my guide to coffee extraction walks through the process.
Why your cupping favorite might not be your brewing favorite
Here's something that surprises a lot of people: the coffee you love most on the cupping table isn't always the one you love most in your morning mug.
Cupping is a slightly lighter, unfiltered immersion brew, tasted at many temperatures. It's designed to show a coffee's character clearly, flaws included.
Your everyday brew is different. A paper-filter pour-over adds clarity. A French press adds body. Espresso concentrates everything. Milk softens acidity and bitterness.
| Shines in cupping | May shine more in daily brewing |
|---|---|
| Bright, complex, very aromatic coffees | Rounder, chocolatey, forgiving coffees |
| Delicate floral coffees | Heavier-bodied coffees for milk drinks |
| Lighter roasts | Medium roasts for espresso |
So treat cupping as a way to understand coffee, not just to pick a winner. Then brew your top two the way you normally drink coffee before deciding which to buy again.
Developing your palate with regular cupping
Regular side-by-side tasting is one of the best ways to get better at recognizing coffee flavors.
Start small, with a few coffees, and pay attention to their differences. Over time you'll become familiar with acidity, sweetness, bitterness, body, aroma and aftertaste, and you'll start recognizing recurring notes like citrus, berries, stone fruit, chocolate, caramel, nuts and florals.
Try coffees from different origins, processing methods and roast levels. Notice what stays consistent and what changes.
Most importantly, trust your own senses. There's no single correct way to experience a coffee. The purpose of cupping at home is to become more observant, understand what you enjoy, and discover how different coffees compare.
Our tip: Cup the same coffee you brew every morning alongside three others. You'll understand your daily coffee far better once you taste what it's being compared to.
Complete home cupping checklist
Here's the whole process in one place. Print it or save it on your phone for your first session.
- Gather coffeesFour or five different samples, about 20 g each.
- Prepare cupsFive or six suitable cups, and check each one's capacity.
- Fill the kettleWith fresh, good-tasting water.
- Weigh the beans12 g per 8–9 oz cup, directly into each cup.
- Purge and grindClean the grinder between coffees and grind all samples medium-fine at the same setting.
- Reweigh and hideCheck for grinder retention, then put bags and notes away.
- Boil and pourWeigh 200 g of hot water onto each cup.
- Steep 4 minutesSmell the crust while you wait.
- Break and skimStir the crust gently three times, then skim off floating grounds.
- Cool 10+ minutesSet out clean spoons and drinking water.
- Taste and compareSmall spoonfuls, gentle slurps, rinse between cups, compare side by side.
- Keep tasting and noteRevisit as the coffee cools and write simple observations.
Key takeaways
- Cupping means brewing several coffees the same way and tasting them side by side.
- It's used across the coffee industry by buyers, importers, roasters and cafes.
- At home you need a kettle, a scale, a grinder, spoons and a few matching cups.
- Use 12 g of coffee to 200 g of water (about 60 g per liter), ground medium-fine.
- Steep 4 minutes, break the crust, skim, and let it cool 10+ minutes.
- Slurp gently from a spoon, rinse between coffees, and compare back and forth.
- Keep tasting as it cools. Coffee changes a lot.
- Write simple notes in plain language. Don't force flavor words.
- Keep it fun. Look for differences, not right answers.
The first session can feel a little awkward, with the slurping, the timers and the row of identical cups. By the third, it feels natural, and you'll start noticing differences you never knew existed.
Home cupping is one of the most accessible ways to explore coffee. Gather a few samples, prepare them the same way, and enjoy discovering how different they can taste.
Frequently asked questions
What is coffee cupping?
Coffee cupping is a standardized way of brewing several coffees the same way and tasting them side by side. It is used by coffee buyers, importers, roasters and cafes to evaluate and compare coffee.
What ratio should I use for cupping at home?
A simple home ratio is about 60 grams of coffee per liter of water, or 12 grams of coffee to 200 grams of water for an 8 to 9 ounce cup. The classic professional standard uses 8.25 grams per 150 ml.
How long do you steep coffee when cupping?
About four minutes. Then break the crust, skim off the floating grounds and let the coffee cool for at least another ten minutes before tasting.
Why do people slurp when cupping coffee?
Slurping sprays the coffee across the whole mouth and carries aroma to the nose, making flavors easier to notice.
Do I need special cupping spoons and bowls?
No. Soup or dessert spoons and matching mugs, small bowls or heatproof glasses work perfectly well at home.
What grind size is used for cupping?
A medium-fine grind, slightly coarser than for a paper-filter pour-over. Use the same setting for every coffee in the session.
Should I swallow or spit when cupping?
Professionals often spit because they taste many cups. At home with a few coffees, swallowing small amounts is fine.
How many coffees should I cup at once?
Three to five is ideal for beginners. Even two coffees side by side can reveal clear differences.

- Michael Reynolds, home and professional cupping notes
- Specialty Coffee Association: Coffee Standards, including cupping (PDF)
- Specialty Coffee Association: Protocols and best practices
Related guides
The coffee flavor wheel Coffee brewing ratios explained How to choose coffee beansWritten by Michael Reynolds. Last updated November 19, 2026.