Coffee Extraction Explained: How to Fix Sour, Bitter and Unbalanced Coffee and Espresso
Extraction is the reason the same beans can taste sour one day and bitter the next. Here's what extraction actually is, how to tell under- from over-extraction by taste, and a step-by-step way to dial in espresso using grind, dose, ratio, temperature and puck prep.
We choose products independently. We may earn a commission through links on this page; your price stays the same. Affiliate policy
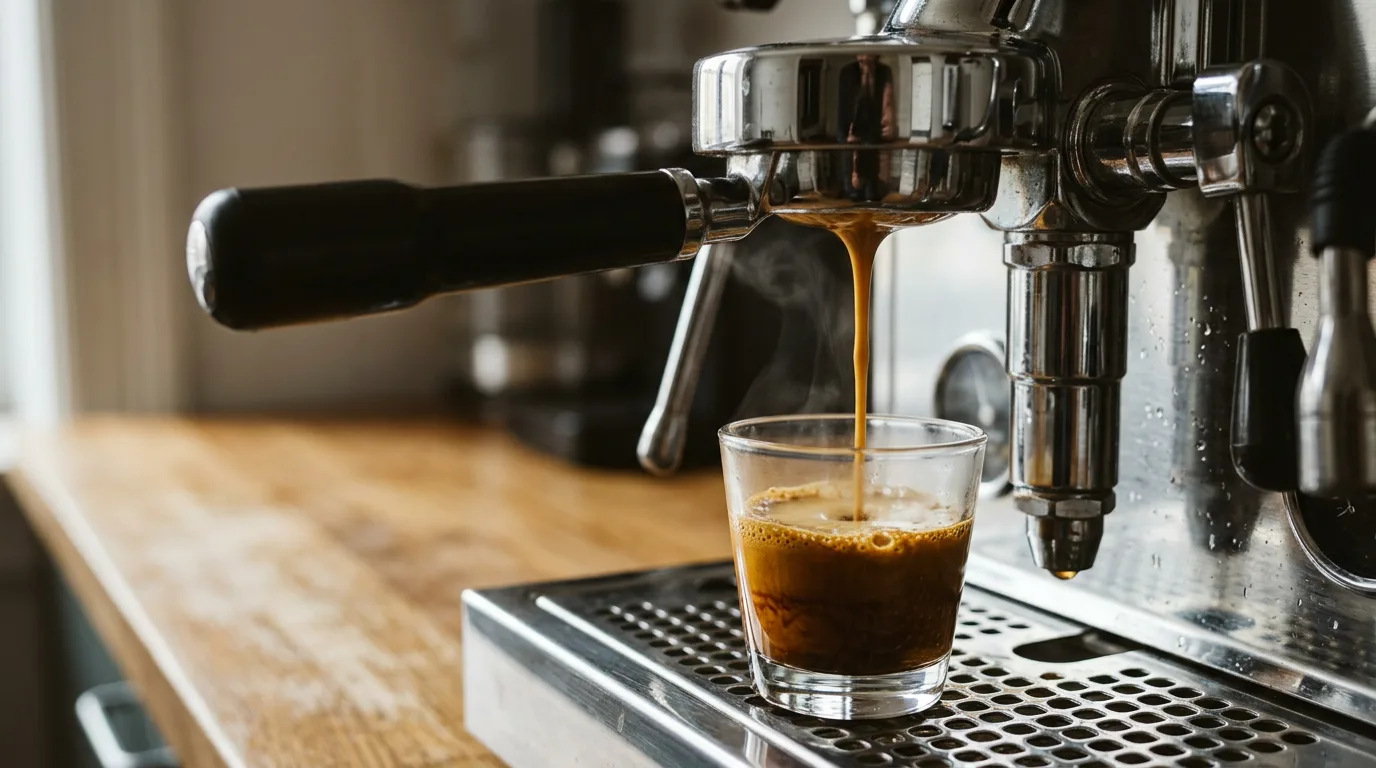
Extraction is how much of the coffee's flavor water dissolves out of the grounds. A balanced cup usually extracts around 18 to 22% of the coffee's weight.
Sour, sharp, thin coffee is usually under-extracted: grind finer, brew longer, or use slightly hotter water. Bitter, harsh, drying coffee is usually over-extracted: grind coarser, brew shorter, or go a little cooler.
For espresso, start with a 1:2 ratio (for example 18 g in, 36 g out) in about 20 to 30 seconds. Adjust grind first, change one thing at a time, and let taste make the final call.
Why I wrote this
The first month I owned an espresso machine, I almost sold it.
My shots were sour one day and bitter the next. Sometimes both at once. I changed beans, changed the grind, changed the dose, changed everything, often all in the same morning. Nothing got better, because I had no idea what I was actually changing.
What fixed it wasn't new gear. It was understanding extraction, and learning to read what the cup was telling me.
This guide is the explanation I wish someone had given me. It works for filter coffee too, but I spend most of the time on espresso, because that's where extraction problems are most obvious and most frustrating.
What you'll learn
- What extraction is and what "balanced" means
- How to tell sour (under-extracted) from bitter (over-extracted)
- The variables that control extraction, and which to change first
- How to dial in espresso: dose, ratio, time and grind
- What crema does and doesn't tell you
- How to spot and prevent channeling
- A troubleshooting order you can follow every time
What extraction actually is
When hot water meets ground coffee, it dissolves some of what's in the grounds and carries it into your cup. That process is extraction.
Roughly 30% of a roasted coffee bean can dissolve in water. The rest is insoluble plant material, mostly cellulose, which stays behind as the spent grounds.
You don't want all of that 30%. If you dissolve too little, the cup tastes sour and thin. If you dissolve too much, it tastes bitter and harsh.
The sweet spot for most coffees is extracting about 18 to 22% of the dry coffee's weight. That's where sweetness, acidity and bitterness tend to balance.
How extraction level usually tastes
Bar length shows how pleasant the cup typically is. Exact ranges vary by coffee and taste.
Extraction is not the same as strength
This trips people up constantly. Extraction is how much you pulled out of the coffee. Strength is how concentrated the drink is.
You can have a strong cup that's under-extracted (lots of coffee, poorly brewed) or a weak cup that's perfectly extracted (great brew, lots of water). I explain this in more detail in my guide to coffee brewing ratios.
What dissolves first, and why it matters
Coffee compounds don't all dissolve at the same speed. That's the key to understanding why under- and over-extracted coffee taste so different.
- Acids and salty compounds come out firstBright, sour and sometimes salty flavors dissolve quickly. Stop here and the cup tastes sharp and thin.
- Sugars and sweetness come nextCaramelized sugars and rounder flavors follow. This is what balances the acidity.
- Bitter and drying compounds come lastHeavier, bitter and astringent compounds dissolve slowest. Push too far and they take over.
So a balanced cup is really a race: you want to get past the sour stage into the sweet stage, and stop before the bitter stage dominates.
That's why "more extraction" fixes sourness and "less extraction" fixes bitterness.
Our tip: Taste a shot in three sips: the first few drops, the middle and the last few drops, collected in separate cups. You'll literally taste extraction happening, from sour to sweet to bitter.
The variables that control extraction
Every brewing method uses the same handful of levers. Here's what each one does.
| Variable | To extract more | To extract less | How strong the effect is |
|---|---|---|---|
| Grind size | Finer | Coarser | Very strong, your main dial |
| Contact time | Longer | Shorter | Strong |
| Water temperature | Hotter | Cooler | Moderate |
| Brew ratio / yield | More water through the coffee | Less water | Moderate to strong |
| Agitation | More stirring or swirling | Less | Moderate |
| Water minerals | Moderate hardness | Very soft water | Moderate |
| Even flow | Even bed, no channels | Channels and dry spots | Strong, especially espresso |
Grind size is almost always the first thing to change. It has the biggest effect, and it's the easiest to adjust in small steps.
Water also matters more than people think. My guide to water chemistry for coffee explains how minerals change extraction.
Sour vs bitter: learning to read the cup
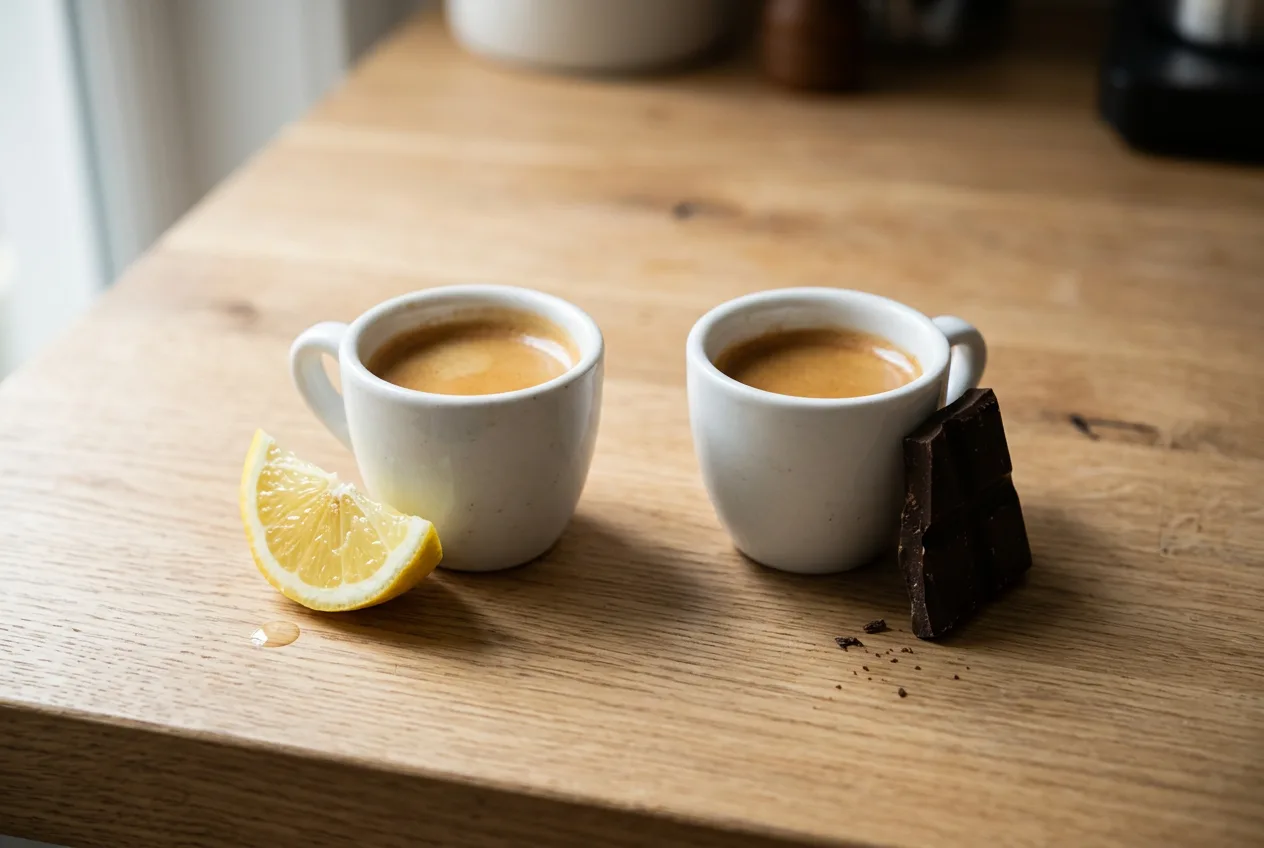
Sourness and bitterness are different sensations, and they usually point to opposite problems. Learning to tell them apart is the single most useful tasting skill for dialing in.
| Sour | Bitter | |
|---|---|---|
| Feels like | Biting into a lemon, mouth-puckering | Dark chocolate, strong hoppy beer, aspirin |
| Where you notice it | Sides of the tongue, quickly | Back of the tongue, lingering |
| Texture | Thin, watery, sometimes salty | Dry, rough, astringent |
| Aftertaste | Short, sharp | Long, harsh |
| Usual cause | Under-extraction | Over-extraction |
Acidity isn't the same as sourness
Good coffee can be bright and acidic, like a crisp apple or a juicy berry. That's pleasant and lively.
Sourness is the unpleasant version: sharp, hollow and unbalanced, with no sweetness behind it. If the acidity feels juicy and sweet, you're fine. If it makes you wince, extract more.
When it's both
Sometimes a cup tastes sour and bitter. That usually means uneven extraction: some grounds over-extracted while others barely brewed. In espresso, the most common cause is channeling, which I cover below.
Our tip: If you can't tell whether a shot is sour or bitter, add a little milk to a spoonful. Milk softens bitterness a lot but does little for sourness. If the problem stays, it's probably sour.
Quick extraction fixes for filter coffee
Before diving into espresso, here's the short version for pour-over, drip and French press. The logic is identical.
| Problem | Pour-over / drip | French press |
|---|---|---|
| Sour, thin | Grind finer, pour slower, water just off the boil | Grind a bit finer or steep 1 minute longer |
| Bitter, harsh | Grind coarser, pour faster | Grind coarser, steep shorter, pour off right away |
| Sour and bitter | Check even wetting, use a gentle swirl | Stir the crust, check grinder consistency |
| Weak but balanced | Use more coffee, not a finer grind | Use more coffee |
| Muddy, silty | Grind less fine, rinse the filter | Grind coarser, pour gently, leave the last bit |
A consistent burr grinder makes all of this much easier, because uneven grounds extract unevenly no matter what else you do. I explain why in my burr vs blade grinder guide.
How extraction works in different brew methods
Every brewer uses the same basic levers, but each leans on them differently. Knowing which lever matters most for your brewer saves a lot of trial and error.
| Method | Grind | Contact time | Main extraction lever | Typical problem |
|---|---|---|---|---|
| Espresso | Fine | 20–35 seconds | Grind and yield | Channeling, fast sour shots |
| Moka pot | Fine-medium | 3–5 minutes | Heat level, grind | Bitter, burnt taste if overheated |
| Pour-over | Medium-fine | 2.5–4 minutes | Grind and pour speed | Uneven wetting, sour or bitter |
| Drip machine | Medium | 4–6 minutes | Grind, machine temperature | Water not hot enough |
| French press | Coarse | 4 minutes or more | Steep time | Over-steeping, silt |
| Cold brew | Coarse | 12–24 hours | Time | Flat if too short, woody if too long |
Espresso: fast and sensitive
Espresso uses a fine grind and pressure to extract a lot in a very short time. That's why tiny grind changes have such a big effect, and why even distribution matters so much.
Pour-over: you control the flow
With pour-over, your pouring is part of the recipe. Pouring slowly, or in more stages, increases contact time and extraction. A fast, heavy pour can push water through channels and leave dry pockets.
Immersion: time does the work
In a French press, all the coffee sits in all the water, so extraction is more even and forgiving. The main lever is steep time. Once you press and pour, extraction stops, so don't leave coffee sitting on the grounds.
Cold brew: very slow extraction
Cold water extracts acids and aromatics far more slowly than hot water. That's why cold brew tastes smooth and low in acidity, and why it needs many hours. Stop too early and it tastes thin. Leave it much too long and it can turn woody.
Temperature and grinder quality: the quiet factors
Water temperature
Hotter water dissolves coffee compounds faster. Most brewing happens between about 195 and 205°F (90 to 96°C).
- Light roasts usually like the hotter end, around 200 to 205°F.
- Medium roasts are comfortable around 198 to 202°F.
- Dark roasts often taste smoother a little cooler, around 192 to 198°F.
For espresso, many home machines don't let you change temperature. That's fine. Grind and ratio give you plenty of control. If your machine does, adjust in small steps of a degree or two.
For pour-over, water just off the boil is usually right for light roasts. Let it sit for 30 seconds or so for darker roasts.
Grinder quality and "fines"
Every grinder produces a mix of particle sizes. Very small particles, called fines, extract extremely fast. Large particles, called boulders, extract slowly.
A grinder that produces lots of fines and boulders gives you some over-extracted and some under-extracted coffee in the same cup. It tastes muddy, sour and bitter at once, no matter how carefully you set everything else.
That's why a good burr grinder often improves coffee more than an expensive brewer. Burrs make more even particles, which extract more evenly.
Our tip: If you're about to spend money to improve your coffee, upgrade the grinder before the machine. Even extraction starts with even grounds.
Espresso: start with consistency
Espresso is extraction under pressure, in about half a minute. Small changes have big effects, so consistency matters more than anything else.
Keep these the same while you dial in:
- The same coffee dose
- The same basket
- The same preparation routine
- The same target ratio
- The same way of timing the shot
Then change one thing at a time, usually the grind. Pull another shot with the same dose and target yield, and judge both the flow and the taste.
Write your settings down, especially with a new coffee. And remember that espresso settings aren't permanent. Beans change as they age, and even temperature and humidity can affect how coffee behaves.
A reliable routine beats chasing a perfect-looking shot. The goal is balanced, enjoyable espresso you can repeat.
Shots running too fast or too slow
When the flow is far from where it should be, grind size is your first adjustment.
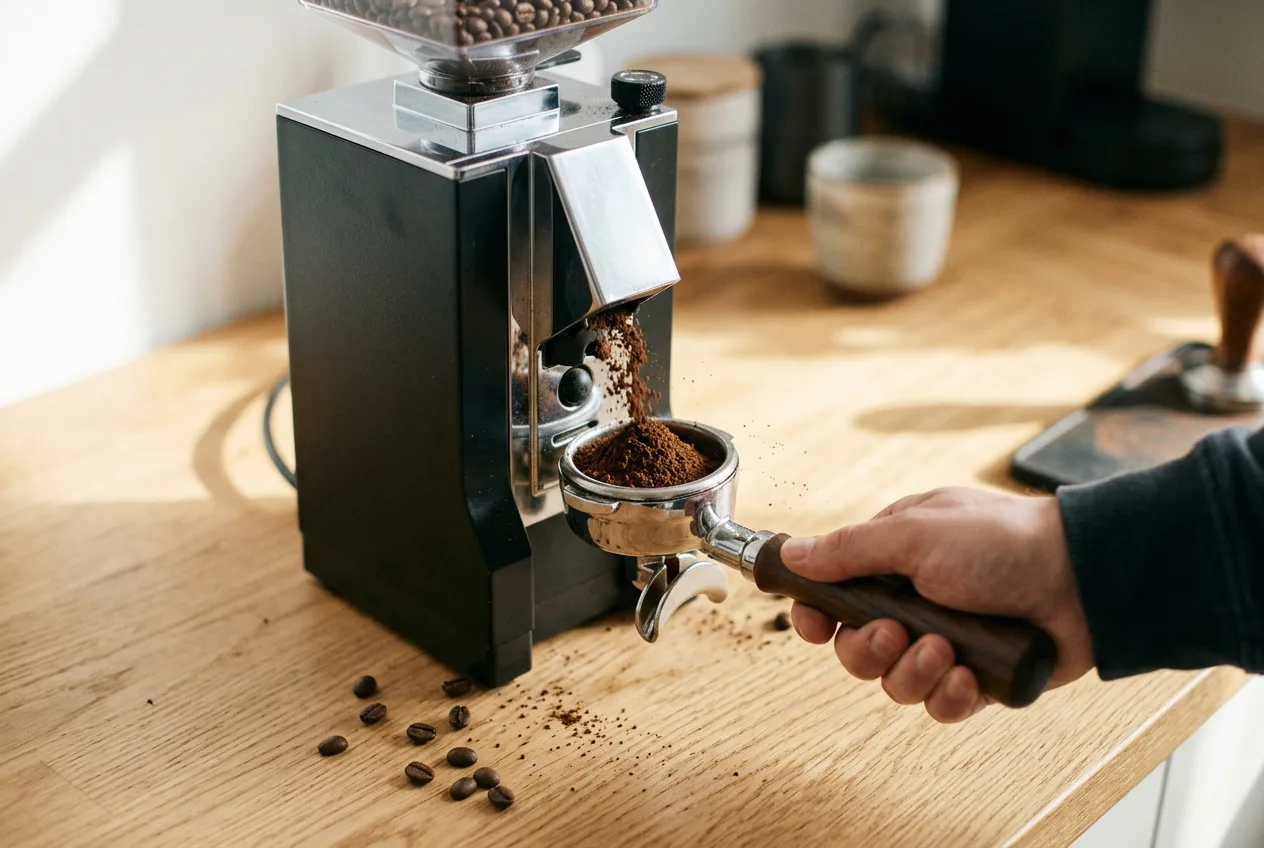
Purge after changing the grind
Many grinders hold some grounds from the previous setting. After an adjustment, grind and discard a small amount so your next dose actually reflects the new setting.
How much depends on the grinder. Some single-dose grinders retain almost nothing. Others hold a few grams.
Once the flow is in a reasonable range, stop watching the clock and start using your taste.
Our tip: Make grind changes in small steps. On most home grinders, one or two clicks is plenty. Big jumps make you overshoot and waste coffee.
Choosing and measuring your dose
The right dose depends mainly on your basket size.
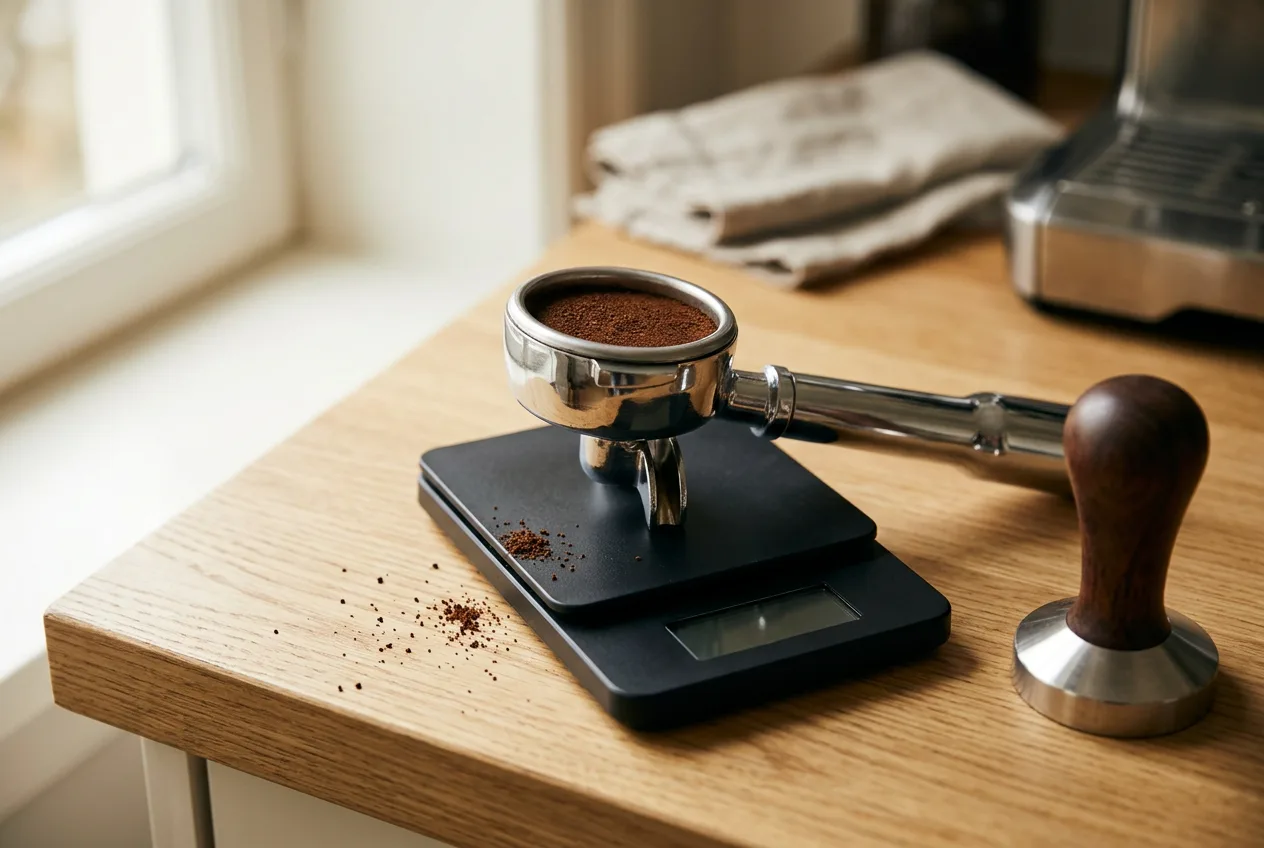
Many standard double baskets that come with home machines hold about 15 to 18 grams at most. Aftermarket baskets are often labeled with a dose, like "18 g."
That number is usually a maximum guideline, not a target you must hit. Using a little less is fine. You'll just have more headspace, and the used puck may look wetter or soupier.
Signs your basket is overfilled
- Grounds spill out while you're filling or locking in the portafilter
- A clear imprint of the shower screen (the screw or mesh pattern) on the used puck
- No room for the coffee to swell as it gets wet
If you see these, drop the dose a little. Pick a dose that fits comfortably and stick with it.
Weigh it
A small scale that reads in 0.1 gram steps is the most dependable tool. Weigh the dry grounds, and if you can, weigh the espresso in the cup as it pours.
No scale? Use a repeatable fill
Without a scale, a consistent technique is the next best thing. Slightly overfill the basket, nudge grounds into low spots with a straight edge, and sweep the excess off level. The back of a butter knife or a card works fine.
It's less precise than weighing, but doing it the same way every time still helps a lot.
Brew ratio and shot timing
A great starting point for a standard double espresso is a 1:2 brew ratio: the espresso in your cup weighs about twice as much as the dry coffee.
Weigh the output, don't eyeball it
Crema makes espresso volume very hard to judge. A shot can look like 2 ounces but weigh far less once the foam settles. Weighing the output is much more reliable.
If you don't have a scale, a rough traditional reference is about 2 ounces of espresso, including crema, in 20 to 30 seconds. Treat it as approximate.
When does the timer start?
People time shots differently. Some start when the pump starts. Others start when the first drops hit the cup.
The first drops usually appear several seconds after the pump starts, so the same shot will show a shorter time if you start counting from the first drops. Either is fine. Just use the same method every time.
Time is a guide, not the goal
A shot can land perfectly at 27 seconds and still taste bad. Taste decides whether the recipe needs more work.
Grinder maxed out?
If your grinder is already at its finest setting and shots still run too fast, add a little more coffee to increase resistance.
When you increase the dose, raise the yield too, so the ratio stays the same. At 1:2, a 19 g dose should give about 38 g of espresso.
| Style | Ratio | 18 g dose gives | Taste |
|---|---|---|---|
| Ristretto | ~1:1 to 1:1.5 | ~18–27 g | Intense, syrupy, less bright |
| Normale | ~1:2 | ~36 g | Balanced starting point |
| Longer shot | ~1:2.5 | ~45 g | Sweeter, lighter, less sour |
| Lungo | ~1:3 | ~54 g | Light body, can turn bitter |
Why yesterday's grind setting stops working
One of the most frustrating parts of espresso: the setting that was perfect yesterday runs fast or slow today.
That's normal. Coffee changes constantly. Roast level, freshness, storage, room temperature and humidity all affect how it grinds and flows.
- Fresh beans are full of gas, which can make shots run slower and less evenly.
- As beans age, they lose gas and often need a slightly finer grind to keep the same flow.
- Humid days can make grounds clump and flow differently.
- A new bag, even of the same coffee, may need a fresh dial-in.
Make small adjustments when flow or taste shifts, rather than expecting one setting to last the whole bag.
With a new coffee, start from your usual dose and ratio, adjust the grind to get the flow in range, then refine by taste. Storing beans well slows the drift down. See my guide on how to store coffee beans.
Fixing sour espresso (under-extraction)
Pronounced sourness, sharp and mouth-puckering, usually means not enough has been extracted. Here are the three main ways to extract more.
- Grind finerMore surface area makes compounds easier to dissolve, and the slower flow gives water more contact time. This is usually the first fix to try.
- Increase the yieldPull a longer shot. Instead of 1:2, try 1:2.5 or 1:3. With 18 g of coffee, that's about 45 g or 54 g of espresso. More water through the same coffee often softens sharp sourness and adds sweetness.
- Raise the temperatureIf your machine lets you adjust temperature, go up a couple of degrees and taste again. Hotter water extracts more.
Change one at a time. If the shot turns harsh or drying, you've gone too far. Step back a little.
Fixing bitter espresso (over-extraction)
Bitterness that lingers at the back of the tongue, often with a dry, rough feeling, can mean too much has been extracted. Reverse the sour fixes:
- Grind coarserLess surface area and faster flow reduce contact time and extraction.
- Shorten the shotStop earlier with a lower ratio. Around 1:1.5 is a good experiment if 1:2 tastes too bitter. With 18 g, that's about 27 g of espresso.
- Lower the temperatureIf you can, drop it slightly and compare.
But don't assume every bitter shot is an extraction problem. Very dark roasts taste bitter even when perfectly extracted, and some people simply prefer a gentler coffee.
| Symptom | Likely cause | Try first | Then | Then |
|---|---|---|---|---|
| Sour, thin, fast | Under-extracted | Grind finer | Longer ratio | Hotter water |
| Sour but slow | Under-extracted, uneven | Improve puck prep | Longer ratio | Hotter water |
| Bitter, slow | Over-extracted | Grind coarser | Shorter ratio | Cooler water |
| Bitter but fast | Dark roast or channeling | Check puck prep | Shorter ratio | Try a lighter roast |
| Sour and bitter | Channeling | Better distribution | Grind slightly coarser | Check tamp |
How roast level changes extraction
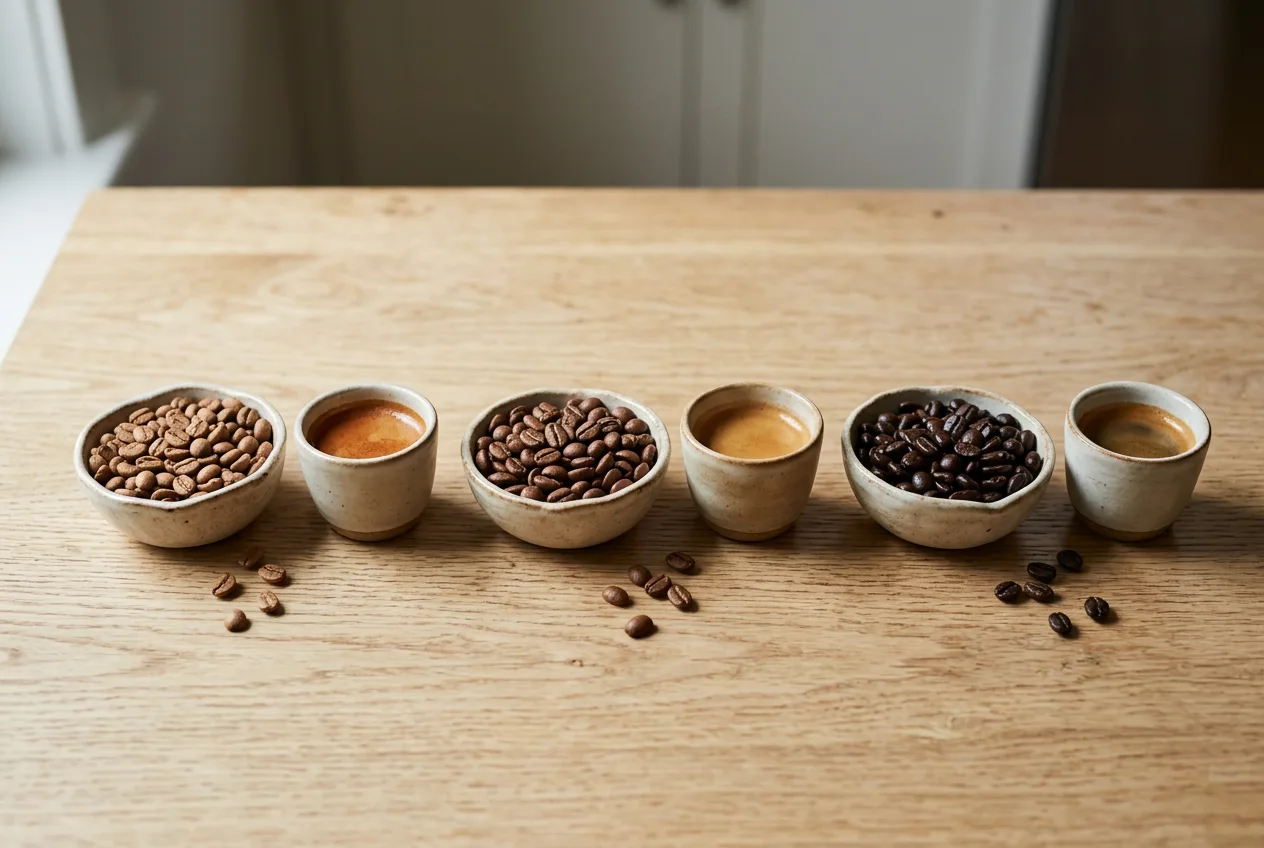
Roast level has a big effect on how easy a coffee is to extract and how it tastes.
| Roast | Ease of extraction | Typical flavor | Common adjustments |
|---|---|---|---|
| Light | Harder | Bright, fruity, acidic | Finer grind, longer ratio, hotter water |
| Medium | Moderate | Balanced, caramel, chocolate | Classic 1:2 works well |
| Dark | Easier | Bold, roasty, bitter-sweet | Coarser grind, shorter ratio, cooler water |
Light roasts are naturally acidic, and that bright acidity can be mistaken for sourness. They're also denser and harder to extract, so they often need a finer grind, a longer ratio or a higher temperature.
If a light roast stays sharply sour after sensible adjustments, try a medium or dark roast. It may simply suit you better.
If your espresso is always too bitter, a lighter roast is worth trying. Roast level doesn't guarantee a taste, but it shapes it a lot.
And taste is personal. Some people love a bright, tangy espresso. Others want something round and chocolatey. The point of adjusting extraction is to get to the flavor you enjoy. My guide to coffee roast levels goes deeper.
Extraction and milk drinks
If you mostly drink lattes, cappuccinos or flat whites, you might wonder whether extraction matters as much. It does, but in a slightly different way.
Milk hides bitterness, not sourness
Milk's fat, sugar and proteins soften bitterness a lot. A slightly over-extracted shot can taste rich and chocolatey in a latte even though it would be harsh on its own.
Sourness is different. An under-extracted shot tends to taste thin and sharp even through milk, and it can make a latte taste oddly tangy.
How I adjust espresso for milk
- Use a slightly shorter ratio, around 1:1.5 to 1:2, so the coffee flavor cuts through the milk.
- Lean toward medium or darker roasts, which pair naturally with milk's sweetness.
- Err on the side of a touch more extraction rather than less, since milk forgives bitterness more than sourness.
- Taste the shot on its own first. If it's balanced straight, it'll almost always be great with milk.
| Drink | Milk amount | Espresso approach |
|---|---|---|
| Macchiato or cortado | Small | Balanced 1:2 shot, flavor shows clearly |
| Cappuccino or flat white | Medium | 1:1.75 to 1:2, a little more intensity |
| Latte | Large | 1:1.5 to 1:2, or a double shot for a large cup |
The bottom line: dial in your espresso straight first, then adjust slightly for milk. Starting from a balanced shot makes every milk drink better.
What crema is, and what it really tells you
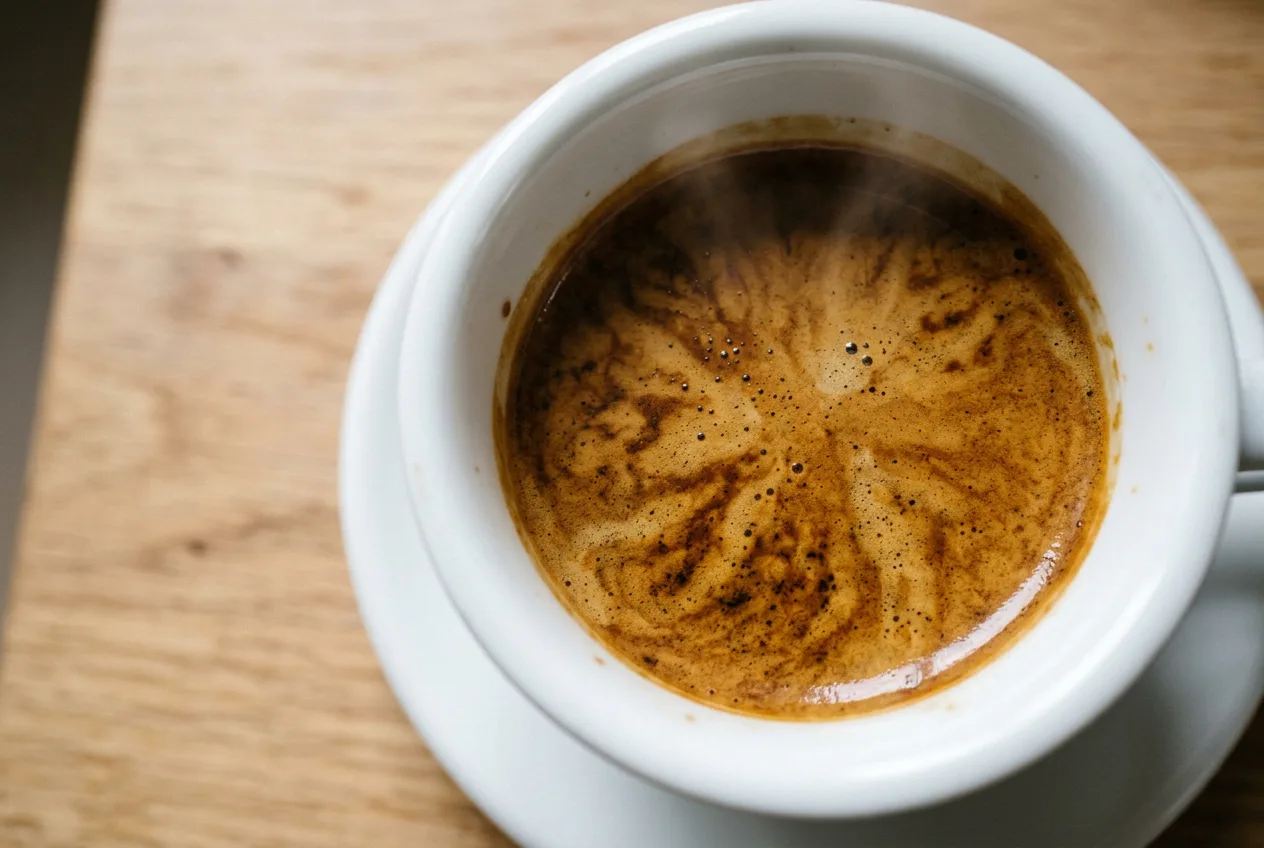
Crema is the golden-brown foam on top of espresso. It's beautiful, and it's often misunderstood.
Where crema comes from
- Roasting creates gasRoasting produces carbon dioxide, which gets trapped inside the beans.
- The gas slowly escapesIt leaks out as beans age, and much faster once they're ground.
- Pressure dissolves itDuring brewing, pressure forces some of the remaining gas into the liquid.
- Bubbles form in the cupWhen espresso leaves the portafilter, the pressure drops and the gas forms tiny bubbles that rise and gather on top as crema.
Crema isn't a quality score
Crema can give clues about freshness and brewing. But a thick layer isn't required for great espresso, and a shot with little crema can taste excellent.
Crema on its own can actually taste more bitter and drying than the liquid underneath. Stirring your espresso before drinking blends the layers and usually makes it taste more balanced.
What affects how much crema you get
These affect appearance, not necessarily quality. Many people prefer arabica, lighter roasts or beans that have rested a while after roasting, even if the crema is thinner. Don't sacrifice flavor for foam. My arabica vs robusta guide explains the trade-off.
Channeling: the hidden cause of muddled espresso
During a shot, pressurized water looks for the easiest path through the coffee. Ideally, it spreads evenly through the whole puck.
Channeling happens when water finds a weak spot and rushes through it. That can come from uneven grounds, poor distribution, a crooked tamp or uneven water from the shower screen.
Why it ruins the taste
Coffee along the channel gets over-extracted, while the rest of the puck is under-extracted. The result can taste muddy, harsh, sour and bitter all at once. That's the classic "sour and bitter" shot.
How to spot it with a bottomless portafilter
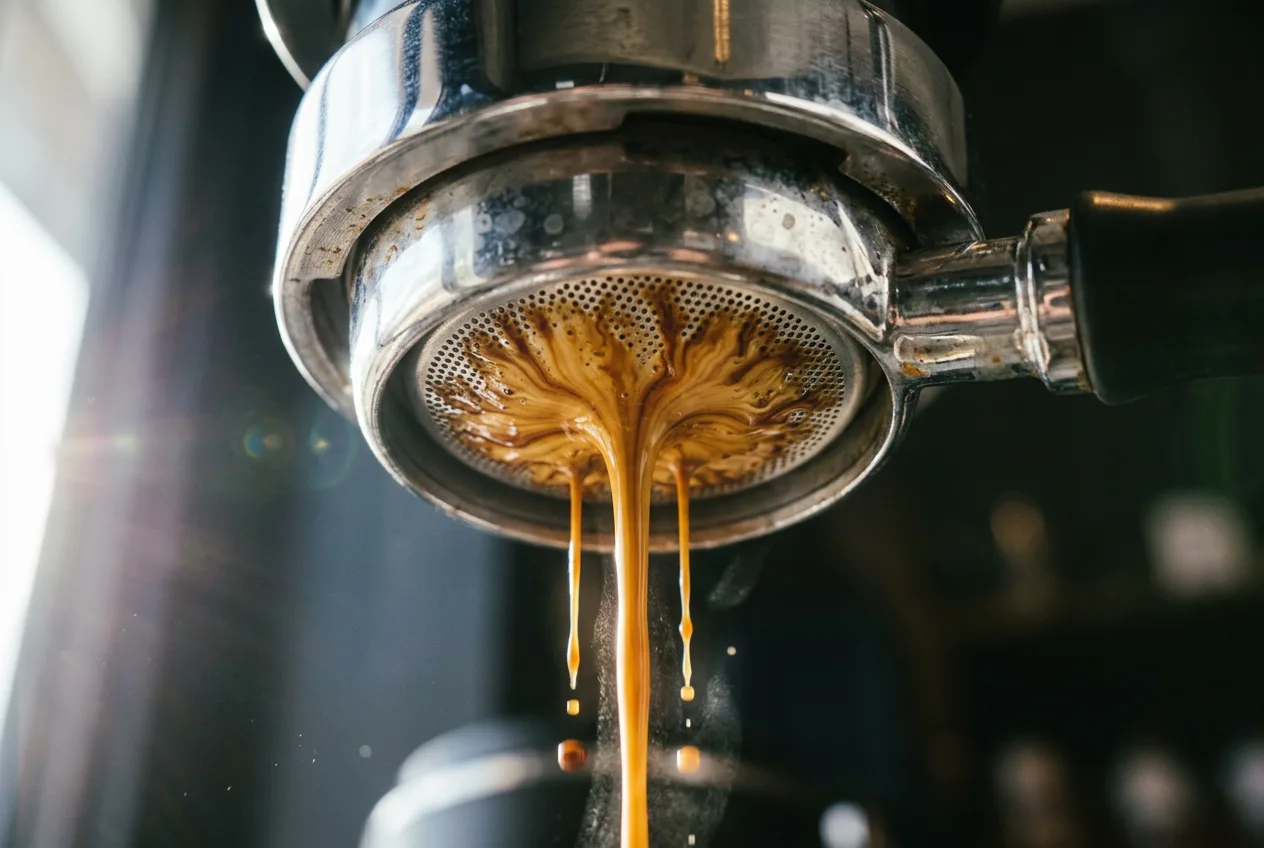
A bottomless (naked) portafilter shows the underside of the basket, so you can watch the extraction. In a good shot, drops appear fairly evenly across the basket, then small streams join into one central flow.
Warning signs:
- A stream that keeps coming from far off-center
- Areas of the basket that stay dry
- Sudden spurts or sprays of espresso
- One spot turning pale or blond much earlier than the rest
- A jerky, uneven flow instead of a steady one
No bottomless portafilter? Check the puck
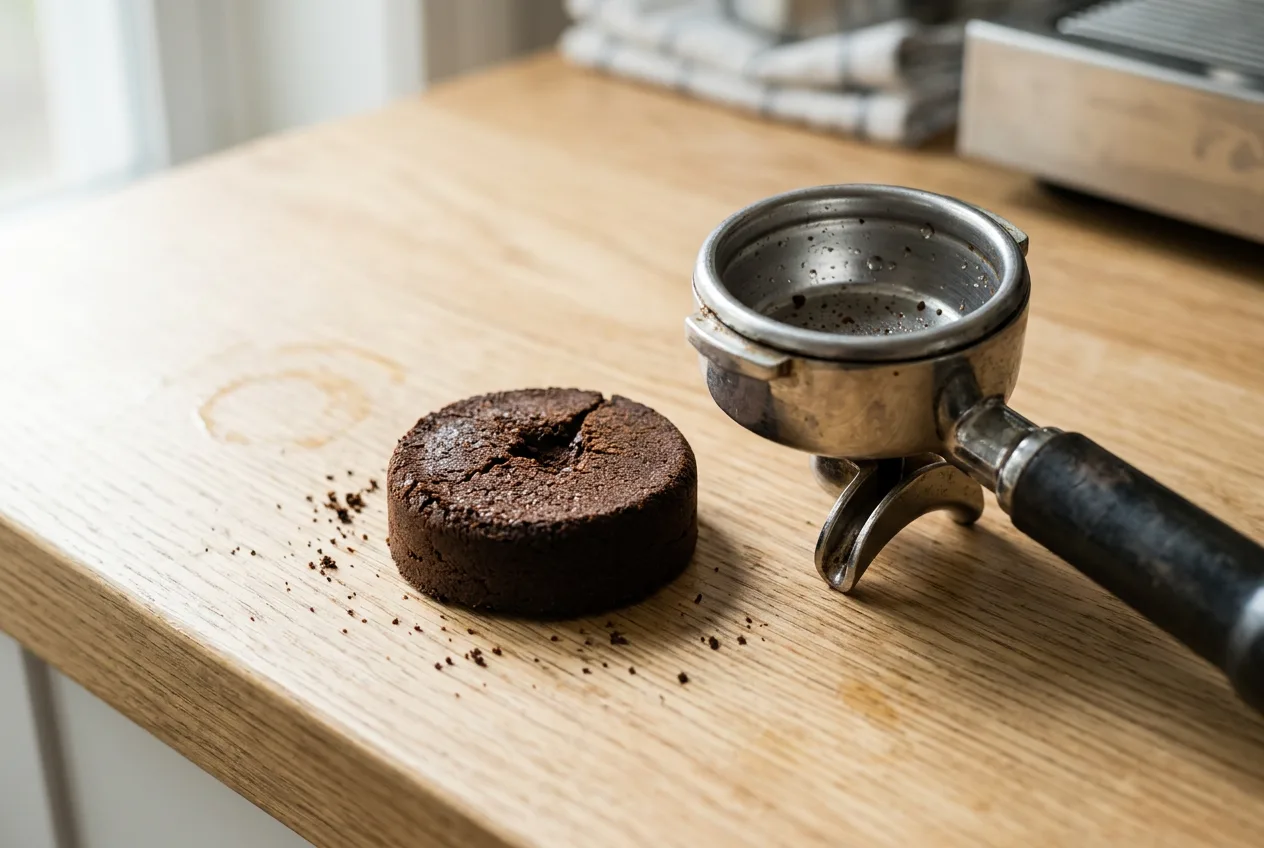
Knock out the used puck and look at it. Large craters, damaged areas or even a tiny pinhole can show where water forced its way through.
A wet or messy puck alone doesn't prove channeling. Look for repeated signs, and always check against taste.
Better puck preparation
Good puck prep builds a coffee bed with even resistance from side to side, so water has no weak spots to rush through.
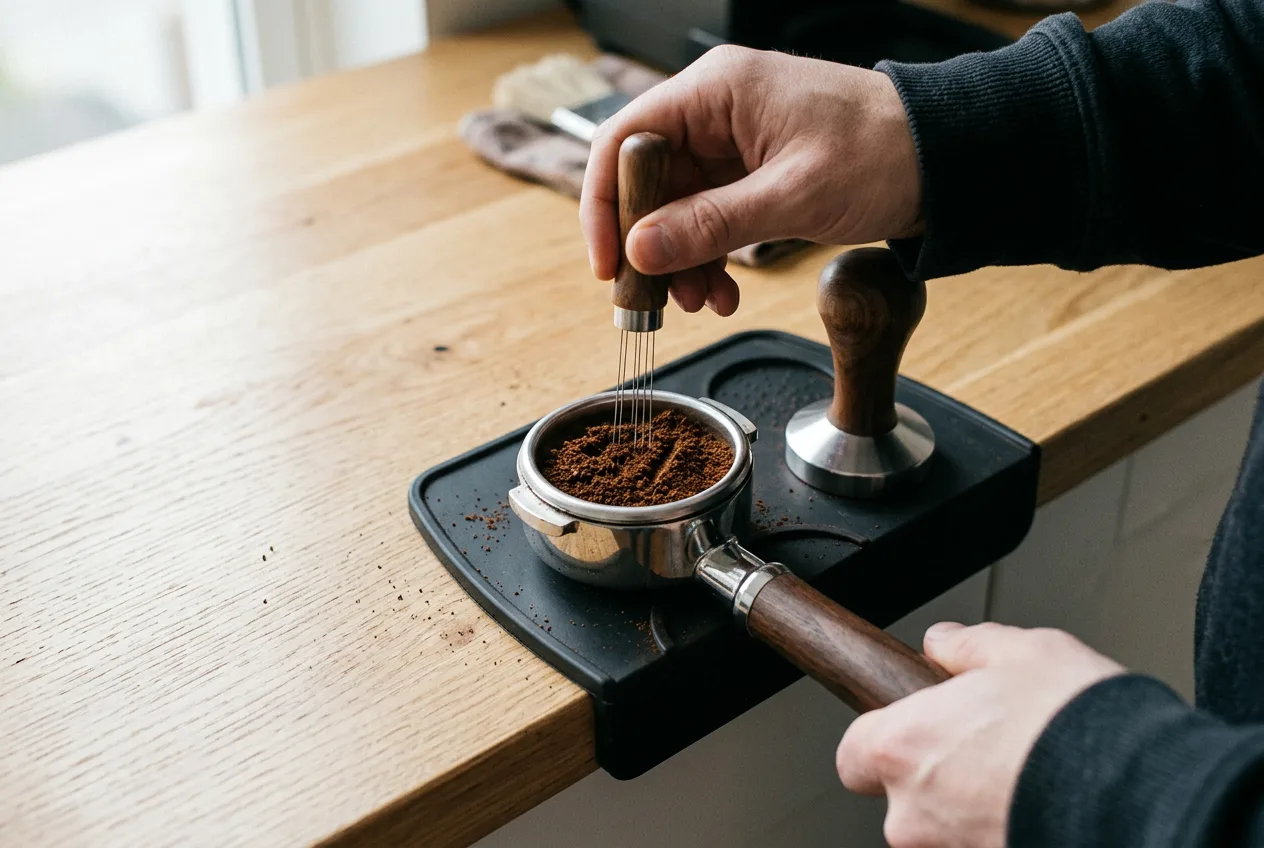
A simple routine
- Break up clumpsGrinders often produce clumps. Break them up so the bed has an even density.
- Stir with a WDT toolA WDT tool uses thin needles to stir the grounds and remove clumps. It's cheap and very effective.
- Fill the edgesMake sure coffee reaches all the way to the basket walls, with no obvious low spots.
- Level the surfaceGently tap or level the bed before tamping.
- Tamp level and firmPress evenly so the bed is compact and flat. Level matters more than force.
The exact tools matter less than a repeatable result. Keep the portafilter steady, avoid creating new uneven areas, and do it the same way every time.
Still channeling? Try slightly coarser
If channeling continues even with careful prep, grind a touch coarser. A very fine grind creates so much resistance that water forces its way through the weakest spot instead of flowing evenly.
Our tip: A WDT tool is the best low-cost upgrade for home espresso. In my experience it fixes more "mystery" sour-bitter shots than any grinder change.
A troubleshooting order that works
When a shot disappoints, work through the variables in a sensible order instead of changing everything at once.
- Check the doseMake sure the basket isn't overfilled and the amount of coffee is the same every time.
- Check the yieldWeigh the espresso and compare it to your target. For a starting recipe, aim for about twice the dry coffee weight.
- Check flow and timeMuch too fast? Grind finer. Much too slow? Grind coarser. Use the same timing method every time.
- TasteSharply sour: finer grind, longer ratio or slightly hotter. Bitter and drying: coarser grind, shorter ratio or slightly cooler.
- Look for channelingUneven flow, spraying, early blonding in one area or damaged pucks point to distribution and tamping.
- Consider the beansFreshness and roast level change flow, crema and flavor. A bright light roast will never taste like a dark roast, however carefully you brew it.
Give each change a fair test, and keep notes: dose, grind setting, yield, time and taste. Patterns show up surprisingly fast.
A real dial-in session, step by step
Here's how a typical dial-in went with a fresh bag of medium-light Colombian coffee on my home machine. Dose fixed at 18 g, target 36 g out, timer started with the pump.
| Shot | Change | Yield / time | Taste | Next move |
|---|---|---|---|---|
| 1 | Starting grind | 36 g / 17 s | Sour, thin, sharp | Grind finer |
| 2 | 2 clicks finer | 36 g / 23 s | Less sour, still bright and a bit hollow | Grind finer |
| 3 | 1 click finer | 36 g / 27 s | Sweet, caramel, slight tang at the end | Try a longer ratio |
| 4 | Same grind, 40 g out | 40 g / 30 s | Balanced, sweet, chocolate and red apple | Keep this recipe |
| 5 | Check: same recipe | 40 g / 29 s | Same as shot 4 | Done, write it down |
Notice a few things:
- I only changed one thing per shot.
- The grind got me into the right range. The ratio fine-tuned the flavor.
- The final recipe (18 g in, 40 g out, about 30 seconds) isn't "textbook." It's simply what tasted best with this coffee.
- I pulled one more shot to confirm it was repeatable before calling it done.
Five shots is about normal for a new bag. With practice, you'll often get there in three.
Two weeks later, the same bag started running a little fast, around 24 seconds for 40 grams, and the shots picked up a slight sour edge again. One click finer brought it straight back. That's the drift I mentioned earlier, and it's why I keep checking the first shot of every morning rather than assuming yesterday's setting still holds.
When I switched to a darker Brazilian blend afterward, I started from the same 18 grams and 1:2, ground three clicks coarser right away because darker roasts extract faster, and was happy after just two shots.
Our tip: Don't throw the "failed" shots away without tasting them. Every sour or bitter shot teaches your palate what to look for next time.
Measuring extraction: do you need a refractometer?
Professionals sometimes measure extraction with a coffee refractometer. It reads the strength of the brewed coffee, and with the dose and yield, you can calculate the extraction percentage.
It's a great tool for cafes and for learning. But it's not necessary at home.
A number in the "ideal" range doesn't guarantee a delicious cup, especially if there's channeling. Your tongue is still the final judge.
If you're curious, borrow one or try one at a coffee class before buying. Seeing how a few grind clicks move the numbers is a great way to connect what you taste with what's happening in the cup. But for everyday brewing at home, a scale, a timer and careful tasting will get you ninety percent of the way there.
Common extraction myths
| Myth | Reality |
|---|---|
| "A shot must take exactly 25 to 30 seconds" | Time is a starting reference. Taste matters more than the clock. |
| "More crema means better espresso" | Crema mostly reflects freshness, roast and bean type, not flavor quality. |
| "Tamp as hard as you can" | A level, consistent tamp matters far more than force. |
| "Sour coffee needs more coffee" | Sourness usually means under-extraction. Grind finer or extract longer first. |
| "Bitter always means over-extracted" | Dark roasts and robusta can taste bitter even when perfectly extracted. |
| "Once dialed in, you're done" | Beans change as they age. Expect small adjustments throughout a bag. |
Key takeaways
- Extraction is how much flavor water pulls from the grounds. Balanced coffee is usually around 18–22%.
- Sour usually means under-extracted. Bitter usually means over-extracted. Both usually means uneven extraction.
- Grind size is your main dial. Fast shots: finer. Slow shots: coarser.
- Use a consistent dose that fits your basket comfortably, and weigh it.
- Start at 1:2 in 20–30 seconds, then let taste guide you.
- To extract more: finer grind, longer yield, slightly hotter water.
- To extract less: coarser grind, shorter yield, slightly cooler water.
- Roast level and freshness change flow, crema and flavor.
- Crema isn't a reliable measure of quality on its own.
- Channeling causes muddled shots. Good distribution and a level tamp prevent it.
- Change one thing at a time, keep notes, and trust your taste.
The central idea is simple: consistency makes troubleshooting possible, but flavor decides success. Use ratios, timing and visual clues to understand what's happening, then adjust until your coffee tastes balanced and enjoyable to you.
Frequently asked questions
What does coffee extraction mean?
Extraction is the process of water dissolving flavor compounds and other soluble material out of ground coffee. About 30% of a bean can dissolve, and balanced coffee usually extracts around 18 to 22% of the dry coffee weight.
Why does my espresso taste sour?
Sour espresso is usually under-extracted. Grind finer, pull a slightly longer shot (for example 1:2.5 instead of 1:2) or raise the brew temperature a little. Change one thing at a time.
Why does my espresso taste bitter?
Bitterness often means over-extraction. Grind coarser, pull a shorter shot (around 1:1.5) or lower the temperature slightly. Very dark roasts can also taste bitter even when extracted well.
How long should an espresso shot take?
A common starting point is 20 to 30 seconds for a 1:2 ratio, such as 18 g of coffee producing 36 g of espresso. Time is a guide; taste decides whether the shot is right.
What is a good espresso ratio?
Start with 1:2 by weight. Shorter shots around 1:1.5 are more intense, while longer shots around 1:2.5 to 1:3 are lighter and can soften sourness.
Does more crema mean better espresso?
No. Crema mostly reflects freshness, roast level and bean type. Robusta and very fresh dark roasts make more crema, but a shot with little crema can still taste excellent.
What is channeling in espresso?
Channeling is when water finds a weak path through the coffee puck and rushes through it, over-extracting some coffee and under-extracting the rest. It often makes espresso taste both sour and bitter.
How do I stop channeling?
Break up clumps with a WDT tool, distribute the grounds evenly to the edges, tamp level and consistently, and avoid an extremely fine grind. A bottomless portafilter helps you see whether it worked.

- Michael Reynolds, home espresso and filter dial-in notes
- Specialty Coffee Association: Coffee Standards (PDF)
- Specialty Coffee Association: Heritage brewing standards
Related guides
Coffee brewing ratios explained Burr vs blade grinder Water chemistry for coffeeWritten by Michael Reynolds. Last updated November 19, 2026.