Philips Barista Brew review: a 58 mm portafilter machine with a built-in grinder, a calibrated tamper and a real Americano button
The Philips Barista Brew Semi Automatic Espresso Machine puts a grinder, a 58 mm portafilter, a pressure gauge and a steam wand in one stainless box. It is Philips' machine for people who want to make espresso themselves, with a calibrated tamper and pressurized baskets to make the learning curve gentler. Its Americano button and 80-ounce tank are genuinely useful, but steaming is slow and the grinder has no fine micro-steps.
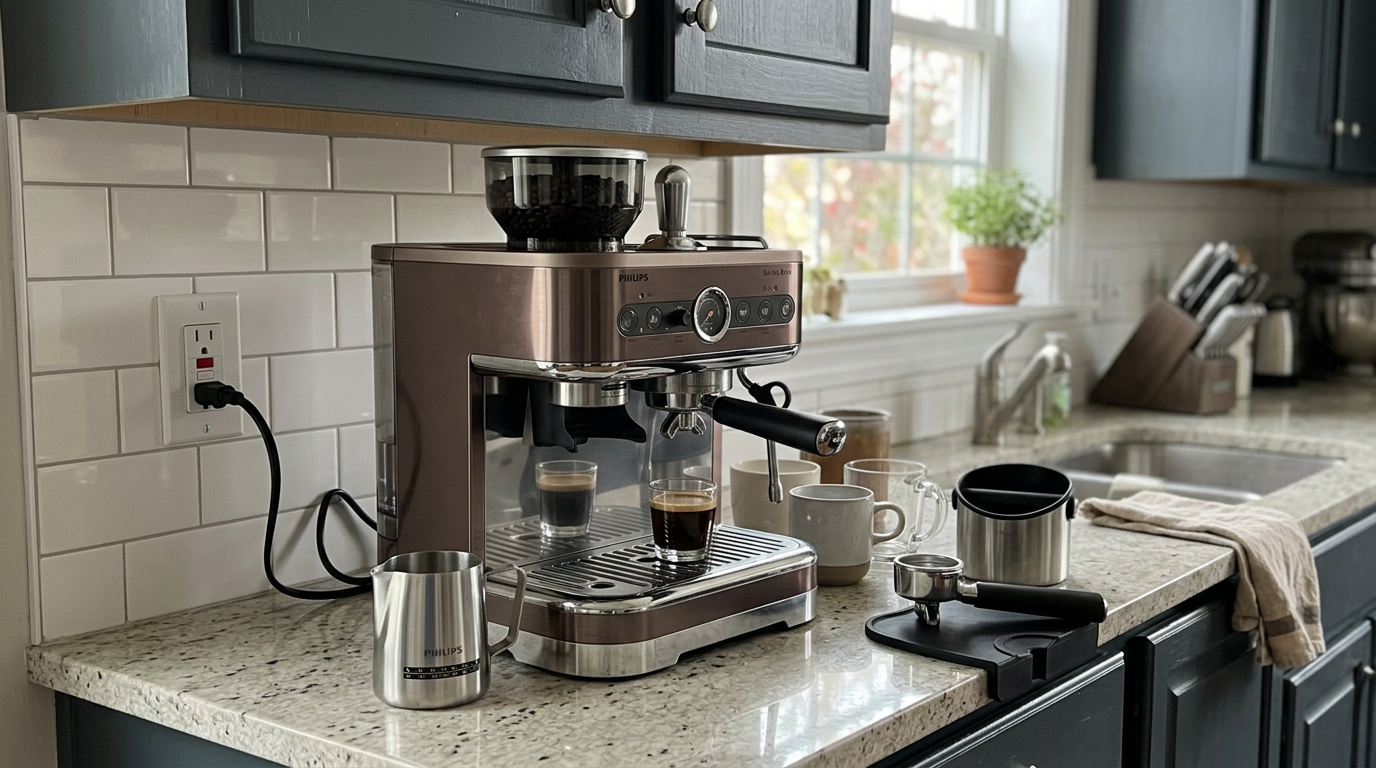

Michael Reynolds
Hands-on review
Hands-on testing, research, specs
4 weeks
22 minutes
Jargon helpNew to espresso? Tap any dotted term to see what it means.
In this review
Yes, if you want to learn real espresso at home without buying a separate grinder, tamper and pitcher. The Philips Barista Brew made the fullest-bodied espresso of every Philips machine I tested, thanks to its 58 mm portafilter and proper double baskets. The calibrated tamper and pressurized baskets make the first weeks forgiving, and the Americano button is a clever touch. Steaming milk took me 50 to 60 seconds per pitcher, and the 15-step grinder can be too coarse a tool for fussy beans.
Philips Barista Brew at a glance
Philips Barista Brew pros and cons
- Fullest espresso of the Philips machines I tested
- Grinder, calibrated tamper and four baskets in one box
- Americano button with separate hot water outlet
- Steaming takes 50 to 60 seconds per pitcher
- Grinder has 15 steps and no micro-adjustment
- Takes practice; not a one-touch machine
Who should buy the Philips Barista Brew?
- Beginners who want to learn real espresso
- Americano and espresso drinkers
- Small kitchens that can't fit a separate grinder
- People who want one-touch lattes
- Households making many milk drinks in a row
- Grind perfectionists who need micro-steps
First impressions of the Philips Barista Brew
After testing a run of fully automatic Philips machines, the Philips Barista Brew felt like a different world.
There's no bean-to-cup button here.
You grind into a portafilter, tamp, lock it in, and watch the pressure gauge while the shot runs.
That's more work, but it's also where the best espresso of this whole Philips test came from.
Out of the box, the Barista Brew looks the part.
The stainless steel body has a fingerprint-resistant finish, and the round pressure gauge sits right in the middle of the front.
The grinder hopper is on top, the steam wand on the side, and a separate hot water outlet sits next to the group head.
In the box, Philips includes almost everything a beginner needs: four baskets, a calibrated tamper, a dosing ring, a milk pitcher with a thermometer and cleaning tools.
My first shot was sour and fast, which is completely normal on day one with any manual machine.
By the end of the first week, I was pulling sweet, syrupy doubles with a thick crema.
The Barista Brew brings grinder, portafilter and steam wand together in one stainless body.
What the Philips Barista Brew actually is
The Barista Brew is a semi-automatic espresso machine with a built-in grinder.
Semi-automatic means you prepare the coffee yourself, but the machine controls the pump and stops the shot at a set volume.
It sits between a fully automatic machine and a fully manual setup.
How it differs from a fully automatic machine
| Step | Fully automatic machine | Philips Barista Brew |
|---|---|---|
| Grinding | Automatic, inside the machine | Into the portafilter, at a button press |
| Dosing | Automatic | You control it |
| Tamping | Automatic | You, with a calibrated tamper |
| Brewing | Automatic | Button for single, double or Americano |
| Milk | Automatic or frother | Steam wand, by hand |
| Used grounds | Drawer | You knock out the puck |
What's in the box
Our tip: Start with the pressurized double basket for your first few days, because it forgives an uneven grind or tamp while you learn.
Philips Barista Brew design and setup
The Philips Barista Brew measures about 32 × 41 × 33.4 cm, or 12.6 × 16.1 × 13.1 inches, and weighs about 8.6 kg, or 19 pounds.
It's wider than the automatic Philips machines but shallower, so it suits counters that aren't very deep.
The water tank
The tank sits at the back and has its own handle.
At around 80 fluid ounces, it's one of the biggest of any machine I tested.
You do need room behind the machine to lift it out, so don't push it right against the wall.
The drip tray
The drip tray has a removable insert.
With it in, small espresso cups sit closer to the spouts.
Take it out, and taller mugs fit under the group head.
Setup
Rinse the tank and fill it, add beans, and run water through the group head and steam wand before your first shot.
The machine heats up quickly, but give the portafilter a few minutes locked in the group head so it's warm for your first shot.
Our tip: Leave the empty portafilter locked into the machine while it heats, because a cold portafilter steals heat from the first espresso.
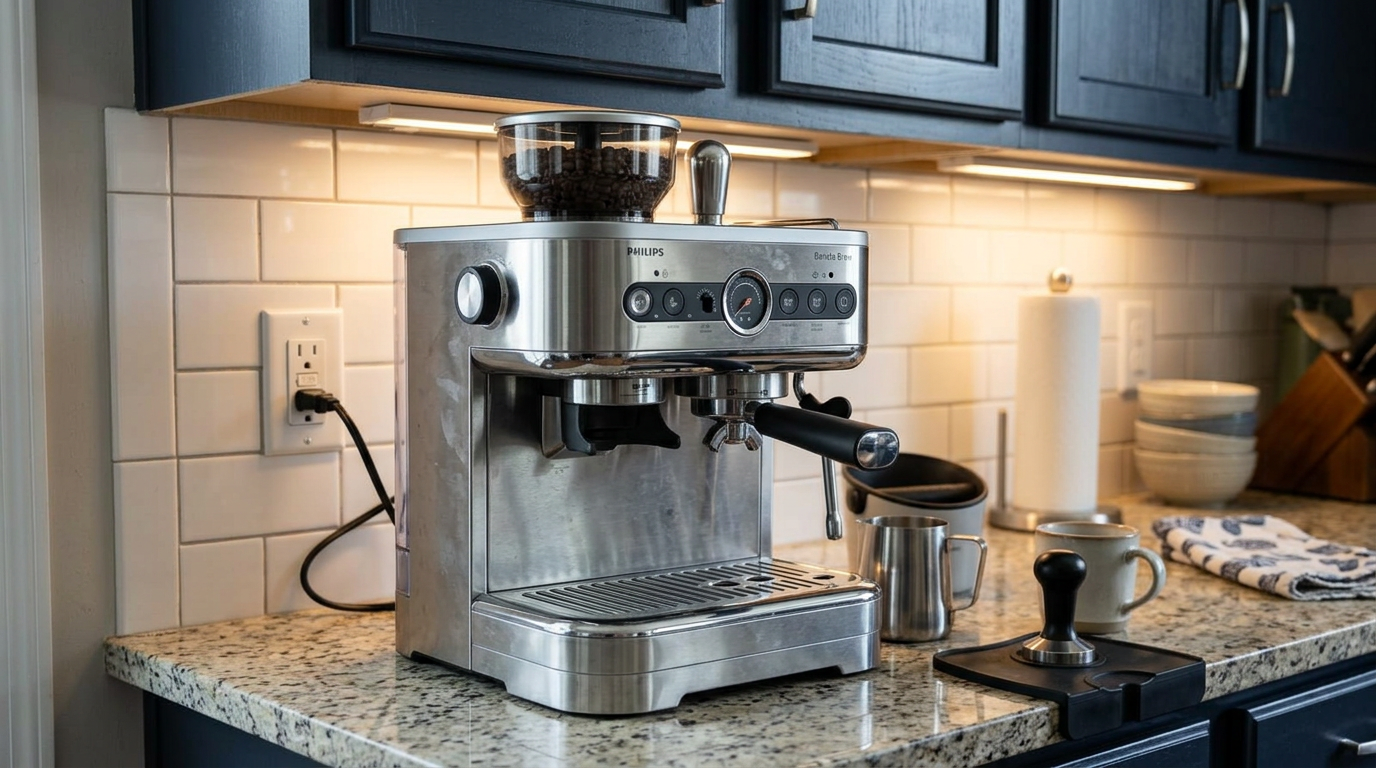
The pressure gauge in the middle of the front panel helps you read every shot.
The built-in grinder
The Barista Brew grinds with a metal conical burr✕Conical burr grinderA grinder with a cone-shaped burr turning inside a ring. It grinds evenly and quietly, and is common on espresso machines and quality coffee grinders. grinder, straight into the portafilter.
There are 15 settings, from coarse to fine, adjusted from the bean hopper.
The hopper holds about 8.8 ounces, or 250 grams, of beans.
That's roughly a bag, and enough for a good number of double shots.
The dosing ring
Philips includes a ring that clips onto the top of the portafilter while you grind.
It works like a funnel, keeping the grounds in the basket instead of on the counter.
After grinding, I tapped the portafilter gently, took the ring off and tamped.
It's a small accessory that made my mornings much tidier.
No micro-steps
The grinder's 15 steps are its main limitation.
On espresso, a single grind step can make a big difference to how fast a shot runs.
With some beans, I found one step too fast and the next too slow, with no in-between setting.
When that happened, I adjusted the dose or the shot volume instead.
Double shots in the non-pressurized basket, from my notes. Pressurized baskets are less sensitive.
Our tip: If one grind step is too fast and the next too slow, keep the faster one and add a little more coffee to the basket.
Portafilter, baskets and the calibrated tamper
The Philips Barista Brew uses a 58 mm stainless portafilter, about 2.28 inches, the same size as most café machines.
A bigger, flatter coffee bed tends to extract more evenly, and it's easier to tamp level.
Four baskets
| Basket | How it works | Best for |
|---|---|---|
| Single pressurized | Extra resistance built into the basket | Learning, pre-ground coffee |
| Double pressurized | Same, for two shots | Your first few weeks |
| Single non-pressurized | Traditional, relies on grind and tamp | Short shots once you are confident |
| Double non-pressurized | Traditional double | The best espresso, once dialed in |
Pressurized baskets✕Pressurized basketA filter basket with a single small exit hole that creates extra pressure. It makes decent crema even if the grind or tamp is not perfect, but limits the best possible flavor. are more forgiving.
They create crema even if your grind or tamp isn't perfect.
Non-pressurized baskets rely on you getting the grind, dose and tamp right, and reward you with better flavor when you do.
One note: the baskets are fairly shallow, so not every aftermarket 58 mm basket will fit.
The calibrated tamper
Tamping is where many beginners struggle.
The Barista Brew's tamper rests on the edge of the portafilter and pushes down with a spring.
That gives you the same pressure and a level surface every time.
Pressurized or non-pressurized: which basket to use
The four baskets are one of the best things about the Philips Barista Brew, but they can be confusing at first.
Start pressurized
For the first few days, I used the pressurized double basket.
It produced a thick crema even when my grind and tamp weren't perfect.
The coffee was good, if a little one-dimensional.
Move to non-pressurized
Once I could tamp consistently and had found a grind setting, I switched to the non-pressurized double basket.
The first shots ran fast and sour, so I went finer until a double took about 25 to 32 seconds.
From then on, the flavor was clearly richer and sweeter.
My ratings out of 100 for flavor, from my notes.
Our tip: Use a pressurized basket whenever you brew with pre-ground coffee, because it is too coarse to work well in the non-pressurized baskets.
Espresso performance
This is where the Barista Brew earned its place.
With a fresh medium-dark blend in the non-pressurized double basket, I pulled shots with thick, hazelnut-colored crema✕CremaThe golden-brown foam on top of an espresso. It forms when pressure pushes gases and oils out of freshly ground coffee. and a syrupy body.
They tasted of dark chocolate, caramel and toasted nuts, with a sweet, lingering finish.
It was the fullest, richest espresso of all the Philips machines I tested.
Single, double and programmable volume
There are buttons for single and double shots.
You can program the volume of each, so the machine stops at the same point every time.
There's also a manual option if you want to stop the shot yourself.
The pressure gauge
The gauge shows the pressure during the shot.
It's a useful guide: if the needle barely moves, the grind is too coarse; if it climbs very high and the coffee drips, it's too fine.
But taste is the final judge, not the needle.
A common café starting point that worked well in the Barista Brew's double non-pressurized basket.
| What you taste or see | Likely cause | First change |
|---|---|---|
| Sour, thin, fast shot | Grind too coarse | One step finer |
| Bitter, slow, dripping shot | Grind too fine | One step coarser |
| Pale, thin crema | Stale beans or too little coffee | Fresher beans, slightly larger dose |
| Uneven, spurting shot | Uneven tamp or clumps | Tap, level the grounds, tamp straight |
| Lukewarm shot | Cold portafilter or low temperature | Preheat portafilter, raise temperature |
Our tip: Weigh your shot on a kitchen scale for the first week, because hitting about twice your dose in coffee is the quickest way to learn what good tastes like.
Four brewing temperatures
The Barista Brew has four temperature settings: low, medium, high and maximum.
Philips uses PID✕PID temperature controlAn electronic controller that keeps the brewing water at a steady temperature, instead of letting it swing up and down. It makes shots more consistent. control to keep the temperature steady during brewing.
Temperature matters more on a manual machine, because it changes how much flavor you pull from the coffee.
| Roast | Temperature I used | Why |
|---|---|---|
| Light roast | Maximum | Extracts more sweetness, less sourness |
| Medium roast | High | Balanced, bright and sweet |
| Medium-dark blend | Medium or high | Rich without harsh bitterness |
| Very dark roast | Low or medium | Keeps bitterness in check |
With my medium-dark blend, high gave the best balance.
When I switched to a lighter roast in week three, moving to maximum fixed a slightly sour taste immediately.
Our tip: Change temperature before you change the grind when switching to a very light or very dark roast, because it is the quicker fix.
The Americano button and hot water outlet
The Americano button is the most distinctive feature of the Philips Barista Brew.
Most machines make a long coffee by pushing more water through the coffee, which over-extracts it and tastes flat or bitter.
The Barista Brew does it properly.
It brews an espresso through the portafilter and then adds hot water through a separate outlet next to the group head.
The coffee and the extra water never mix in the puck, which is how a café makes an Americano✕AmericanoAn espresso topped up with hot water. It tastes cleaner than a single long brew, because the coffee is not over-extracted by a large volume of water..
Programmable both ways
You can program the espresso amount and the hot water amount separately.
I set a double shot with a medium amount of water for a strong Americano, and Alex added more water for a milder mug.
Relative coffee strength in the cup.
The separate outlet is also handy for tea or warming cups.
Our tip: Put the cup under both outlets before you press Americano, because the hot water comes from a separate spout next to the coffee.
Steaming milk on the Barista Brew
The Barista Brew has a manual steam wand powered by its thermoblock✕ThermoblockA heater that warms water as it flows through a hot metal block, instead of heating a whole boiler. It is quick to heat but makes steam more gently than a big boiler..
Philips includes a stainless pitcher with a thermometer built into the side.
Slow, but capable
The steam is gentler than on machines with a large boiler.
Steaming a pitcher of milk took me about 50 to 60 seconds, depending on how much milk I used.
For one latte, that's fine.
For four cappuccinos in a row, it adds up.
Getting good microfoam
Because steaming takes longer, the risk is overheating the milk before it's well textured.
The trick is to add air early, in the first few seconds, then let the milk spin.
With practice, I made smooth, glossy microfoam✕MicrofoamMilk foam with bubbles so small you can't see them. It feels silky and blends into the coffee instead of sitting on top like froth. and poured simple hearts.
I could also make drier, stiffer foam for a classic cappuccino.
Measured from opening the steam to reaching about 60–65°C.
The thermometer
The thermometer on the pitcher is genuinely useful.
Milk tastes sweetest at around 60 to 65°C, or 140 to 150°F.
Above about 70°C, or 158°F, it starts to taste flat and cooked.
Our tip: Stop steaming when the pitcher thermometer is a few degrees under your target, because the temperature keeps rising for a moment after you close the steam.
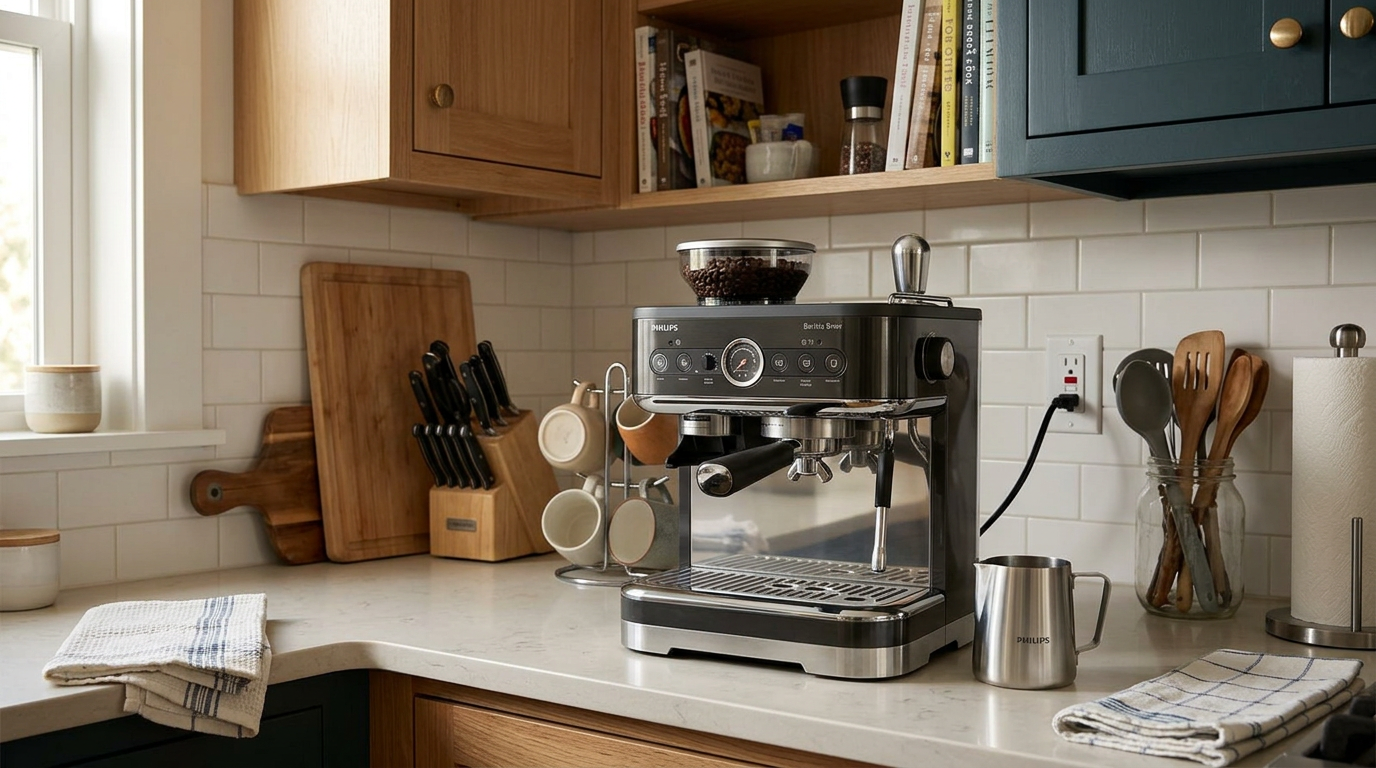
The steam wand is slower than a big boiler, but makes good microfoam with practice.
The drinks I made, step by step
Here are the drinks I made most on the Philips Barista Brew, with the settings that worked.
| Drink | Coffee | Milk or water | Notes |
|---|---|---|---|
| Espresso | Double, about 18 g in, 36 g out | None | High temperature |
| Americano | Double shot | Hot water, medium | Use the Americano button |
| Cortado | Double shot | About 60 ml milk, little foam | Small glass |
| Flat white | Double shot | About 120 ml silky milk | Thin, glossy layer |
| Latte | Double shot | About 200 ml milk | Light foam, pour latte art |
| Cappuccino | Double shot | About 150 ml milk, more foam | Dry, airy top |
A morning flat white, start to finish
Lock the empty portafilter in while the machine heats.
Clip on the dosing ring, grind into the double non-pressurized basket and tap the portafilter.
Remove the ring, tamp with the calibrated tamper, lock in and press double.
While the shot runs, pour cold milk into the pitcher.
Steam, adding air for the first ten seconds, until the thermometer reads around 60°C.
Swirl the pitcher, then pour from low and close.
The whole routine took me about four minutes by the end of week two.
Measured from grinding to the finished drink.
Cleaning and maintaining the Philips Barista Brew
Cleaning a semi-automatic machine is different from an automatic one.
There's no brew group to remove, but you handle the coffee and milk yourself, so there's more daily wiping.
After every shot
Knock the used puck into a bin, rinse the basket and wipe the group head.
If coffee gets stuck in the basket holes, the included cleaning pin clears them.
After every milk drink
Wipe the steam wand straight away with a damp cloth, carefully, because it's very hot.
Then open the steam for a second to blow out any milk inside.
Dried milk on the wand is much harder to remove later.
Weekly
Brush coffee grounds out of the grinder outlet and around the portafilter holder with the included brush.
Empty and wash the drip tray and rinse the water tank.
Descaling
The machine has a descaling reminder.
Use a Philips-approved descaler and follow the manual's steps.
Descaling removes mineral scale that slowly builds up in the heater and pipes.
| When | Task | Why it matters |
|---|---|---|
| After each shot | Knock out puck, rinse basket | Prevents stale coffee taste |
| After milk | Wipe and purge the steam wand | Stops dried milk |
| Daily | Empty drip tray, wipe group head | Hygiene |
| Weekly | Brush grinder outlet, clean tank and tray | Removes old grounds |
| When reminded | Descale | Protects the heater |
My estimate of hands-on cleaning time per day.
Our tip: Keep a damp cloth on the drip tray just for the steam wand, so wiping it straight after steaming becomes automatic.
Learning curve: four weeks with the Barista Brew
A semi-automatic machine gets better as you do, so here's how my four weeks went.
Week 1: getting started
I began with the pressurized double basket and pre-set grind.
The coffee was good straight away, with plenty of crema, but a little flat in flavor.
Week 2: switching baskets
I moved to the non-pressurized double basket and started weighing shots.
The first few were sour and fast, until I went three steps finer.
Then the espresso became noticeably sweeter and fuller.
Week 3: milk and temperature
I practiced steaming every day and poured my first clean hearts.
A lighter roast tasted sour until I raised the temperature to maximum.
Week 4: routine
A latte took me about four minutes from start to finish.
The espresso was consistently the best of any Philips machine I tested.
My own rating of shot quality, from our shared notes.
Our tip: Change only one thing per shot (grind, dose or volume), or you will not know which change helped.
What daily use is really like
Daily life with the Philips Barista Brew is more hands-on than with an automatic machine, and that's the point.
I enjoyed the routine: grind, tamp, watch the gauge, steam, pour.
Alex, who wanted his Americano with as little effort as possible, liked the Americano button most.
The big tank
The 80-ounce tank was one of the nicest everyday details.
With two of us making espressos, Americanos and lattes, I refilled it every three days or so.
Rough maths from a 2.3 L tank. Americanos use the most water.
Noise
The grinder is loud for a few seconds, and the pump hums during the shot.
Steaming is a steady hiss.
Philips lists the noise level at under 78 dB, which matched my impression of a normal espresso machine.
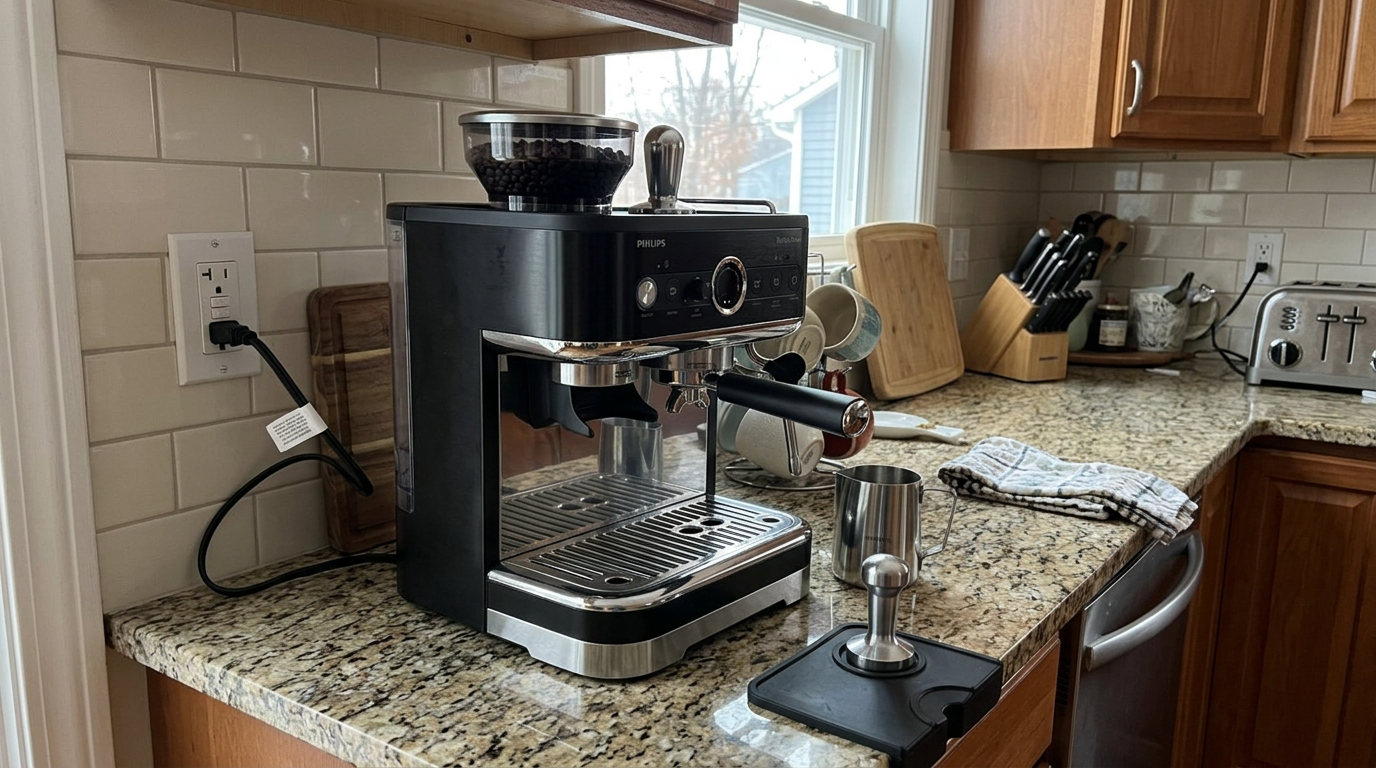
By the window in our kitchen, the Barista Brew became the center of our weekend coffee routine.
Beans, water and milk
A manual machine shows the difference between good and average beans more than any automatic.
Buy whole beans roasted within the last few weeks, and use them within a month of opening.
Medium and medium-dark espresso blends were the easiest to dial in.
Lighter roasts were more rewarding but needed a finer grind and maximum temperature.
Avoid oily, very dark and flavored beans, which can clog the grinder.
| Bean type | Grind | Temperature | Result |
|---|---|---|---|
| Medium-dark blend | Fine | High | Rich, chocolatey, easiest |
| Medium roast | Fine | High | Sweet, balanced |
| Light roast | Finest steps | Maximum | Bright, fruity, trickier |
| Oily or flavored | Avoid | Avoid | Clogs the grinder |
Water and milk
Use fresh, cold water and refill rather than topping up.
For milk, start with cold whole milk straight from the fridge; it's the easiest to texture.
Barista-style oat milk also steamed well.
Common mistakes to avoid
| Mistake | What happens | Better habit |
|---|---|---|
| Pushing harder on the calibrated tamper | Slow, bitter shots | Let the spring set the pressure |
| Cold portafilter | Lukewarm, sour shot | Lock it in while heating |
| Adding air late when steaming | Big bubbles, overheated milk | Air in the first ten seconds |
| Skipping the steam purge | Milk inside the wand | Wipe and purge every time |
| Changing several settings at once | Can't tell what helped | One change per shot |
| Buying any 58 mm basket | May not fit | Check depth and compatibility |
What I would change
Micro-steps between grind settings would make dialing in easier.
A stronger steam wand would speed up milk drinks.
And a dosing timer on the grinder would help repeat the same dose without a scale.
Three kinds of coffee drinker, three verdicts
The curious beginner
Someone who has always wanted to make café-style espresso at home.
The Barista Brew is a great first step: forgiving baskets to start, proper baskets to grow into, and everything in one box.
The Americano drinker
Someone who wants a big, clean black coffee every morning.
The Americano button makes this effortless and tastes much better than a long brew.
The latte-for-four household
Several people who all want milk drinks at the same time.
The slow steaming and hands-on workflow make this tiring, so a fully automatic machine is a better choice.
| Drinker | Fit | Main reason |
|---|---|---|
| Curious beginner | Excellent | Forgiving to start, room to grow |
| Americano drinker | Excellent | Dedicated Americano button |
| Espresso hobbyist | Very good | 58 mm portafilter, but no grind micro-steps |
| Latte-for-four household | Fair | Slow steaming, one drink at a time |
Is the Philips Barista Brew worth the money?
The Barista Brew replaces a separate espresso machine, grinder, tamper and milk pitcher.
Bought separately, those would take more counter space and more money.
For people who want to learn espresso, that all-in-one package is the main appeal.
It isn't for everyone.
If you want coffee at one touch, a fully automatic machine will make you happier.
Three questions to ask:
Do you want to make espresso by hand, and learn as you go?
Do you mostly make one or two drinks at a time?
And would you enjoy the routine of grinding, tamping and steaming?
How it compares with other coffee setups
| Feature | Philips Barista Brew | Fully automatic machine | Separate machine and grinder |
|---|---|---|---|
| Espresso quality | Richest, skill-dependent | Good, consistent | Richest, skill-dependent |
| Grinder | Built in, 15 steps | Built in | Separate, often micro-steps |
| Milk | Steam wand, full control | Automatic | Steam wand |
| Effort | Medium | Low | High |
| Counter space | One appliance | One appliance | Two or more |
| Learning curve | Moderate | Very low | Steep |
Against a fully automatic machine, the Barista Brew makes better espresso and gives you real milk control, but needs time and practice.
Against a separate machine and grinder, it saves space and money, but gives up grind precision and steam power.
| You mostly drink | Is the Barista Brew a fit? | Why |
|---|---|---|
| Espresso | Excellent | 58 mm portafilter, proper baskets |
| Americanos | Excellent | Dedicated Americano button |
| Flat whites and lattes | Good | Microfoam possible, but slow steaming |
| Several milk drinks in a row | Fair | 50–60 s per pitcher |
| One-touch convenience | Poor | Semi-automatic by design |
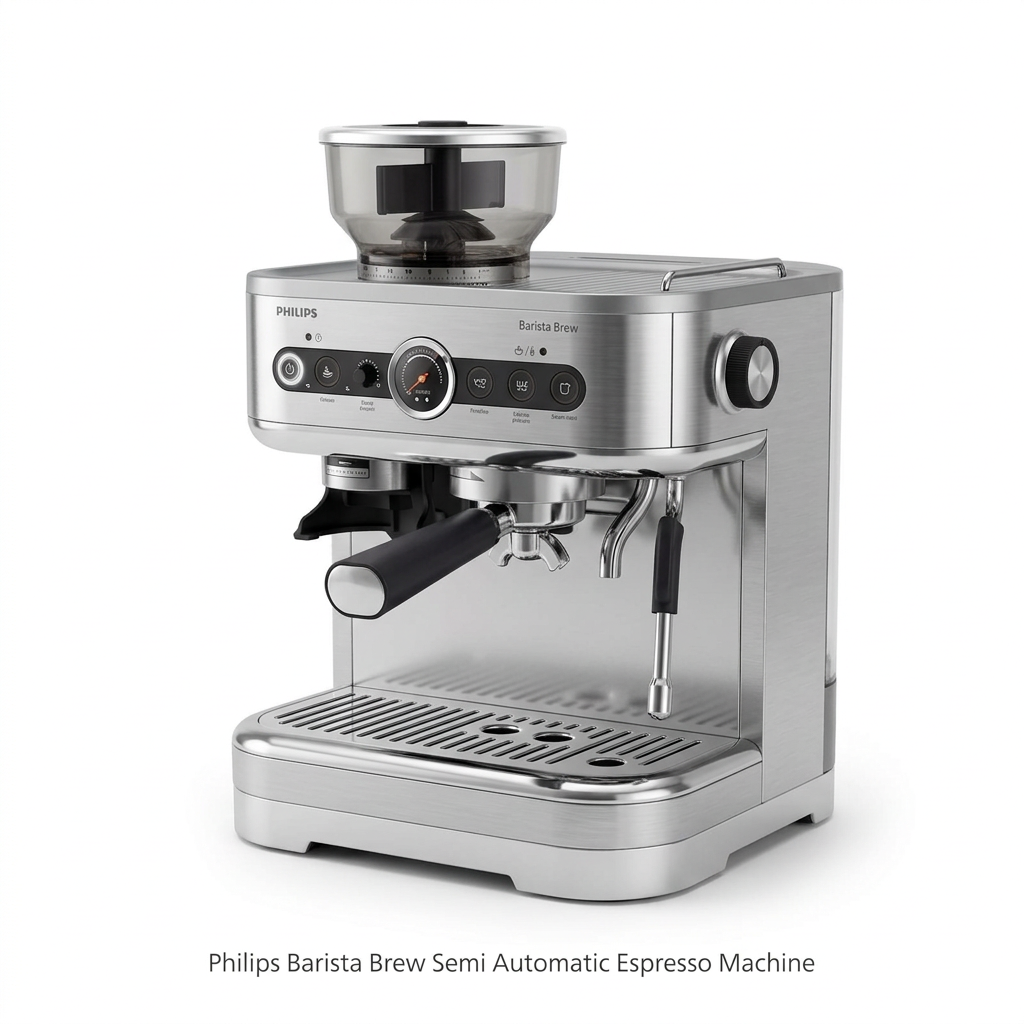
Grinder, pressure gauge, portafilter, hot water outlet and steam wand in one body.
Other Philips machines I tested
If you want one-touch drinks instead, see my Philips 4400 Series review.
For a simple automatic machine with a steam wand you can strip down, read my Philips 2200 Series review.
And for one-touch lattes with easy cleaning, the Philips 3200 Series is worth a look.
The Philips 4300 Series sits just below the 4400, with eight drinks and two saved profiles.
If you want fresh-bean espresso without the hands-on work, my Philips 800 Series review covers the simplest automatic machine in the range.
Which one is right for you: is the Philips Barista Brew your match?
4 quick questionsPhilips Barista Brew specifications
From manufacturer data and my own testing.
How I tested and scored the Philips Barista Brew
For four weeks, the Philips Barista Brew was our everyday espresso machine.
Alex van Gog and I shared it and kept joint notes on every setting change.
I pulled shots in all four baskets, weighed doses and yields, timed shots and worked through the grind range with three roasts.
I steamed milk daily, timed steaming for different drink sizes, used the Americano function with different water amounts and tried all four temperatures.
Finally, I checked our notes against Philips' specifications and user manual.
- Espresso (8.4): body, crema, flavor and consistency once dialed in.
- Milk drinks (7.3): microfoam quality, steaming speed and pitcher.
- Ease of use (7.6): learning curve, accessories, Americano button and workflow.
- Cleaning (7.9): daily wiping, steam wand, grinder and descaling reminder.
The overall score of 8.1 is an editorial rating that reflects those four areas.
Philips Barista Brew FAQ
Is the Philips Barista Brew worth it?
Yes, if you want to learn real espresso at home and like the idea of grinding, tamping and steaming yourself. If you want one-touch coffee, choose a fully automatic machine.
Is the Philips Barista Brew good for beginners?
Yes. The pressurized baskets, calibrated tamper and dosing ring make the first weeks forgiving, and you can move to the non-pressurized baskets as you improve.
What size is the portafilter?
58 mm, or about 2.28 inches, made of stainless steel. The included baskets are fairly shallow, so check before buying aftermarket baskets.
How many grind settings does it have?
Fifteen, from coarse to fine. There are no micro-steps in between.
How does the Americano button work?
It brews an espresso through the portafilter, then adds hot water from a separate outlet. You can program both amounts separately.
How long does it take to steam milk?
About 50 to 60 seconds for a full pitcher in my tests, less for small drinks.
Can it make latte art?
Yes, with practice. The steam wand can make glossy microfoam, but add air early because steaming is fairly slow.
How many temperature settings are there?
Four: low, medium, high and maximum.
How big is the water tank?
About 2.3 liters, or 80 fluid ounces, with a handle for lifting it out from the back.
Does it have a pressure gauge?
Yes, on the front panel, so you can watch the pressure during each shot.
How do I clean it?
Rinse the basket after every shot, wipe and purge the steam wand after milk, brush the grinder outlet weekly and descale when the machine reminds you.
What comes in the box?
Four filter baskets, a dosing ring, a calibrated tamper, a stainless milk pitcher with thermometer, a cleaning pin and a brush.
Kitchen & coffee tester
Michael spent six years as a line cook in restaurants in Chicago and New York, and he has tested kitchen appliances for HouseholdMe since 2018, from air fryers to coffee makers. He holds an SCA certificate in barista skills and used the Philips Barista Brew as his everyday coffee machine for four weeks for this review.
- Four weeks of hands-on testing of the Philips Barista Brew Semi Automatic Espresso Machine
- Philips product specifications and user manual
- General espresso brewing and maintenance guidance