Breville Barista Touch review: a simple touchscreen, three-second heat-up and hands-free milk in a compact body
The Breville BES880BSS Barista Touch Espresso Machine heats in about three seconds, puts every control on one simple touchscreen and textures milk by itself to the temperature you choose. It is quick and easy to live with, but you still dose and tamp by hand, the presets all brew the same shot, and the compact drip tray fills up fast.

Michael Reynolds
Hands-on review
Hands-on testing, research, specs
4 weeks
22 minutes
Jargon helpNew to espresso? Tap any dotted term to see what it means.
In this review
Yes, if you want real espresso and hands-free milk without a cluttered control panel. The Breville Barista Touch is ready in seconds, keeps every setting on one responsive touchscreen and steams milk to the exact temperature you choose. Once I weighed my dose and stopped the shot by weight, the espresso was sweet and balanced. You still grind, stir and tamp by hand, the drink presets all use the same shot, and the compact drip tray needs emptying often.
Breville Barista Touch at a glance
Breville Barista Touch pros and cons
- Ready in about three seconds
- Hands-free milk stops at your set temperature
- Clean, simple touchscreen with 8 saved drinks
- You still dose and tamp by hand
- Presets all use the same shot settings
- Small drip tray needs frequent emptying
Who should buy the Breville Barista Touch?
- Latte and flat white drinkers who want easy milk
- Small kitchens that need a compact all-in-one
- People who like a clean panel with no knobs
- Anyone who wants the machine to tamp for them
- Black-coffee drinkers who don’t need auto milk
- Households making many drinks in a row
First impressions of the Breville Barista Touch
The Breville Barista Touch looks calmer than most espresso machines.
There are no knobs, no pressure gauge and no rows of buttons on the front.
Instead, a color touchscreen sits at eye level, and everything happens there.
The body is brushed stainless steel with crisp, straight edges, and it looks smart in a modern kitchen.
It's also compact, so it slid under my wall cabinets with room to spare.
On the first morning, I swiped to Flat White, ground into the portafilter, tamped and pressed brew.
Then I put the milk jug on the drip tray and pressed start.
The wand textured the milk and stopped by itself at the set temperature.
That hands-free milk is the main reason to choose this machine.
The espresso side took a little more work.
Like Breville's hand-tamped all-in-ones, it rewards a scale, a stirring tool and a steady tamp.
After two days of weighing doses and stopping shots by weight, it was making espresso I'd happily pay for.
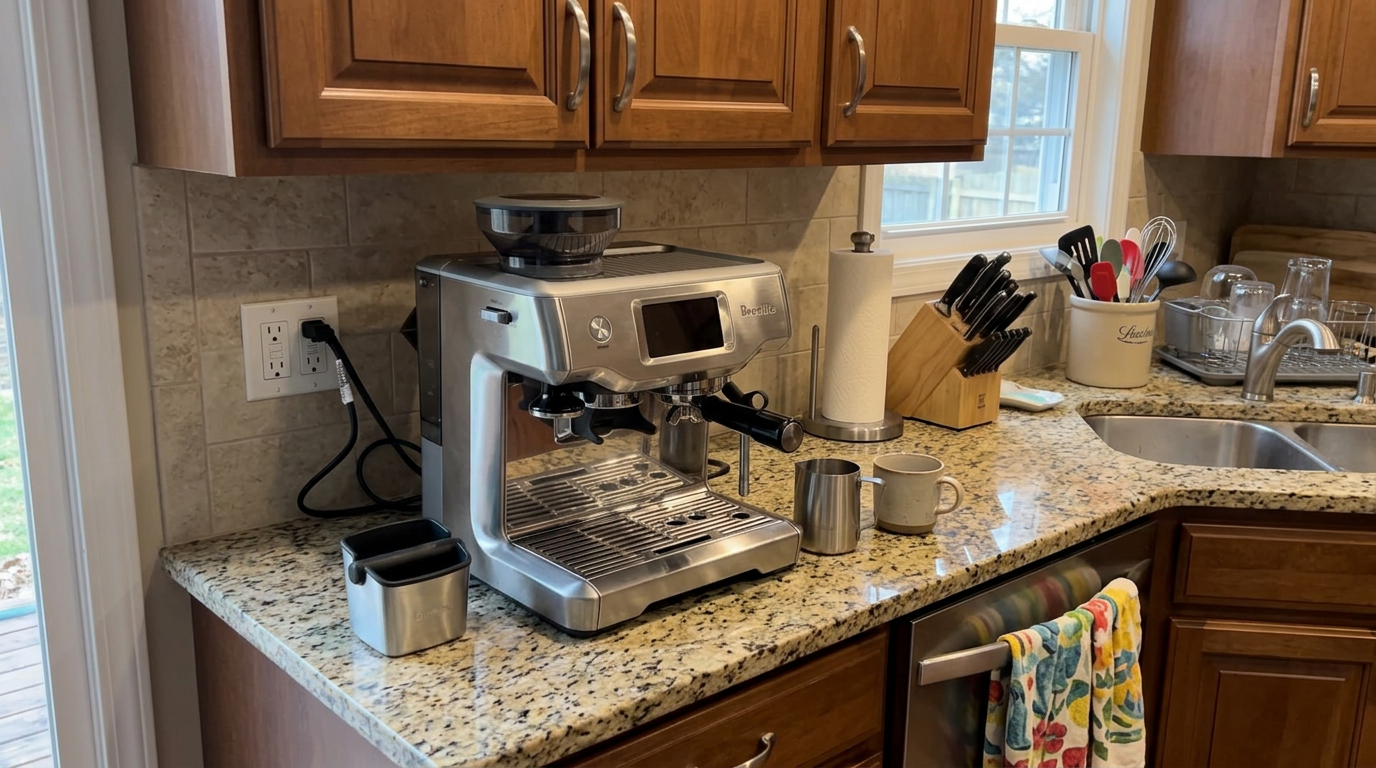
The Barista Touch's compact footprint fits easily under standard cabinets.
What the Breville Barista Touch actually is
The Barista Touch is a semi-automatic espresso machine with a built-in grinder and an automatic steam wand.
You grind into a 54 mm portafilter, tamp the coffee yourself and lock it into the group head.
The touchscreen controls the grind time, the shot and the milk.
The heater
Inside is a 1680-watt ThermoJet✕ThermoJetBreville's compact heating block. Its small mass heats in under three seconds and switches to steam almost instantly. heater.
It brings water from room temperature to brewing temperature in under three seconds.
Because it heats so quickly, there's no need to leave the machine on for long warm-ups, which saves energy.
The grinder
The integrated grinder uses hardened steel conical burrs✕Conical burrsA cone-shaped burr turning inside a ring. The gap between them sets how fine the coffee is ground. with 30 grind settings.
It doses by time, and the cradle lets you pause halfway to settle the grounds.
The milk system
The steam wand textures milk automatically.
A sensor in the drip tray reads the jug's temperature and cuts the steam at your target.
Our tip: Think of the Barista Touch as a hands-on espresso machine with an automatic milk assistant built in.
Who the Barista Touch is really built for
Breville makes several all-in-one espresso machines that look similar, so it helps to know where the Barista Touch fits.
It shares its heater, grinder size and portafilter with the button-controlled models.
What sets it apart is the touchscreen and the automatic milk.
The milk is the point
If you drink lattes, flat whites or cappuccinos most days, steaming milk by hand is the step that takes longest to learn.
Getting the tip in the right place, building a whirlpool and stopping at the right temperature takes practice.
The Barista Touch takes that whole step away.
You set the temperature and the texture once, and every jug comes out the same.
The espresso is still yours
What the Barista Touch doesn't do is tamp for you.
You still weigh, stir and tamp, and those steps decide how good the espresso is.
That's good news if you enjoy the ritual, and less good if you want a machine that does it all.
Who should look elsewhere
If you only drink espresso and americanos, the automatic milk is wasted, and a simpler machine makes the same coffee.
If tamping is the step that worries you, a model with assisted tamping will be more reassuring.
| You are | Barista Touch fit | Why |
|---|---|---|
| A latte drinker new to espresso | Great | Milk is automatic, you learn the shot |
| An experienced home barista | Good | Fast and capable, manual mode available |
| A black-coffee drinker | Fair | You won't use the milk system |
| Someone nervous about tamping | Fair | Tamping is still by hand |
Breville Barista Touch design and setup
The Barista Touch is about 12.6 inches wide, 12.6 inches deep and 16.1 inches tall, plus room for the portafilter handle.
It weighs around 22 pounds.
No knobs
All physical knobs, side dials and toggle switches are gone except the grind dial.
Everything else runs through the touchscreen, which keeps the front panel clean and easy to wipe.
The drip tray
The drip tray has a brushed steel grate over a plastic basin with internal baffles.
The baffles stop splashing when the steam wand purges.
Because the machine is compact, the tray is smaller than on bigger machines, so I emptied it more often.
Hidden storage
Behind the drip tray is a storage compartment for spare baskets, the cleaning disc, the steam-tip pin and the brush.
That kept everything in one place and off the counter.
The hopper and tank
The bean hopper has a rubber seal to keep beans fresher.
The tank sits at the back, with clear level markings, a filter holder and a lid on top, so you can refill without removing it.
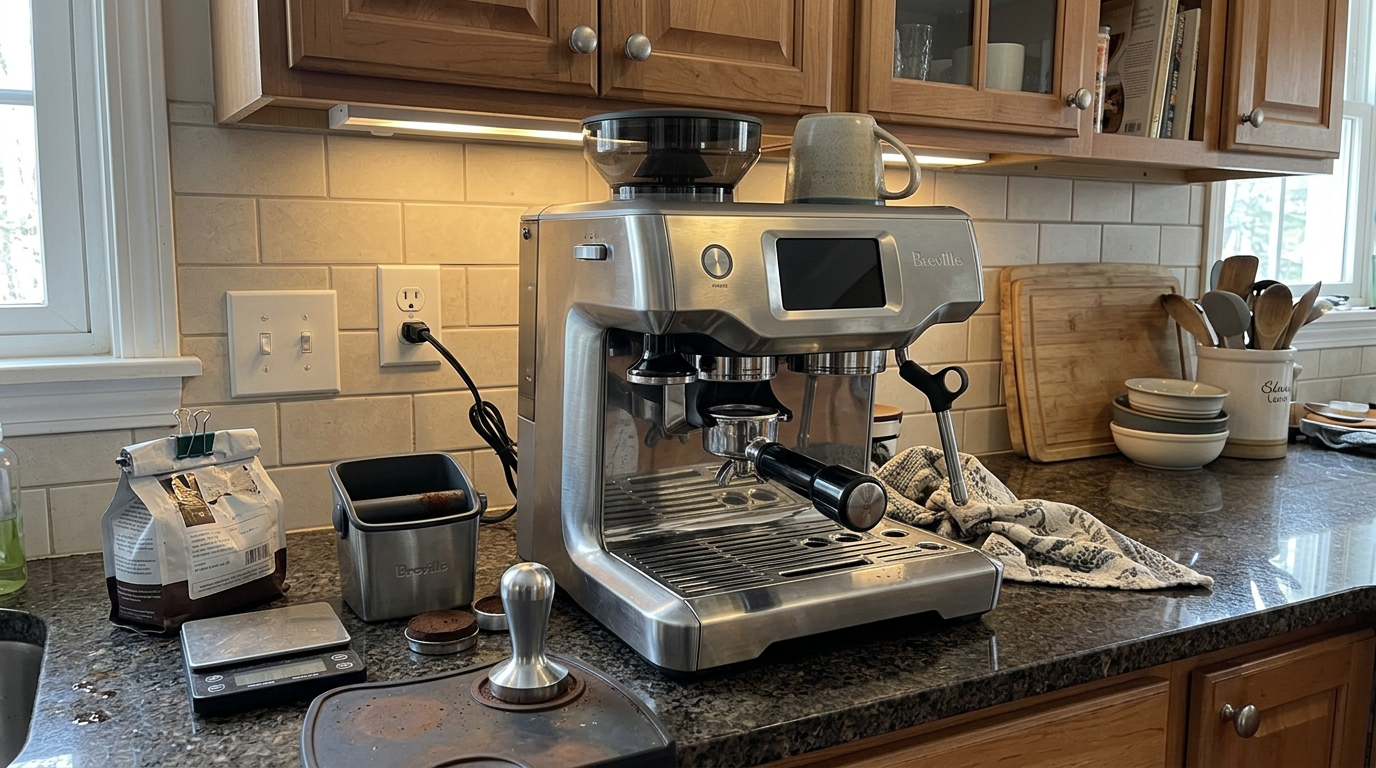
There are no knobs on the front panel, just the touchscreen.
Our tip: Keep the spare baskets in the hidden compartment behind the drip tray, so you always know where they are.
The touchscreen and presets
The capacitive touchscreen responded instantly, even when my fingers were slightly damp.
The menu is flat, with no deep submenus, so I never needed the manual.
Presets
There are five one-touch presets: Espresso, Americano, Latte, Flat White and Cappuccino.
There's also a hot water option.
Custom drinks
You can change any preset, then save it with a name.
Up to eight custom drinks can be stored, each with its own grind time, shot and milk settings.
Built-in tutorials
An info icon on the main screen opens step-by-step visual guides for brewing, grind changes, milk and cleaning.
They're short and clear, and they made the first day much easier.
Settings
The settings menu lets you change brew temperature, milk temperature, screen brightness and other defaults.
Our tip: Save your drinks under people's names, so everyone in the house gets their own settings without overwriting each other's.
How the presets really differ
The touchscreen shows five different drinks, but under the hood they share a lot.
I compared the default settings for each one.
The grind time and brew volume are identical across all five presets.
The main difference is the milk.
Latte and cappuccino, for example, differ by just one step on the eight-step foam scale.
| Preset | Shot | Milk temperature | Foam |
|---|---|---|---|
| Espresso | Default double | None | None |
| Americano | Default double, then hot water | None | None |
| Latte | Default double | Medium-high | Low to moderate |
| Flat white | Default double | Medium-high | Fine, liquid microfoam |
| Cappuccino | Default double | Medium-high | One step higher than latte |
What that means for you
If you want a cappuccino that's clearly different from a latte, adjust the foam and save your own version.
I raised my cappuccino foam to level 7 and dropped my flat white to level 3, which made them taste and feel like different drinks.
Our tip: Don't rely on the factory presets to make distinct drinks, because the shot is the same and the foam barely changes.
Heat-up and the blank shot
The ThermoJet reaches brewing temperature in under three seconds.
That changed my routine.
I switched the machine off between coffees instead of leaving it idling, which also cut standby power use.
The catch
The heater is instantly hot, but the metal group head and portafilter are not.
They take longer to warm, and cold metal pulls heat out of the first shot.
So before my first espresso, I ran a blank shot✕Blank shotRunning hot water through the empty portafilter and group head, with no coffee, to warm the metal before brewing., hot water through the empty portafilter.
That warmed the metal, stabilized the brew temperature and warmed my cup too.
My rough timings, from pressing the button.
Temperature stability
Once warm, back-to-back shots were consistent, and I couldn't taste any temperature drift between drinks.
The built-in grinder
The grinder has 30 stepped settings on the side dial.
That gave me enough range for light, medium and dark roasts without changing anything inside.
Timed dosing
The grind amount is set by time on the touchscreen.
Pushing the portafilter into the cradle starts the grinder, and pushing again pauses it.
I used the pause halfway through to settle the grounds before finishing the dose.
Clumping
Like most built-in grinders, it produces some clumps because of static and the shape of the chute.
That's why a stirring step helped so much, which I'll cover next.
Lower numbers are finer. Bars show how fine the setting is.
Our tip: Adjust the grind dial while the grinder is running, so whole beans can't jam between the burrs.
Dosing, stirring and tamping
This is the part you still do by hand, and it makes the biggest difference to the espresso.
Dose by weight
I used 17.5 grams of coffee in the double basket.
I put the portafilter on a scale, tared it, ground, checked the weight and adjusted the grind time on the screen until it landed there.
Break up the clumps
Built-in grinders can drop clumpy grounds into the basket.
Those clumps create dense spots, and water races around them, which is called channeling✕ChannelingWhen water finds a weak spot in the coffee puck and races through it, leaving the rest under-extracted. The shot tastes sour and thin..
I stirred the grounds with a WDT✕WDT (stirring)Stirring ground coffee with very thin needles to break up clumps and even out the density before tamping. tool, a few fine needles in a handle, in small circles from the bottom up.
You can even make one from a wine cork and a few thin acupuncture needles.
Level and tamp
After stirring, I tapped the portafilter gently on a tamping mat to collapse air pockets.
Then I used a self-leveling tamper with a rim guide to press the coffee perfectly flat.
| Step | What I did | Why |
|---|---|---|
| Weigh | 17.5 g in the double basket | Same dose every shot |
| Stir | Needles, small circles, bottom to top | Breaks clumps, evens density |
| Tap | One gentle tap on a mat | Removes air pockets |
| Tamp | Self-leveling tamper, firm press | Flat, even puck |
| Wipe | Clean the rim | Good seal in the group |
Our tip: If you only add one tool, make it a needle stirring tool, because it fixed more sour shots than any grind change.
Breville Barista Touch espresso performance
The factory presets stop the shot by time, which can vary as beans age.
For better control, I used manual mode.
Manual shots
I put a scale with a 0.1-gram readout on the drip tray, placed my cup on it and tared it.
Then I pressed and held the brew icon until the screen switched to manual.
I pressed brew to start and pressed again when the scale read 40 grams.
My recipe
17.5 grams in and 40 grams out is a ratio of about 1 to 2.3.
With a medium roast, that ran in roughly 28 to 32 seconds.
The machine starts with a low-pressure pre-infusion✕Pre-infusionA gentle soak at low pressure before full pressure kicks in. It swells the coffee evenly so water doesn't punch through weak spots., which wets the puck evenly before full pressure.
How it tasted
The shot had a thick crema✕CremaThe golden-brown foam on top of an espresso, formed when pressure pushes gases and oils out of fresh coffee. with golden-brown tiger striping.
It tasted balanced and sweet, with chocolate and nut notes.
| What you taste or see | Likely cause | First change |
|---|---|---|
| Sour, thin, fast | Grind too coarse or dose too low | Finer grind or slightly more coffee |
| Bitter, harsh, dripping | Grind too fine or uneven tamp | Coarser grind, tamp level |
| Spurts and sprays | Clumps and channeling | Stir longer before tamping |
| First shot weaker | Cold portafilter | Run a blank shot first |
| Different every day | Timed preset with aging beans | Stop by weight in manual mode |
Dialing in light, medium and dark roasts
The ThermoJet lets you change brew temperature, and roast level decides where it should be.
Dark roast
Dark roasts are more porous and less dense.
To avoid harsh, bitter flavors, I brewed them at 198 to 200°F with a slightly coarser grind.
Medium roast
Medium roasts balance caramelized sugars and acidity.
At the default 200 to 202°F and my 17.5-gram recipe, they tasted of chocolate and nuts.
Light roast
Light roasts are dense and acidic.
They needed 204 to 206°F and a finer grind, and I stretched the ratio to about 1 to 2.5, around 44 grams out.
That brought out floral and fruit notes without astringency.
| Roast | Temperature | Grind | Yield from 17.5 g |
|---|---|---|---|
| Dark | 198 to 200°F | Slightly coarser | About 35 to 38 g |
| Medium | 200 to 202°F | Middle | About 40 g |
| Light | 204 to 206°F | Finer | About 44 g |
My taste scores out of 10.
Our tip: Change the temperature first when a roast tastes wrong, then fine-tune the grind.
Automatic milk texturing
The automatic milk is the Barista Touch's best feature.
A temperature probe in the drip tray touches the base of the jug and reads the milk temperature constantly.
When it hits your target, the steam stops.
Temperature
The default milk temperature is 150°F.
I lowered it to 140°F for most drinks.
Milk tastes sweeter at that temperature, because its natural sugars start to break down above about 145°F.
Coffee also tastes more complex as it cools, which is why professional tasters sample coffee at several temperatures.
Texture
The foam scale has eight levels.
Level 1 is hot milk with almost no air.
Level 3 made smooth microfoam✕MicrofoamMilk foam with bubbles too small to see. It's glossy, silky and blends into the coffee. that was ideal for flat whites and simple latte art.
Level 8 made dry, dense foam for a classic cappuccino.
How much milk
About 5 ounces of cold milk gave the best results in the included jug, with enough depth for the steam to spin it.
Higher levels add more air.
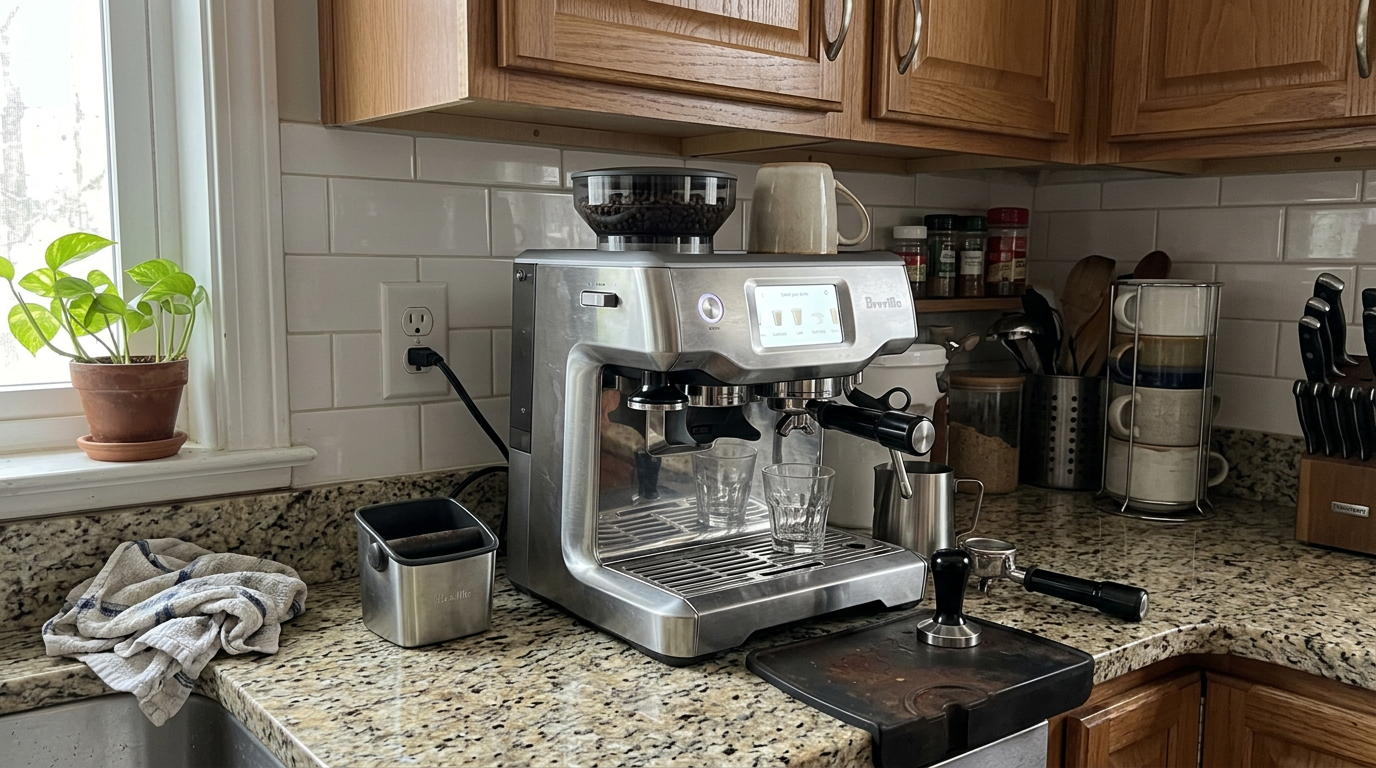
The milk jug sits on a sensor plate under the steam wand.
Latte art with automatic milk
I expected automatic milk to be too foamy for latte art, but at the right setting it worked well.
Texture level 3 at 140°F produced a fine, liquid microfoam that poured cleanly.
After a swirl and a tap, I could pour hearts and simple tulips.
My pouring routine
I pulled the shot into a wide cup so the crema had room to spread.
I started pouring high and thin to sink the milk under the crema, until the cup was half full.
Then I brought the jug close to the surface and poured faster, so the white foam floated up and formed the design.
When it didn't work
At level 5 and above, the foam was too thick for detailed shapes.
And if I waited too long before pouring, the foam separated and the design came out patchy.
| Texture level | Latte art result |
|---|---|
| 1 to 2 | Too thin, little contrast |
| 3 | Best for hearts and tulips |
| 4 | Good for simple shapes |
| 5 and above | Too thick for detailed art |
Plant milks
Non-dairy milks have less protein than dairy, so they don't hold foam as easily.
The fix is simple: set the texture two levels higher than you would for dairy.
For an oat flat white, I used level 5 instead of 3.
| Milk | Texture setting | Result |
|---|---|---|
| Whole dairy | Level 3 for flat whites | Glossy and stable |
| Oat | Level 5 | Good, slightly looser |
| Almond | Level 5 | Light, fades faster |
| Soy | Level 5 | Stable, keep it cooler |
Our tip: Use barista versions of plant milks, because the regular cartons often won't foam at all.
The steam wand and auto purge
The steam wand has a plastic sleeve inside its stainless shaft.
That keeps the outside cooler, so milk doesn't bake onto the metal as quickly.
Cleaning after each use
After steaming, I lifted the wand, wiped it with one stroke of a damp cloth and lowered it back down.
Lowering it triggers an automatic purge, a short burst of steam and water through the tip into the drip tray.
That clears milk from the inside of the nozzle.
The baffled drip tray catches the purge without spraying mist onto the counter.
Hot water and americanos
The Americano preset brews a standard espresso and then adds hot water automatically.
There's also a dedicated hot water option for tea or for warming cups.
For a long black with more crema, I added hot water to the cup first and then pulled the espresso on top.
| Drink | How I made it |
|---|---|
| Americano preset | Espresso, then automatic hot water |
| Long black | Hot water first, espresso on top |
| Tea | Hot water option |
| Cup warming | Hot water, then discard |
My four-week shot log
I logged every espresso with dose, yield, time and a taste note.
Week one
In the first days, I relied on the timed presets, and shot times wandered by several seconds.
Switching to manual mode and stopping by weight fixed that almost immediately.
Week two
Adding the stirring step cut down on spurts and sour shots.
Most shots landed between 28 and 32 seconds.
Weeks three and four
By week three, my shots were consistent, and I only touched the grind when a bag aged or changed.
Share of shots inside my 28 to 32 second window, by week.
The lesson: the Barista Touch can be very consistent, but only once you weigh, stir and stop by weight.
Setting up your coffee corner
A tidy setup made my routine much faster.
Work left to right
I arranged everything in the order I used it.
Beans and hopper on the far left, then the grinder cradle, then a stirring and tamping station, then the group head, then the milk station, and finally a knock box on the far right.
Keep the knock box close
A knock box next to the group head meant I could empty the basket immediately and re-dose without walking anywhere.
Two towels
I kept two microfiber towels: a damp one only for the steam wand, and a dry one only for drying the basket.
Mixing them up leaves milk on your basket or water in your coffee.
| Position | What goes there | Why |
|---|---|---|
| Far left | Beans and hopper | Start of the routine |
| Left | Grinder cradle and scale | Weigh as you grind |
| Center left | Stirring tool and tamper | Puck prep in one spot |
| Center | Group head and cup | Brewing |
| Right | Milk jug and damp towel | Steaming and wiping |
| Far right | Knock box and dry towel | Cleanup |
Our tip: Use different colored towels for the wand and the basket, so you never mix them up.
How long each drink really takes
Speed is one of the Barista Touch's biggest strengths, so I timed my everyday drinks from power on to first sip.
The three-second heat-up means the only waiting happens while you prepare the coffee.
My timings
An espresso took about two minutes with weighing and stirring.
A flat white took about three and a half minutes, because the milk steamed while I cleaned the portafilter.
Two cappuccinos took about six minutes, as I had to steam two jugs one after the other.
My timings, from power on to first sip.
Where to save time
Run the blank shot while you weigh the beans.
Start the automatic milk as soon as the shot begins, and wipe the portafilter while both finish.
Save your favorite drinks, so you never have to adjust the milk on a busy morning.
Our tip: Start the milk right after you press brew, because the machine can heat for both almost back to back.
Cleaning and maintaining the Breville Barista Touch
Daily cleaning is quick, and the touchscreen guides the bigger jobs.
Daily
Empty and rinse the drip tray basin.
Flush the group head after each session.
Wipe the outside with a microfiber cloth.
Weekly
Remove the steam tip with the included tool and clean the holes.
Wash the baskets and portafilter spouts in warm water with a little espresso machine cleaner.
Monthly
Put the rubber disc and a cleaning tablet in the single basket and run the backflush✕BackflushCleaning the group head by blocking the basket so water and cleaner are forced back through the valve. cycle from the maintenance menu.
Descaling
Every three to six months, depending on your water, run the guided descale✕DescalingRunning a mild acid solution through the machine to dissolve mineral scale from hard water. cycle.
You'll need a container that holds at least 30 ounces under the group head and steam wand.
The machine alternates the solution through the heater, group head, hot water outlet and wand, then you rinse the tank and run a fresh-water cycle.
| When | Task | Why it matters |
|---|---|---|
| After each milk drink | Wipe the wand, let it purge | Keeps the tip clear |
| Daily | Empty the drip tray, flush the group | Small tray fills fast |
| Weekly | Clean the steam tip and baskets | Prevents weak steam |
| Monthly | Backflush with a tablet | Clears oil from the valve |
| Every 2 to 3 months | Replace the filter | Slows down scale |
| Every 3 to 6 months | Guided descale | Keeps flow and heating efficient |
My estimate of hands-on cleaning time per day.
Breville covers the Barista Touch with a two-year limited warranty.
Water quality and scale
Water is over 98 percent of an espresso, so it matters more than most people expect.
A good target is around 120 to 150 ppm of total dissolved solids, with calcium hardness around 50 to 80 ppm.
Why filter
Unfiltered hard water leaves scale in the narrow channels of the ThermoJet.
Scale slows heating, reduces flow and eventually affects temperature.
The charcoal filter in the tank helps, and so does filling with filtered water.
Why not distilled
Pure distilled or reverse-osmosis water lacks minerals.
It makes flat, under-extracted espresso, and very low-mineral water can slowly corrode metal parts.
| Water | Effect on espresso | Effect on the machine |
|---|---|---|
| Filtered tap, moderate hardness | Full, balanced flavor | Slow scale buildup |
| Very hard tap | Chalky, muted flavor | Fast scale buildup |
| Pure distilled | Flat, thin flavor | Can corrode parts |
| Soft filtered water | Bright, clean flavor | Ideal |
Our tip: Test your tap water hardness once, then decide whether the filter alone is enough or you need filtered water too.
What daily use is really like
My flat white routine took about three to four minutes.
Switch on, blank shot, dry the basket, grind and weigh, stir, tamp, brew by weight, steam, wipe.
Because heat-up is so fast, I switched the machine off between drinks.
Water and drip tray
The 67-ounce tank lasted two people about two days.
The drip tray was the limiting factor; I emptied it every day, sometimes twice when friends visited.
Rough maths from a 67 oz tank, allowing for blank shots and purging.
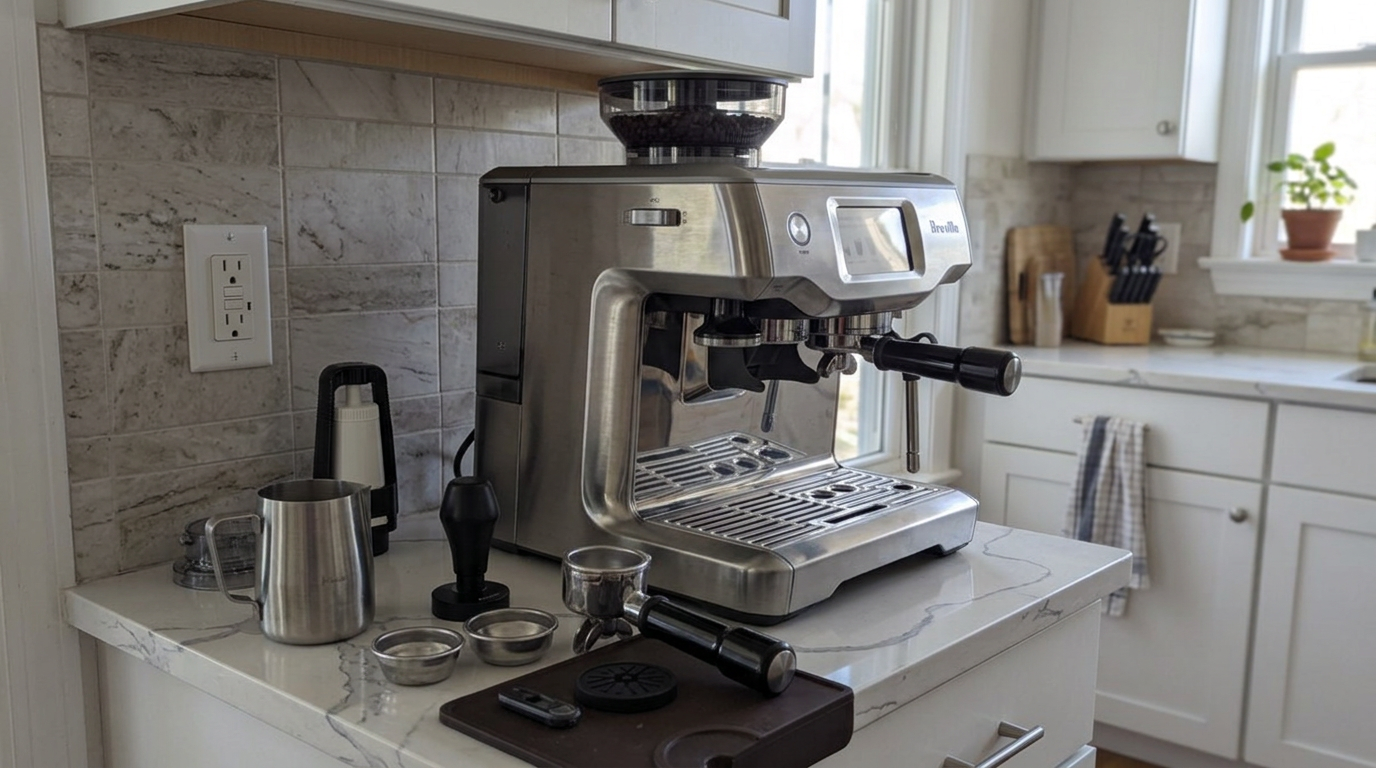
The clean, knob-free front panel suits a bright, modern kitchen.
Our tip: Empty the drip tray at the end of every day, because the compact tray fills quickly with purge water.
Living with it as a household
Everyone in my house could use the Barista Touch, but not everyone could make great espresso on it straight away.
The touchscreen and the automatic milk were instantly easy for everyone.
The puck prep needed a short lesson.
I showed my partner how to weigh, stir and tamp once, and after a few days the shots were consistent.
Saved drinks helped most
Each of us saved a drink under our own name, with our own milk temperature and foam.
That meant nobody accidentally changed anyone else's settings.
Where it got busy
When friends visited, the compact drip tray and the one-jug-at-a-time milk slowed things down.
For two people, it was perfect; for six, it was a bit of a queue.
Common mistakes to avoid
The Barista Touch is simple to use, but these habits make a big difference to the espresso.
| Mistake | What happens | Better habit |
|---|---|---|
| Skipping the blank shot | First shot sour and thin | Warm the portafilter first |
| Grinding into a wet basket | Clumps and channeling | Dry the basket |
| Not stirring the grounds | Spurts and sour shots | Stir with needles |
| Relying on timed presets | Shots vary day to day | Stop by weight in manual mode |
| Plant milk on dairy settings | Thin, flat foam | Two texture levels higher |
| Forgetting the drip tray | Overflow | Empty it daily |
Change one setting at a time and taste after each change.
What I would change
A bigger drip tray would cut down on daily emptying.
Truly different shot defaults for each preset would make the menu more meaningful.
And assisted tamping, as on Breville's Impress models, would make it easier for beginners.
Is the Breville Barista Touch worth the money?
The Barista Touch makes the most sense if you drink milk drinks and want them easy.
You get fast heat-up, a clean touchscreen, saved drinks and hands-free milk in a compact body.
The espresso can be excellent, but it depends on your puck prep.
Ask yourself three questions.
Do you make lattes or flat whites most days? Do you want hands-free milk? And are you happy to dose and tamp by hand?
If yes, it's a great fit.
If you mostly drink espresso and americanos and don't need automatic milk, a machine with simple buttons and a manual wand gives the same espresso for less complexity.
And if tamping worries you, the Impress version adds assisted tamping.
In Europe, the same machine is sold as the Sage Barista Touch.
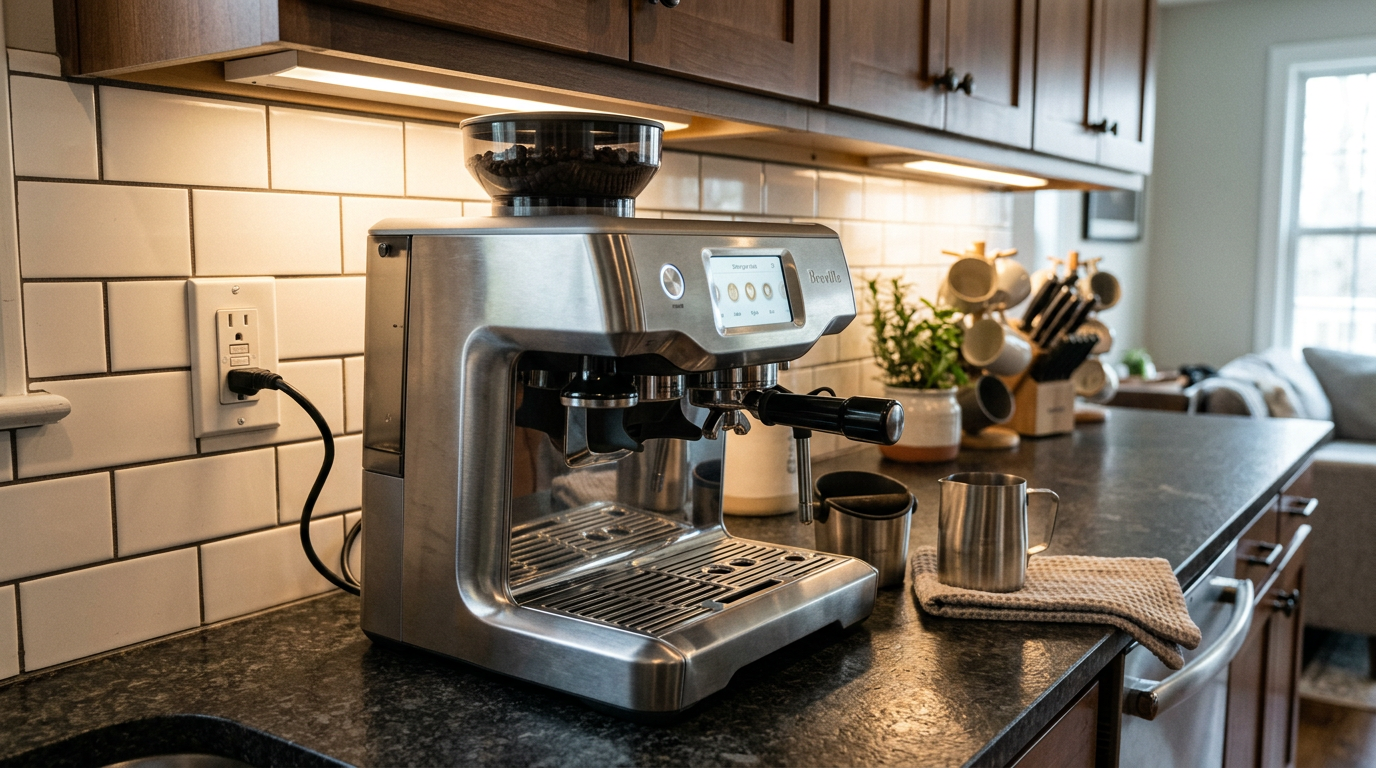
Brushed steel and straight edges give the Barista Touch a modern look.
How it compares with other espresso setups
The most useful comparison is with the setups you're likely to consider.
The Breville Barista Touch stands out for its simple screen and automatic milk.
| Feature | Barista Touch | Buttons and manual wand | Fully automatic machine |
|---|---|---|---|
| Heat-up | About 3 seconds | About 3 seconds to 1 minute | 1 to 2 minutes |
| Controls | Touchscreen | Buttons and dials | Screen |
| Tamping | By hand | By hand | Automatic, hidden |
| Milk | Automatic with sensor | Manual | Automatic frother |
| Saved drinks | 8 | None | Often several |
| Espresso quality | Very good with good prep | Very good with good prep | Good |
A button machine with a manual wand gives the same espresso but asks you to steam by hand.
A fully automatic machine is easier, but its espresso and foam can't match a real portafilter and steam wand.
| You mostly drink | Is it a fit? | Why |
|---|---|---|
| Lattes and flat whites | Excellent | Hands-free milk at your chosen temperature |
| Espresso | Very good | With weighing and stirring |
| Plant-milk drinks | Good | Raise the texture two levels |
| Black coffee only | Fair | You pay for milk features you won't use |
| One-touch everything | Fair | Tamping is still manual |
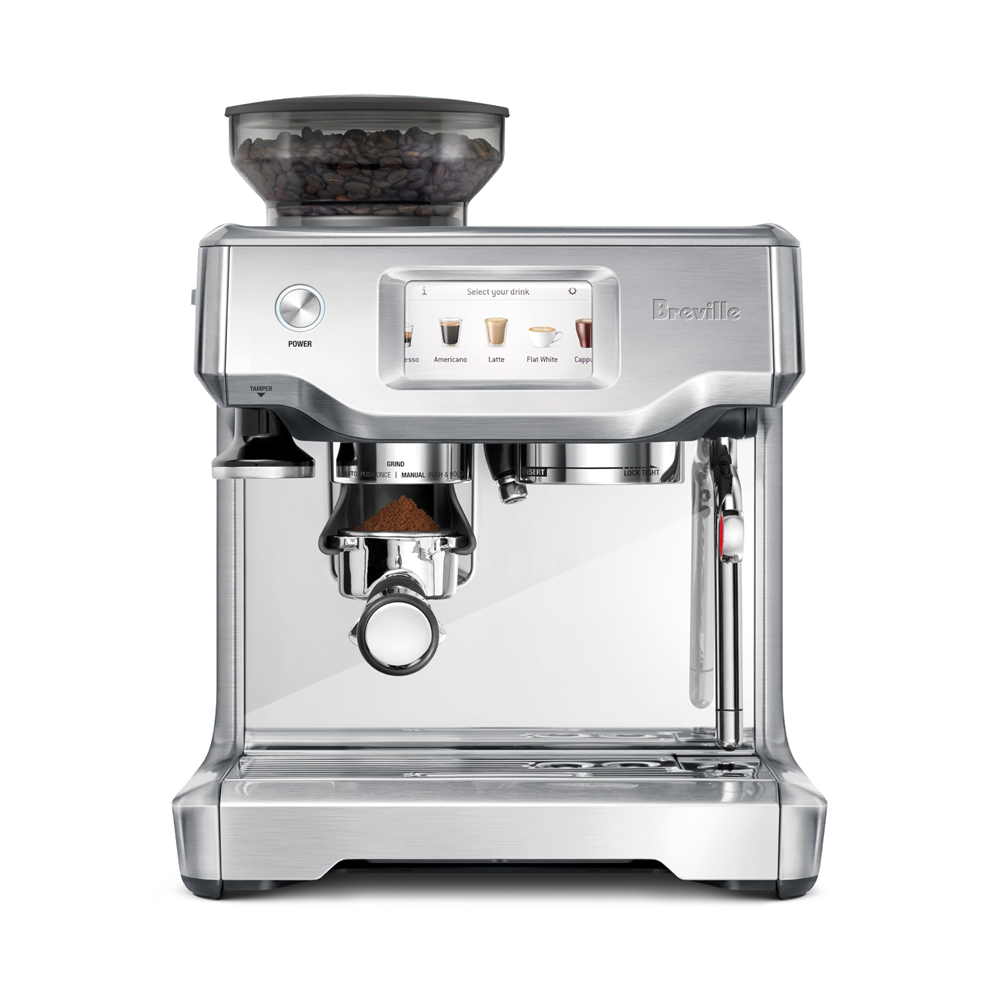
The full package: touchscreen, hopper, 54 mm portafilter and automatic steam wand.
Other Breville machines I tested
For the same touchscreen with assisted tamping, see my Barista Touch Impress review.
For buttons, an LCD and strong manual steam, read my Breville Barista Pro review.
For automatic grinding and tamping, see the Oracle Jet review.
Which one is right for you: is the Breville Barista Touch your match?
4 quick questionsBreville Barista Touch specifications
From manufacturer data and my own testing.
How I tested and scored the Breville Barista Touch
For four weeks, I used the Breville Barista Touch as my everyday espresso machine for espresso, americanos, long blacks, flat whites, lattes and cappuccinos.
I compared the timed presets with manual shots stopped by weight, tested a stirring tool and a self-leveling tamper, and dialed in light, medium and dark roasts at different temperatures.
I steamed whole, oat, almond and soy milk on every texture level, and followed the daily, weekly, monthly and descaling routines.
I then checked my notes against Breville's specifications and owner documentation.
- Espresso (8.5): body, crema, flavor and consistency with good puck prep.
- Milk drinks (8.6): automatic texture, temperature accuracy and plant milk.
- Ease of use (8.6): touchscreen, heat-up, presets and saved drinks.
- Cleaning (8.1): drip tray size, wand care, backflushing and descaling.
The overall score of 8.4 is an editorial rating that reflects those four areas.
Breville Barista Touch FAQ
Is the Breville Barista Touch worth it?
Yes, if you mostly drink milk drinks and want hands-free milk with simple touchscreen controls. You still dose and tamp by hand.
How fast does the Barista Touch heat up?
In under three seconds. Run a blank shot first to warm the portafilter and group head.
Does the Barista Touch tamp automatically?
No. You tamp by hand. A stirring tool and a self-leveling tamper make shots more consistent.
How does the automatic milk work?
A sensor in the drip tray reads the jug temperature and stops the steam at your target. You choose the temperature and one of eight texture levels.
What milk temperature should I use?
The default is 150°F. I preferred 140°F, which tastes sweeter.
Can I use oat milk?
Yes. Use a barista oat milk and set the texture two levels higher than you would for dairy.
How many drinks can I save?
Up to eight custom drinks with your own names and settings.
Is the portafilter 54 mm or 58 mm?
54 mm.
What dose and yield should I use?
I used 17.5 grams in and about 40 grams out for medium roasts, stopping the shot by weight in manual mode.
How often should I descale?
Every three to six months, depending on your water. The touchscreen guides you through it.
Is the Sage Barista Touch the same machine?
Yes. The Sage Barista Touch sold in Europe is the same machine.
Kitchen & coffee tester
Michael spent six years as a line cook in restaurants in Chicago and New York, and he has tested kitchen appliances for HouseholdMe since 2018, from air fryers to coffee makers. He holds an SCA certificate in barista skills and used the Breville Barista Touch as his everyday coffee machine for four weeks for this review, working from testing notes he compiled together with the HouseholdMe team.
- Four weeks of hands-on testing of the Breville BES880BSS Barista Touch
- Breville product specifications and owner documentation
- General espresso brewing, water quality, milk texturing and maintenance guidance