Philips 1200 Series review: a touch-panel bean-to-cup machine with a sealed hopper, tall cup clearance and a beginner-friendly frother
The Philips 1200 Series Fully Automatic Espresso Machine grinds fresh beans and brews espresso or a long coffee from a simple touch panel. It adds a sealed, tinted bean hopper, three brewing temperatures and a forgiving milk frother. Its coffee is smooth and easy to like, but the foam is airy, the drink menu is short and the water filter isn't in the box.

Michael Reynolds
Hands-on review
Hands-on testing, research, specs
4 weeks
24 minutes
Jargon helpNew to espresso? Tap any dotted term to see what it means.
In this review
Yes, if you want fresh-bean coffee with almost no learning curve. The Philips 1200 Series makes smooth espresso and coffee from a clear touch panel, remembers your strength and cup size, and fits tall mugs under its spout. The Panarello-style frother makes big, fluffy cappuccino foam rather than silky latte milk, and you only get two coffee drinks. Budget for an AquaClean filter, because it isn't included.
Philips 1200 Series at a glance
Philips 1200 Series pros and cons
- Touch panel is clear and remembers your settings
- Sealed, tinted bean hopper keeps beans fresher
- Tall cup clearance fits big mugs
- Only two coffee drinks on the menu
- Frother makes airy foam, not microfoam
- AquaClean filter is sold separately
Who should buy the Philips 1200 Series?
- First-time bean-to-cup buyers
- Couples where one drinks espresso and one drinks mugs of coffee
- Fans of classic, foamy cappuccinos
- Households that want lattes at one touch
- Latte art hobbyists
- Espresso enthusiasts who want full control
First impressions of the Philips 1200 Series
I came to the Philips 1200 Series with one question.
Can a machine with only two coffee buttons still feel like a real upgrade from a pod machine or a drip maker?
After four weeks, my answer is yes, as long as you know what you're buying.
The 1200 is one of Philips' entry-level fully automatic machines.
It grinds whole beans, brews under pressure and gives you a classic frother for milk, all from a touch panel on the front.
There's no screen with menus and no app.
Out of the box, it looked a little more polished than I expected.
The front panel is a flat, glossy black touch surface with white icons.
The rest of the body is matte black plastic, with a chrome-look strip around the spout.
It's light enough to move with one hand, at about 7.5 kilograms, or 16.5 pounds.
Alex set it up while I unpacked the beans, and we were drinking espresso about fifteen minutes later.
The first cup was smooth and mild, with a soft crema and a little sweetness.
By the end of the first week, after a few grinder tweaks, it was a coffee I looked forward to every morning.
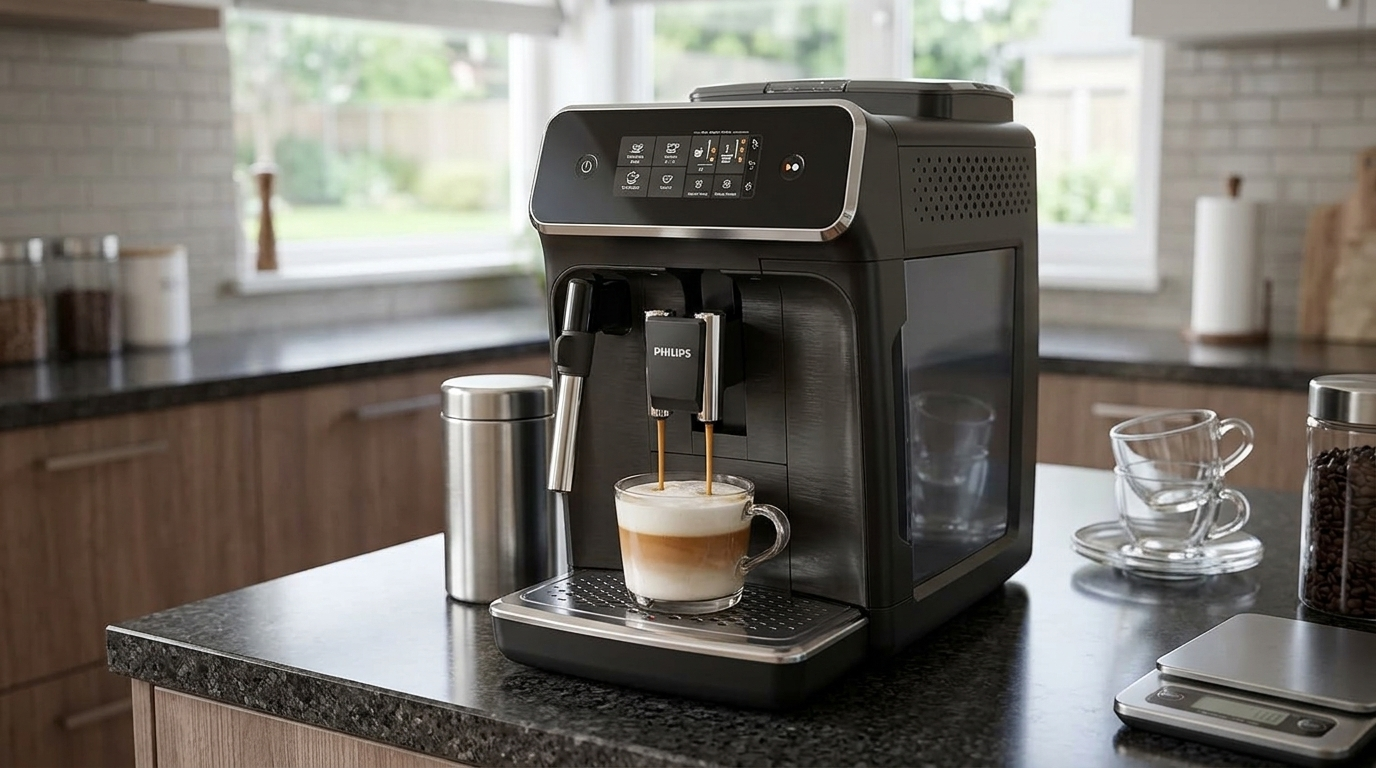
The 1200 Series makes a classic, foamy cappuccino with very little practice.
What the Philips 1200 Series actually is
The 1200 is a fully automatic, bean-to-cup✕Bean-to-cupA machine that grinds whole coffee beans and brews them in one go, so every cup starts from freshly ground coffee. espresso machine with a manual milk frother.
It handles grinding, dosing, pressing, brewing and dumping the used grounds.
Milk is the only part you do yourself.
Inside is a 15-bar pump and a fast-heating system that warms water on demand.
The brew group✕Brew groupThe part inside an automatic machine that receives the ground coffee, presses it into a puck, pushes hot water through it and then ejects the used grounds. comes out completely for rinsing, which is one of the best things about Philips' entry machines.
The drink list is short on purpose.
You get espresso, coffee and hot water, plus steam for milk.
Espresso and coffee each have a double option, marked x2.
What makes it different from the cheapest Philips
Compared with the most basic machine in the range, the 1200 adds a touch panel instead of push buttons.
It also gives you three brewing temperature levels, set in the machine's settings.
The core coffee system, the grinder and the brew group are essentially the same family design.
Our tip: If you never steam milk, look at the cheapest Philips model too, because the grinder and brew group are the same family design.
Philips 1200 Series design and setup
The Philips 1200 Series is about 24.6 cm wide, 37.1 cm tall and 43.3 cm deep.
That's roughly 9.7 × 14.6 × 17 inches, which is narrow for a bean-to-cup machine.
It fit under my wall cabinets with enough room to open the bean lid without sliding the machine forward.
Cup clearance
The spout slides between roughly 8.5 and 14.5 cm, or 3.3 to 5.7 inches.
In practice, that meant my regular coffee mugs fit with room to spare.
That's not true of every automatic machine, some of which only take short cups.
A very tall latte glass still won't fit, but a standard 12-ounce mug will.
The sealed bean hopper
The hopper on top holds 275 grams, or just under 10 ounces.
Its lid has a rubber seal, and the cover is tinted to block some light.
Air and light are two of the things that make beans go stale fastest, so this is a genuinely useful detail.
After a week in the hopper, my beans still smelled noticeably fresh when I lifted the lid.
Our tip: Only fill the hopper with what you will use in about a week, even with the sealed lid, so the beans stay at their best.
What's in the box
The box contained the machine, a measuring scoop, a tube of brew group grease and a water hardness strip.
In the US version I tested, the AquaClean filter was not included, so I bought one separately.
Setup
You fill the tank, add beans, switch on, and let the machine rinse and prime itself.
Then you test your water hardness with the strip and set it in the machine.
If you use AquaClean, you activate it during setup so the machine tracks it.
| Setup step | Time it took me | Notes |
|---|---|---|
| Unbox and place | About 5 min | Leave room on the right for the tank |
| Rinse tank and fill beans | About 3 min | Use fresh, non-oily beans |
| First rinse and prime | About 2 min | Put a cup under the spout |
| Set water hardness | About 2 min | Factory setting is for hard water |
| First throwaway coffees | About 5 min | Three or four cups to settle the grinder |
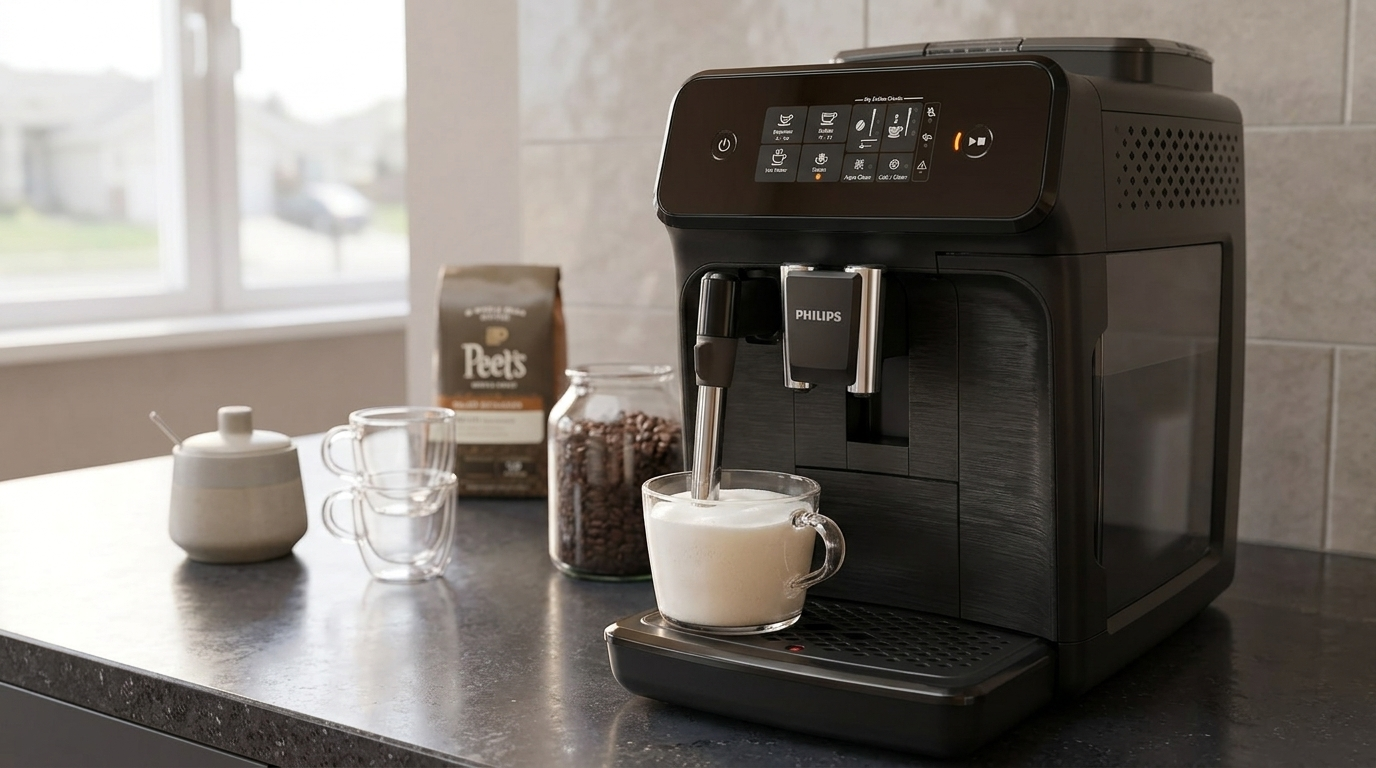
Fresh beans and a clean cup on day one: the first few coffees are worth pouring away.
The grinder and the sealed hopper
The 1200 grinds with flat ceramic burrs✕Ceramic burrsGrinding plates made of ceramic instead of steel. They wear slowly and stay cool, which helps keep the coffee's aroma intact during grinding., with 12 settings.
Philips rates them for around 20,000 cups.
The adjustment knob sits inside the hopper, under the beans.
You push it down and turn it one notch at a time.
Only adjust while grinding
This is the most important habit with any Philips grinder.
Turn the knob only while the grinder is running.
If you force it with the motor off and beans wedged between the burrs, you can damage the mechanism.
My routine was to start a coffee, turn the knob one click during the grind, and taste the result two cups later.
Reading the puck
The used coffee pucks tell you a lot about the grind.
A firm, mostly dry puck means the grind and dose are working well together.
A wet, crumbly puck usually means the grind is too coarse for your beans.
| Puck looks | What it suggests | What to try |
|---|---|---|
| Firm and fairly dry | Good grind for your beans | Leave it |
| Wet and sloppy | Grind too coarse | One step finer |
| Crumbles apart | Grind too coarse or very light dose | Finer grind, stronger setting |
| Very hard, coffee drips slowly | Grind too fine | One step coarser |
With a medium-dark blend, I settled one step finer than the factory setting.
With a light roast, I went two steps finer.
Lower numbers are finer. Longer bars mean a finer grind.
Philips 1200 Series espresso performance
I made more espresso than anything else on the Philips 1200 Series, straight and as a base for milk drinks.
Each brew starts with a short pre-infusion✕Pre-infusionA short, gentle soak of the coffee before full pressure. It lets the puck swell evenly so water doesn't rush through weak spots., which wets the coffee before full pressure.
Then the pump runs the shot through and the machine drops the puck into the drawer.
How it tasted
With a fresh medium-dark blend, the espresso had a light-brown crema✕CremaThe golden-brown foam on top of an espresso. It forms when pressure pushes gases and oils out of freshly ground coffee. and a smooth, medium body.
I tasted milk chocolate, a little caramel and a gentle roasted finish.
It was never harsh, and it was never sour once the grind was set.
What it lacked was the dense, syrupy weight of a café espresso.
Why it tastes lighter than café espresso
Philips' entry machines use a relatively small dose of ground coffee per brew.
That keeps the brew group compact, but it means each shot is closer to a long, gentle espresso.
In café terms, the brew ratio✕Brew ratioThe weight of ground coffee compared with the weight of the drink. A café espresso is often about 1:2. A higher ratio, such as 1:5, gives a longer, lighter drink. is longer than a classic 1:2 shot.
Brew ratio is coffee to drink. Longer bars mean more water per gram of coffee.
Getting the most from it
Use the strongest aroma setting and the smallest cup size.
Grind one or two steps finer than you think.
And for milk drinks, use the x2 espresso, which brews twice for a fuller coffee flavor.
| What you taste or see | Likely cause | First change |
|---|---|---|
| Sour, thin | Grind too coarse | One step finer while grinding |
| Bitter, dry finish | Cup size too large | Smaller cup size |
| Weak in milk drinks | Single shot under lots of foam | Use x2 espresso |
| Pale crema | Stale beans | Fresher beans, check the roast date |
| Not hot enough | Low temperature or cold cup | Set temperature to high, warm the cup |
Our tip: Set the brewing temperature to its highest level for espresso and dark roasts, and drop it one level only if the coffee tastes harsh.
Three brewing temperatures
The 1200 Series lets you choose between three brewing temperatures.
You change it in the machine's settings, rather than per drink.
This is a small feature, but it makes a real difference to the taste.
Higher temperature extracts more from the coffee, which suits darker roasts and makes espresso taste hotter and fuller.
Lower temperature can soften a very dark or slightly bitter blend.
Relative extraction and heat by setting, from my testing with a medium-dark blend.
I left it on high for nearly the whole test.
The espresso came out hot enough to drink straight away and stayed warm in a pre-heated cup.
Long coffee and the x2 button
The coffee button gives you a longer drink brewed under pressure.
It's richer than filter coffee, with a thin layer of crema, and it suits a big breakfast mug.
On the medium cup size and strongest aroma, it tasted round and mellow.
On the largest size, the finish got thinner and a bit woody.
How x2 works
The x2 option doesn't push twice the water through one dose.
It grinds and brews twice, so each cycle gets its own fresh dose of coffee.
That's why x2 drinks taste fuller rather than just bigger.
| Drink | How it is made | Best use |
|---|---|---|
| Espresso | One short pressurized brew | Straight or under a little milk |
| Espresso x2 | Two full brew cycles | Cappuccinos and lattes |
| Coffee | One long pressurized brew | Everyday mug |
| Coffee x2 | Two full long cycles | Big mug or two cups |
| Hot water | Through the steam wand | Tea and Americanos |
| Steam | Through the frother | Milk for cappuccinos and lattes |
Our tip: For a big mug, try espresso x2 topped up with hot water: it tastes cleaner than the largest coffee setting.
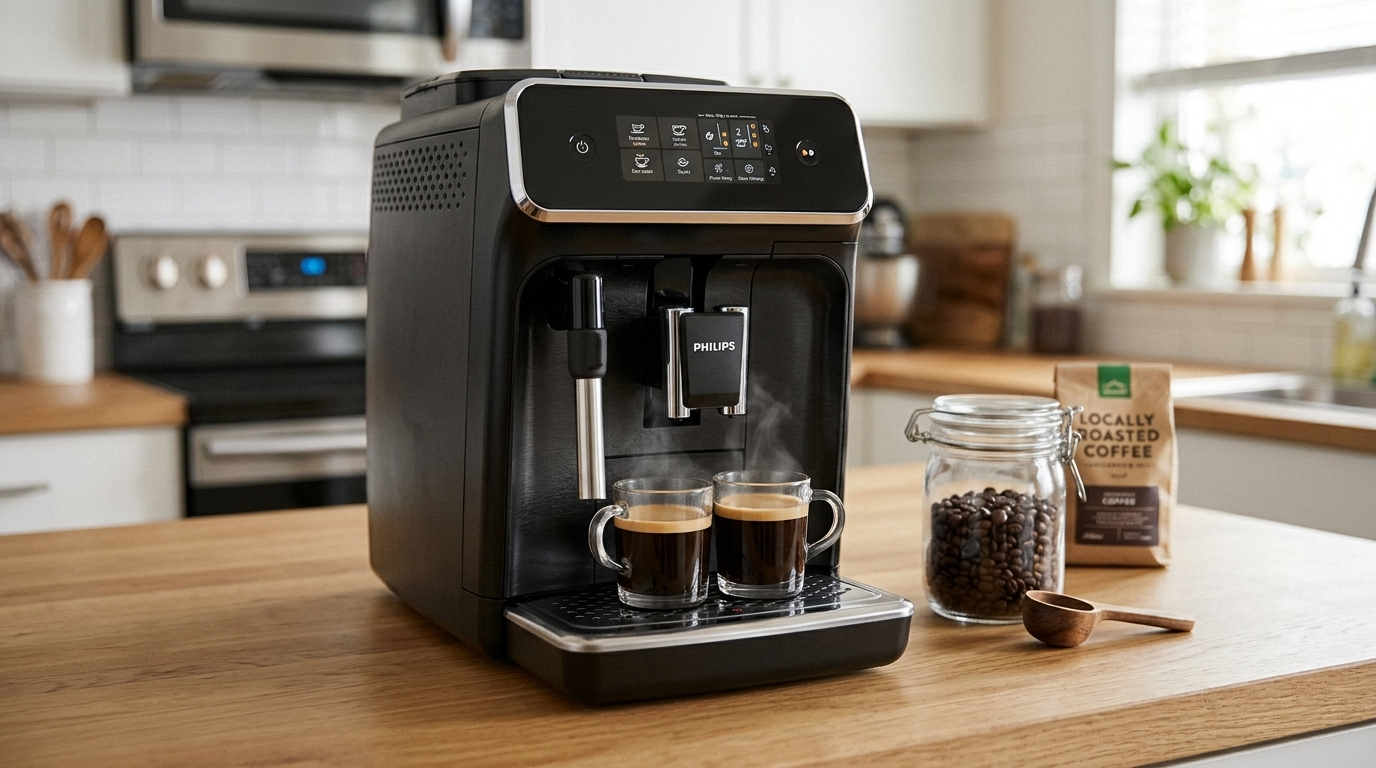
The x2 button brews two full cycles, one after the other.
Strength, cup size and remembered settings
Philips calls its strength and volume controls My Coffee Choice.
You tap the aroma icon to choose one of three strength levels, and the cup icon to choose one of three sizes.
Strength changes how much coffee is ground.
Cup size changes how much water runs through it.
It remembers your last choice
The 1200 remembers the last strength and size you used for each drink.
If you always make a small, strong espresso, you set it once and just press start every morning.
That turned out to be the feature I appreciated most in daily use.
Alex used the coffee button with a medium strength and a large cup, and I used espresso on the strongest and smallest.
We never had to change each other's settings, because they were stored on different drinks.
What you can't change
There are no user profiles and no way to name or save extra drinks.
You can't set an exact volume in milliliters from the panel.
And you can't change pre-infusion or pressure.
Milk foam from the classic frother
The Philips 1200 Series has no automatic milk system.
Instead, it has a classic milk frother, a steam wand with a Panarello✕PanarelloA sleeve that fits over a steam wand and pulls air into the milk automatically. It makes foaming easy for beginners, but the foam is coarser than what a skilled barista makes with a plain wand.-style sleeve.
The sleeve pulls air into the milk as the steam passes through, so foaming takes almost no skill.
How I made a cappuccino
I brewed an espresso x2 first.
Then I tapped steam, waited for the machine to heat up, and dipped the frother into cold milk in a stainless pitcher.
After about 30 to 40 seconds, the milk was hot, and the foam had doubled the volume.
How the foam turned out
The foam was soft, light and plentiful.
It sat on top of the cappuccino like a cloud and held its shape for several minutes.
That's exactly what you want in a traditional, foamy cappuccino.
It's not what you want for a flat white or latte art.
The bubbles are larger than café microfoam✕MicrofoamMilk foam with bubbles so small you can't see them. It feels silky and blends into the coffee instead of sitting on top like froth., and the milk underneath separates from the foam quickly.
My ratings for the classic frother, on a relative scale.
Plant milks and extra-hot milk
Because you steam in your own pitcher, you can use any milk you like.
Barista-style oat milk foamed well and held up nicely.
Almond milk made thinner foam that faded fast.
And if you like your milk drinks extra hot, you can just keep steaming a little longer.
| Milk | Foam result | Notes |
|---|---|---|
| Whole dairy | Rich, stable foam | Best overall |
| Semi-skimmed | More foam, drains faster | Good for big cappuccinos |
| Barista oat | Smooth and fairly stable | Best plant option |
| Almond | Thin, fades quickly | Use a barista version |
The steam wait
The machine heats steam on demand.
After brewing, there's a short wait before steam is ready, usually under half a minute in my tests.
For one or two drinks, it hardly matters.
For four cappuccinos for guests, those waits stack up.
Our tip: Purge the frother for two seconds into the drip tray after steaming, then wipe it, because milk dries hard inside the tip within minutes.
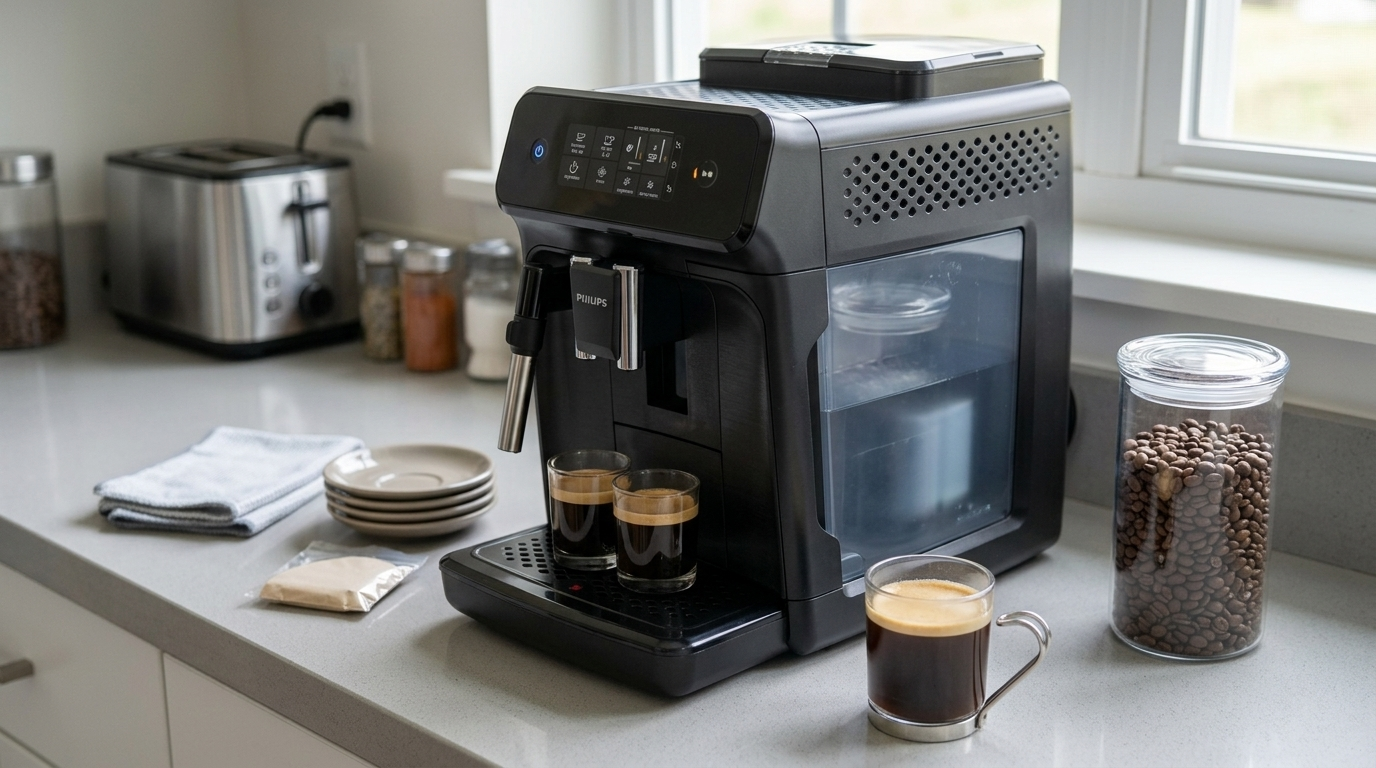
Hot water and steam share the frother on the left side of the machine.
My favorite drinks and how I made them
With only two coffee buttons, the Philips 1200 Series relies on you to build the rest of the menu.
Here's what I made most often, and the exact settings that worked for me.
| Drink | Coffee setting | Milk or water | Steps |
|---|---|---|---|
| Classic cappuccino | Espresso x2, strongest | About 120 ml cold whole milk | Steam until the pitcher is too hot to hold for long, swirl, pour |
| Latte | Espresso x2, strongest | About 200 ml milk | Steam with the tip deeper for less foam |
| Americano | Espresso x2, strongest, smallest | Hot water, medium | Water after the coffee keeps some crema |
| Long black | Espresso x2 | Hot water first | Pour espresso over the water for more crema |
| Café au lait style | Coffee, medium strength, large | Steamed milk to taste | Mild, comforting afternoon drink |
| Affogato | Espresso, strongest, smallest | None | Pour straight over a scoop of vanilla ice cream |
Making a latte with less foam
The frother wants to make foam, so a latte takes a little technique.
Keep the tip near the surface for only two or three seconds, then push it deeper into the milk.
That limits how much air gets in and gives you more hot milk and less froth.
Milk temperature
I aimed for milk that felt hot but not scalding on the side of the pitcher, around 60 to 65°C, or 140 to 150°F.
Hotter than that, the milk loses its sweetness and starts to taste cooked.
General milk steaming guidance, matching what I tasted in testing.
Our tip: Steam in a stainless pitcher filled only a third of the way, because the foam from this frother roughly doubles the volume.
Hot water and the pre-ground option
Hot water comes out of the frother, in small, medium or large amounts.
I used it for tea, Americanos and to warm espresso cups.
If you've just steamed milk, run a short purge first so your tea doesn't taste of milk.
Pre-ground coffee and decaf
There's a separate chute for pre-ground coffee✕Pre-ground bypassA separate chute that sends already-ground coffee straight to the brew unit, skipping the grinder. Handy for decaf without emptying the bean hopper..
It lets you brew a decaf without emptying the beans.
You select your drink, switch the aroma setting to the ground coffee option, add one level scoop and press start.
Only use one scoop at a time, and never add whole beans to this chute.
Our tip: Keep a small jar of pre-ground decaf next to the machine for evening coffee, and use the included scoop so you never overfill the chute.
The touch panel
The touch panel is clean and easy to read, with one icon per function.
There are icons for espresso, coffee, hot water and steam, plus aroma strength, cup size and start.
Warning icons light up when the tank is empty, the grounds drawer is full or maintenance is due.
The touch surface responded well, even with slightly wet fingers.
It occasionally registered a light brush when I wiped the panel, so switch it off before cleaning the front.
There's no screen with text, so you rely on icons and the manual for the less common functions.
Cleaning and maintaining the Philips 1200 Series
The 1200 Series rinses its coffee path on start-up and shutdown.
The rest of the care is quick, as long as you keep to a routine.
The brew group
The brew group sits behind a small door on the right, behind the water tank.
Switch the machine off, lift out the tank, open the door, squeeze the release and slide the group out.
I rinsed it under cold water once a week, a little more often than the manual asks.
Every couple of months it needs a thin layer of the included food-safe grease on its rails.
AquaClean and descaling
The machine works with the AquaClean filter, but it's not included with the US model.
With the filter fitted and replaced when prompted, Philips says you can go up to 5,000 cups without descaling.
Each filter lasts for roughly 600 cups, depending on your water.
Without it, the machine asks you to descale✕DescalingRunning a mild acid solution through the machine to dissolve mineral scale left by hard water. Scale slows heating and can block pipes. based on your water hardness setting.
Philips figures for the filter. Unfiltered intervals depend on your water hardness.
| When | Task | Why it matters |
|---|---|---|
| Every start-up | Let it rinse into a cup | Clears the coffee path |
| After steaming | Purge and wipe the frother | Stops dried milk |
| Daily | Empty drip tray and grounds drawer | Prevents odors |
| Weekly | Rinse the brew group | Removes coffee oils |
| Every 1 to 2 months | Grease the brew group | Keeps it moving smoothly |
| When prompted | Replace AquaClean or descale | Protects the heater |
Our tip: Empty the drip tray before it is full, because the rinse cycles add water even on days you only make one coffee.
Philips covers the 1200 Series with a two-year limited warranty.
What daily use is really like
A typical morning looked like this.
Switch on, let the machine rinse into a cup, then press espresso or coffee.
From a cold start, I had a drink in about a minute and a half.
A cappuccino took about three minutes, including steaming and a quick wipe of the frother.
The tank and the grounds drawer
The 1.8-liter tank lasted two of us about two days.
The grounds drawer filled after about a dozen coffees and the warning icon told us exactly when.
Rough maths from a 1.8 L tank, allowing for rinse water.
Noise
The grinder is the loudest part, with a sharp ten-second burst.
The pump hums steadily and the frother hisses loudly, which is normal for steam.
In an open-plan apartment, it's audible in the next room, but it never felt unusually loud for this type of machine.
Relative loudness from my notes in a quiet kitchen.
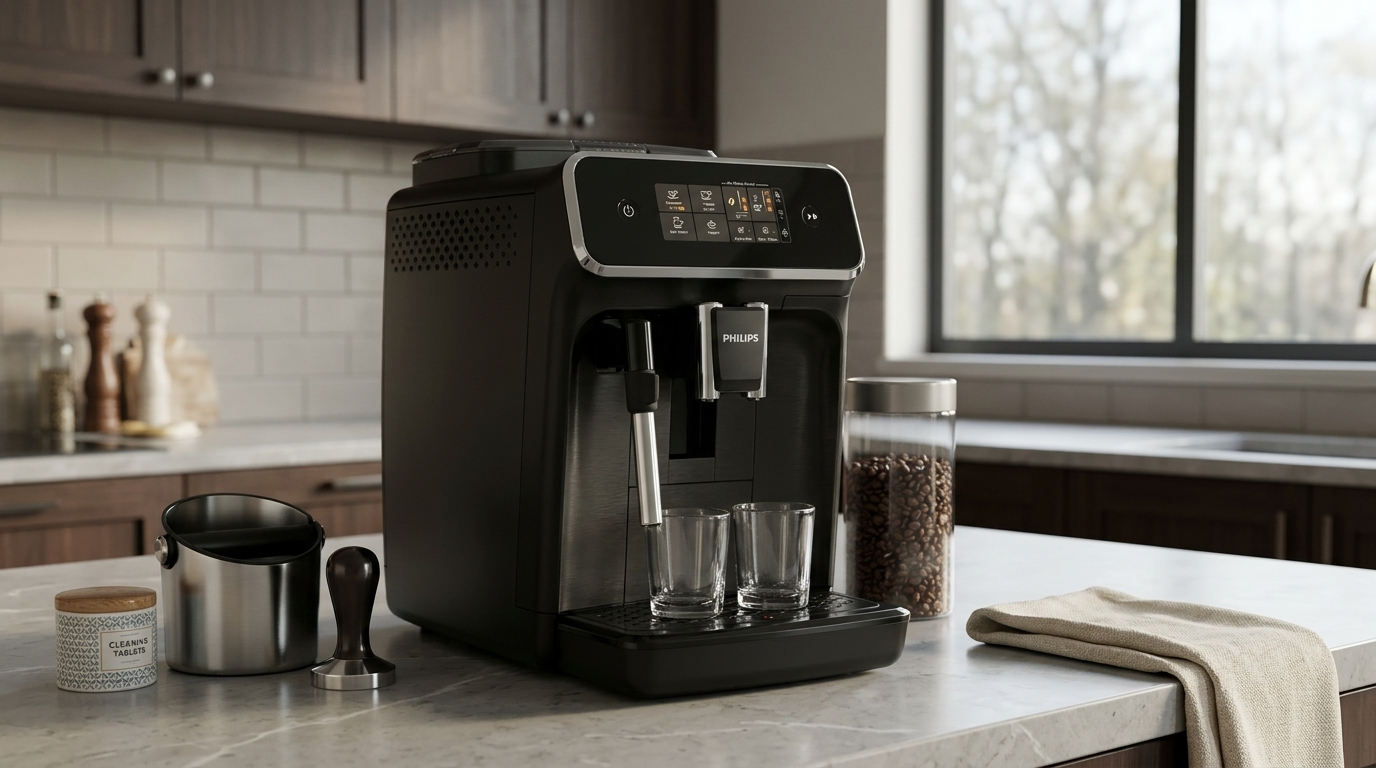
A towel and a pitcher next to the machine became part of my daily routine.
Beans, water and milk
The 1200 Series rewards good beans more than you might expect from an entry machine.
Because the dose is modest, beans with natural sweetness and body make the biggest difference.
Medium-dark espresso blends gave me the best espresso, with cocoa and caramel notes.
A blend with some Robusta made thicker crema and a stronger cup, which some people will love.
Avoid oily, dark-shiny beans and flavored beans, which can gum up the grinder.
| Bean type | Espresso | Coffee |
|---|---|---|
| Medium-dark blend | Best, sweet and smooth | Very good |
| Medium roast | Good, brighter | Best for a mild mug |
| Light roast | Grind finer, can be sour | Fair |
| Arabica and Robusta blend | More crema and body | Bolder |
| Oily or flavored | Avoid | Avoid |
Water
Use fresh, cold water and change it every day or two.
Set your water hardness with the included strip, and add AquaClean if your water is hard.
Don't use distilled water, because it makes coffee taste flat.
Common mistakes to avoid
A few habits make a big difference with the Philips 1200 Series.
| Mistake | What happens | Better habit |
|---|---|---|
| Forcing the grind knob with the motor off | Stiff knob, possible damage | Turn it only while grinding |
| Single espresso in a cappuccino | Weak, milky drink | Use espresso x2 |
| Not purging the frother | Milk residue in the tip and in tea | Purge and wipe every time |
| Adding beans to the pre-ground chute | Jams the brew group | Ground coffee only, one scoop |
| Skipping brew group rinses | Stale, bitter taste | Rinse it weekly |
| Ignoring water hardness | Wrong descale alerts | Test and set it on day one |
What I would change
I'd like one more drink, such as a one-touch Americano or a ristretto.
A plain steam tip option for finer milk would also help.
And including the AquaClean filter in the box would make the machine better value from day one.
Is the Philips 1200 Series worth the money?
The 1200 Series sits near the start of the fully automatic range, just above the most basic model.
You pay a little extra for the touch panel, the temperature settings and the sealed hopper.
In daily use, the remembered settings and the tall cup clearance were the things I valued most.
If you drink espresso, coffee and the occasional foamy cappuccino, it covers everything you need.
If you want lattes at one touch, you will be happier stepping up to a model with an automatic milk system.
Three questions to ask yourself:
Do you mostly drink espresso or black coffee?
Are you happy steaming milk by hand when you want a cappuccino?
And would you rather have simple buttons than lots of drink options?
If yes, it's a sensible, easy first bean-to-cup machine.
How it compares with other coffee setups
Here's how the Philips 1200 Series stacks up against the setups most people weigh it against.
| Feature | Philips 1200 Series | Automatic machine with milk carafe | Manual machine and grinder |
|---|---|---|---|
| Grinding and brewing | Automatic | Automatic | You do it |
| Espresso | Smooth, a little light | Similar to fuller | Best, skill-dependent |
| Milk | Manual frother, airy foam | One touch | Steam wand, skill-dependent |
| Drink menu | 2 coffees plus hot water | Often 5 or more | Unlimited, by hand |
| Learning curve | Very low | Low | High |
| Cleaning | Easy | More milk parts | More daily steps |
| Size | Compact | Usually larger | Two appliances |
An automatic milk carafe saves time if you drink lattes every day, but it adds parts to wash.
A manual setup makes the best espresso, but only after weeks of practice and a lot more morning effort.
The 1200 sits in the easy middle ground.
| You mostly drink | Is the 1200 a fit? | Why |
|---|---|---|
| Espresso | Good | Smooth and consistent, a little light |
| Mugs of black coffee | Excellent | Tall cup clearance, remembered settings |
| Foamy cappuccinos | Good | Frother makes lots of foam easily |
| Flat whites, latte art | Poor | Foam too airy |
| Decaf in the evening | Good | Pre-ground chute |
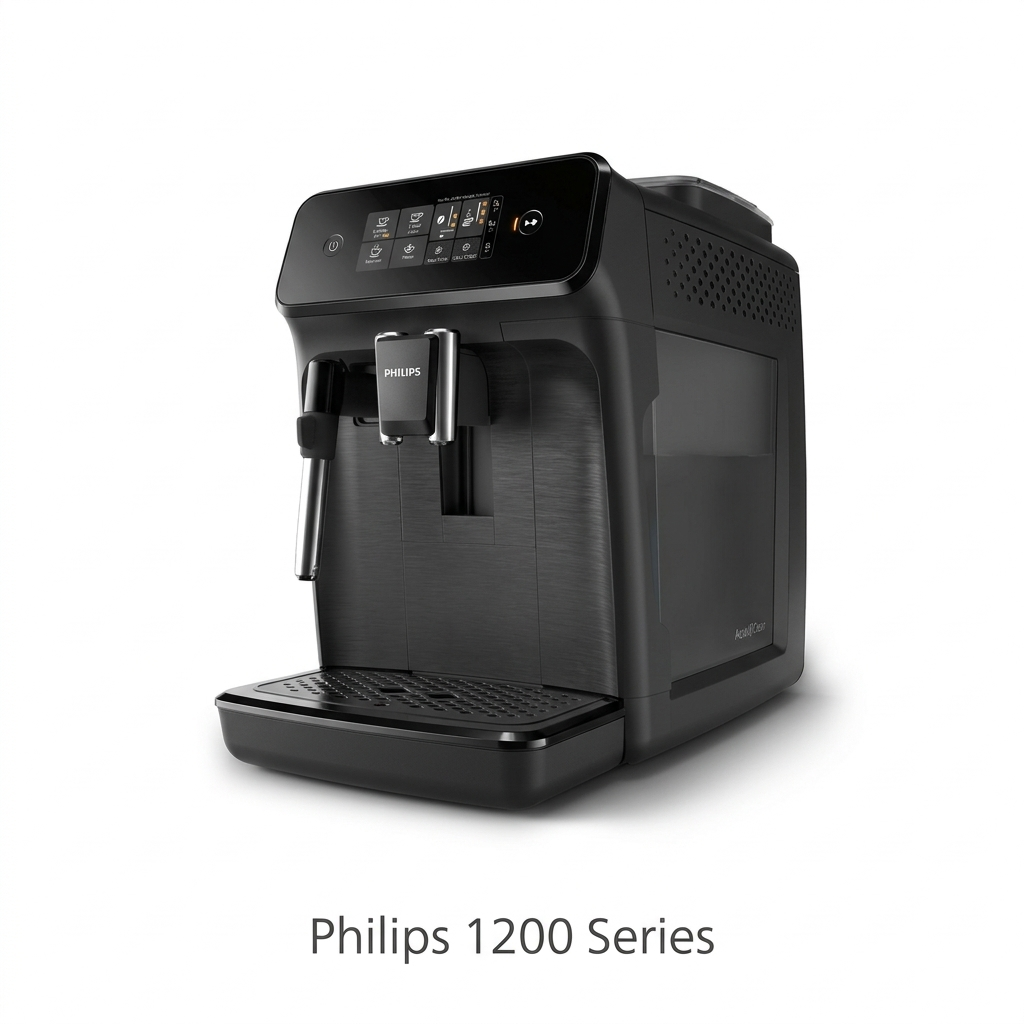
Touch panel, adjustable spout and the classic frother on the left.
Other Philips machines I tested
For the simplest, button-only version, see my Philips 800 Series review.
The Philips 2200 Series lets you pull the frother sleeve off for finer, silkier milk.
And for one-touch milk drinks, my Philips 3200 Series review covers the LatteGo system.
If you would rather skip frothing by hand, the Philips 2300 Series is the cheapest way I know into one-touch cappuccinos, with a two-part LatteGo jug.
Which one is right for you: is the Philips 1200 Series your match?
4 quick questionsPhilips 1200 Series specifications
From manufacturer data and my own testing.
How I tested and scored the Philips 1200 Series
For four weeks, the Philips 1200 Series was my everyday machine for espresso, coffee, cappuccinos, Americanos and tea.
Alex van Gog and I shared it at home and kept a joint log of settings, tastes and maintenance.
We worked through the grind range with three different roasts, tried every strength, size and temperature, and compared single and x2 drinks.
I steamed four kinds of milk, followed the cleaning routine, counted drinks per tank and checked puck consistency.
Finally, I compared our notes with Philips' specifications and user manual.
- Espresso (7.5): body, crema, flavor and consistency.
- Milk drinks (6.5): foam texture, heat and ease of steaming.
- Ease of use (8.7): touch panel, remembered settings and setup.
- Cleaning (8.3): rinse cycles, brew group access and maintenance prompts.
The overall score of 7.6 is an editorial rating that reflects those four areas.
Philips 1200 Series FAQ
Is the Philips 1200 Series worth it?
Yes, if you want fresh-bean espresso and coffee with simple controls and don't mind frothing milk by hand. If you want one-touch lattes, choose a model with an automatic milk system.
What drinks can the Philips 1200 Series make?
Espresso and coffee, each with an x2 double option, plus hot water and steam for milk drinks.
Does the Philips 1200 Series come with an AquaClean filter?
The US version I tested did not include it. The machine is compatible with AquaClean, which you can buy separately.
How many grind settings does it have?
It has a ceramic grinder with 12 settings. Adjust it only while the grinder is running.
Can I set the brewing temperature?
Yes, there are three temperature levels in the machine's settings. I used the highest for espresso.
Will a tall mug fit under the spout?
Most regular mugs fit. The spout adjusts between about 8.5 and 14.5 cm, or 3.3 to 5.7 inches.
Can it make latte art?
Not really. The classic frother makes plenty of airy foam, which suits traditional cappuccinos but is too coarse for latte art.
How do I use decaf without emptying the beans?
Select your drink, switch the aroma setting to ground coffee, add one level scoop to the pre-ground chute and press start.
How often should I clean the brew group?
Philips suggests regular rinsing. I rinsed it under cold water once a week and greased it every couple of months.
Does it remember my settings?
Yes. It keeps the last strength and cup size you used for each drink.
How big is the water tank?
It holds 1.8 liters, or about 61 fluid ounces.
Kitchen & coffee tester
Michael spent six years as a line cook in restaurants in Chicago and New York, and he has tested kitchen appliances for HouseholdMe since 2018, from air fryers to coffee makers. He holds an SCA certificate in barista skills and used the Philips 1200 Series as his everyday coffee machine for four weeks for this review.
- Four weeks of hands-on testing of the Philips 1200 Series Fully Automatic Espresso Machine
- Philips product specifications and user manual
- General espresso brewing and maintenance guidance