Gaggia Naviglio Milk review: a one-touch cappuccino machine with a backup Pannarello wand
The Gaggia Naviglio Milk One-Touch Espresso Machine is built around one drink: the cappuccino. Its Cap in Cup system draws milk from almost any container and makes a cappuccino at one touch, and when you want more control, it converts into a Pannarello steam wand. After four weeks, I liked its flexibility and its simple programming, though the milk system needs rinsing every time and the menu is short.

Michael Reynolds
Hands-on review
Hands-on testing, research, specs
4 weeks
22 minutes
Jargon helpNew to espresso? Tap any dotted term to see what it means.
In this review
Yes, if the cappuccino is your daily drink and you want it at one touch from a compact, simple machine. The Gaggia Naviglio Milk grinds fresh, makes good espresso and builds a cappuccino through its Cap in Cup system from whatever milk container you have. When you want to control the foam yourself, it converts into a Pannarello wand. You need to rinse the milk line after every cappuccino, the menu is short, and taller mugs won’t fit.
Gaggia Naviglio Milk at a glance
Gaggia Naviglio Milk pros and cons
- One-touch cappuccino from almost any milk container
- Converts to a Pannarello wand for hands-on milk
- Simple, step-by-step volume programming
- Milk line needs rinsing after every cappuccino
- Short menu: espresso, cappuccino, milk and hot water
- Low cup clearance for tall mugs
Who should buy the Gaggia Naviglio Milk?
- Daily cappuccino drinkers
- Small kitchens with front access only
- People who want both automatic and manual milk
- Latte and flat white fans who want one touch
- Big households with different drink tastes
- Anyone who hates rinsing milk parts
First impressions of the Gaggia Naviglio Milk
The Naviglio Milk doesn't try to be everything.
It has four drink buttons: espresso, cappuccino, frothed milk and hot water.
That focus is the point.
It's a machine for people who make the same cappuccino every morning and want it fast.
Out of the box, it looks plain but tidy, with a black body, a stainless cup tray and backlit buttons.
At about 10 inches wide and 13.4 inches tall, it sat easily under my wall cabinets.
The water tank, puck drawer and drip tray all come out from the front.
On the front, below the spout, sits the Cap in Cup assembly with a thin milk pickup tube hanging from it.
I dropped the tube into a glass of cold milk, put a cup under the outlet and pressed Cappuccino.
Milk came first, then espresso, and the whole thing took about a minute.
The foam was thick and creamy, the classic Italian kind, with espresso pooling underneath.
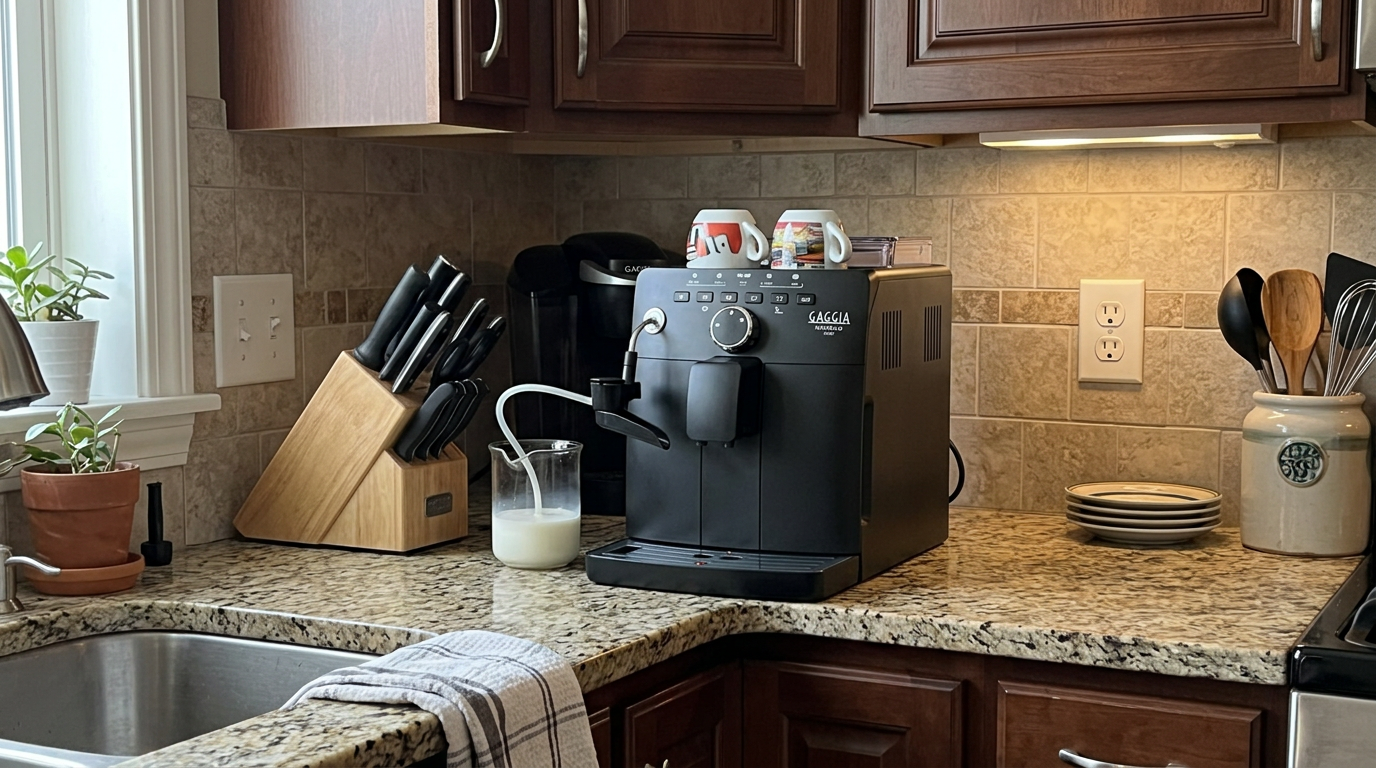
The Naviglio Milk can draw milk straight from a glass on the counter.
What the Gaggia Naviglio Milk actually is
The Naviglio Milk is a bean-to-cup espresso machine with two ways to make milk.
It grinds whole beans with flat ceramic burrs✕Ceramic burrsTwo grinding plates made of ceramic instead of steel. They stay cooler, run quieter and keep a sharp edge for many years., doses and tamps them in a removable brew group✕Brew groupThe removable unit inside the machine that receives the ground coffee, presses it into a puck, pushes hot water through it and then drops the used puck into the drawer., brews at pressure and drops the puck into a drawer.
For milk, the Cap in Cup system draws milk through a pickup tube, heats and froths it with steam and dispenses it straight into the cup.
Remove the Cap in Cup, and the same steam wand takes a Pannarello✕PannarelloA sleeve that slips over a steam wand and sucks in air through a small hole. It makes thick foam easily, without much technique. sleeve for manual frothing.
Heat comes from a single quick-heating boiler, and the pump is rated at 15 bar.
Gaggia makes the Naviglio for people who love cappuccino but don't want a big, complicated machine.
It's simple to learn, and the automatic and manual milk options give it more range than its short menu suggests.
Gaggia Naviglio Milk design and setup
The Naviglio Milk measures about 10 inches wide, 13.4 inches tall and 17.3 inches deep, and weighs about 20 pounds.
Everything you handle daily comes out from the front.
The 1.5-liter water tank, about 51 ounces, slides out from the front.
The bean hopper on top holds about 10.6 ounces, roughly a standard bag.
You need a little space above to open the hopper lid, but nothing like the clearance top-loading tanks require.
The drip tray holds about 18 ounces, and the puck drawer about 10 pucks.
Cup clearance
The adjustable spout reaches about 4.3 inches at its highest.
Cappuccino cups and regular coffee cups fit.
My tall mugs didn't, so for a big drink I used a wider, lower cup.
First-time setup
Setup is quick: fill the tank, prime, fill the hopper and run a rinse.
The first few espressos settle the grinder and brew group, so pour away the first two or three.
I also tested my water hardness and fitted a water filter, which is optional but worth it in hard-water areas.
Our tip: Check that your favorite cup is under about 4.3 inches tall, or plan to use lower, wider cups for big drinks.
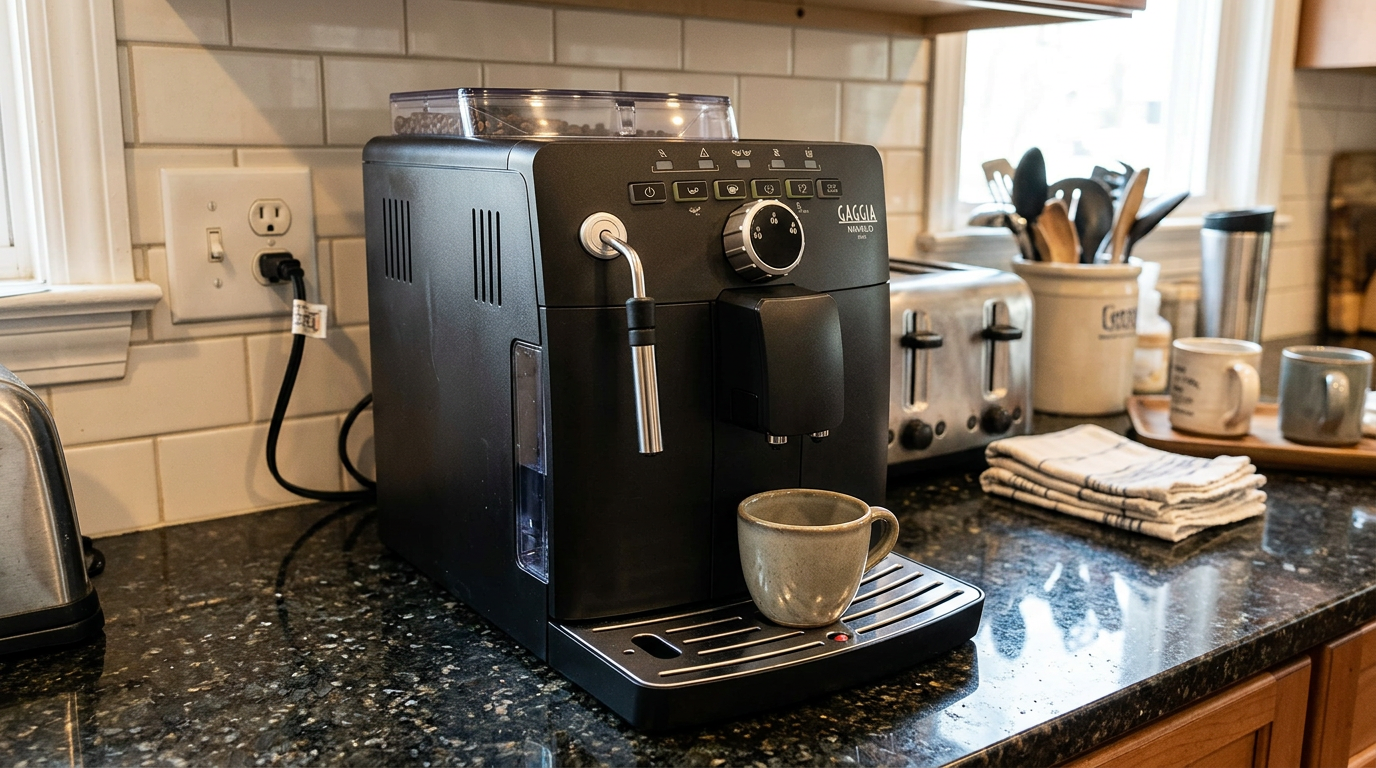
Front-access tank and drawer mean the Naviglio never has to leave its spot.
The built-in ceramic grinder
The grinder uses flat ceramic burrs✕Ceramic burrsTwo grinding plates made of ceramic instead of steel. They stay cooler, run quieter and keep a sharp edge for many years., quiet and cool-running, with five settings.
For a stronger taste or light roasts, go finer.
For a lighter taste or dark, oily roasts, go coarser.
Each of the five steps is a clear change, so dialing in is quick.
Bars show how much resistance the coffee puts up and how long the shot takes to run.
Turn the grind adjustment only while the grinder is running, using the included key.
With a medium-dark blend, setting 2 gave me the best cappuccino base.
A medium roast was happiest on setting 3.
Our tip: Change the grind one step at a time and wait two drinks before judging, because coffee from the old setting is still in the chute.
Gaggia Naviglio Milk espresso performance
The espresso button can be programmed for a short espresso or a longer coffee, and there's a strength button with three levels.
I kept the button set to espresso, about 1 ounce, at the strongest setting for cappuccinos.
With a medium-dark blend, the shots had a solid hazelnut crema✕CremaThe golden-brown foam on top of an espresso. It forms when pressure pushes gases and oils out of freshly ground coffee. and a round, chocolatey body.
They had a little less depth than the shots from Gaggia's larger machines, but they were clean and sweet, with no harsh edge.
Pressing the espresso button twice queues two drinks.
Consistency and temperature
Back-to-back espressos were consistent.
Espresso brewed right after steaming came out hotter, because the boiler is still at a higher temperature.
That's handy for a cappuccino you want piping hot.
Strength, volume and why they are different
The strength button and the volume setting do two different jobs, and mixing them up is the most common way to end up with a weak cappuccino.
Strength changes how much ground coffee goes into the puck.
Volume changes how much liquid comes out of it.
If your cappuccino tastes milky, raise the strength first.
Raising the volume pushes more water through the same coffee, which makes the shot bigger but thinner and more bitter.
I kept the strength at its highest level for every milk drink and kept the espresso short, at about 1 ounce.
For straight espresso in the afternoon, I dropped to the middle setting for a softer, sweeter shot.
Once you find a combination you like, the machine remembers it, so this is a one-time job.
My tasting notes with the same 4 oz of milk in each cup.
| What you taste or see | Likely cause | First change |
|---|---|---|
| Sour, thin, watery | Under-extraction✕Under-extractionWhen water does not pull enough out of the coffee, often because the grind is too coarse. The cup tastes sour, thin and watery. | Grind one step finer or raise strength |
| Bitter, harsh, drying | Over-extraction✕Over-extractionWhen water pulls too much out of the coffee, usually because too much water runs through one puck. The cup tastes bitter, harsh and thin. | Grind coarser or shorten the volume |
| Pale crema | Stale beans or grind too coarse | Fresher beans, finer grind |
| Drips or stops | Grind too fine | One step coarser while grinding |
| Lukewarm drink | Cold cup | Warm the cup with hot water first |
Our tip: Brew the espresso straight after the milk if you like your cappuccino very hot, because the boiler is still hot from steaming.
The one-touch cappuccino
The Cap in Cup system is the heart of this machine.
It sits on the front, around the steam outlet, and a milk pickup tube hangs from its side.
You put the end of the tube in a container of cold milk, put your cup under the outlet and press Cappuccino.
The machine draws the milk up, heats and froths it with steam and pours it into the cup.
Then it brews the espresso on top.
The milk pickup tube and Cap in Cup assembly come in the box.
Gaggia's dedicated milk carafe is an optional extra, and you don't need it.
The tube works in almost any container: a drinking glass, a milk jug, a pitcher or the optional carafe.
| Milk container | Did it work? | Notes |
|---|---|---|
| Drinking glass | Yes | Easiest for one or two drinks |
| Small milk jug or pitcher | Yes | Good for several drinks in a row |
| Milk carton | Yes, if the tube reaches the bottom | Handy but harder to keep cold |
| Optional Gaggia carafe | Yes | Best for fridge storage between uses |
The foam was dense and creamy, with fairly large bubbles, the classic tall cappuccino cap.
Milk came out hot and sweet.
It isn't silky microfoam✕MicrofoamMilk foam with bubbles so small you cannot see them. It feels silky and blends into the coffee instead of sitting on top like froth., so lattes and flat whites aren't its strength, but for cappuccinos it was very good.
My ratings on a 10-point scale for foam texture and stability.
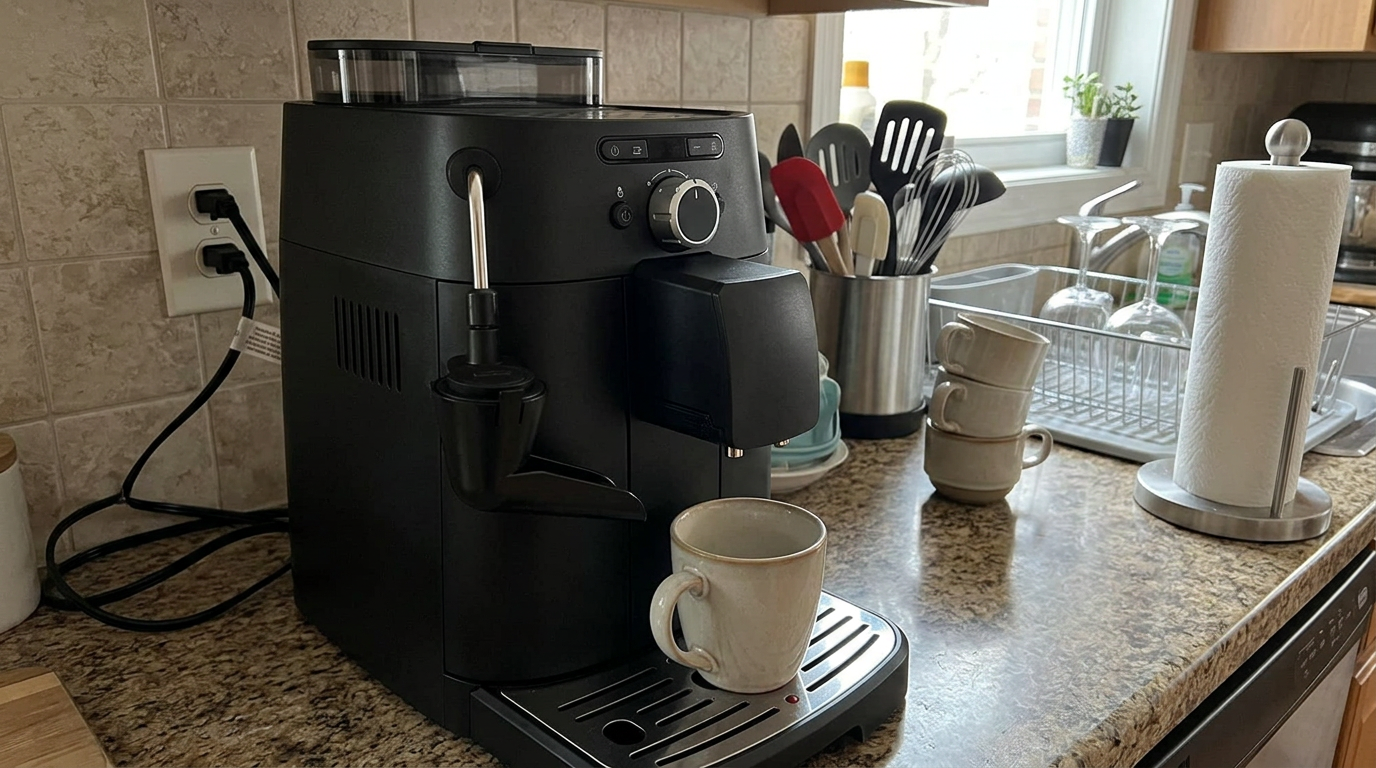
The Cap in Cup outlet sits right next to the coffee spout.
Programming your cappuccino
Out of the box, the Naviglio makes a traditional Italian cappuccino, which is small and strong.
You can change both the milk and the espresso amounts, and the process is pleasantly simple.
| Step | What you do | What the machine does |
|---|---|---|
| 1 | Press and hold the Cappuccino button | Other lights go off, the Cappuccino light flashes |
| 2 | Wait for milk to dispense | Machine is in programming mode |
| 3 | Press Cappuccino again at the milk level you want | Milk stops, amount is saved |
| 4 | Wait for espresso to brew | Espresso stage begins |
| 5 | Press again at the espresso level you want | Espresso stops, amount is saved |
| 6 | Press Cappuccino any time | Your new recipe at one touch |
Milk is programmed first, then espresso, as two separate stages.
I set mine to a little more milk and a slightly longer espresso for a 7-ounce cup.
The machine repeated it exactly every time after that.
The only limit is that there's one cappuccino recipe, shared by everyone in the house.
Cleaning the Cap in Cup after use
Milk left in the pickup tube and outlet goes off quickly, so the Cap in Cup needs a rinse after every cappuccino session.
It takes less than a minute.
| Step | What to do |
|---|---|
| 1 | Take the tube out of the milk and put it in a container of fresh water |
| 2 | Put an empty container under the milk outlet |
| 3 | Press the Steam button and wait for the lights to stop flashing |
| 4 | Let water run through until it comes out clear |
| 5 | Stop, then wipe the outlet with a clean towel |
Water drawn through the tube flushes the whole milk path.
Once it runs clear, the system is ready for the next drink.
Every few days, I also took the Cap in Cup assembly off and rinsed its parts at the sink.
Our tip: Keep a glass of fresh water next to the machine, so rinsing the milk line takes seconds and never gets skipped.
The optional carafe and milk storage
If you buy Gaggia's optional carafe, storing milk is neat.
After rinsing, you slide the pickup tube back to its central position and disconnect the hose from the Cap in Cup assembly.
The hose fits over a post on the carafe's lid, which seals it, and the whole carafe goes into the fridge.
Without the carafe, I simply poured what I needed into a glass and kept the carton in the fridge.
Either way, the key is keeping milk cold until you use it and keeping the pickup parts clean.
Switching to the Pannarello wand
When you want more say over the foam, the Naviglio converts to a manual Pannarello✕PannarelloA sleeve that slips over a steam wand and sucks in air through a small hole. It makes thick foam easily, without much technique. wand.
First, the Cap in Cup assembly comes off.
You pull its lower part downward so it slides off the rubber section, then gently work the rest off the steam wand.
Underneath is the bare wand, with a small notch that holds attachments in place.
The Pannarello uses a rubber elbow that fits around the wand, and you push the tube on until it feels secure.
The whole swap took me about a minute once I'd done it twice.
The Pannarello has a small air hole near its top.
As steam rushes past, it sucks air in and whips it into the milk, which is why it makes foam so easily.
You still control how much air goes in, by how you hold the jug.
Our tip: Make sure the Pannarello is pushed firmly into place before you start steaming, so it can’t slip off under steam pressure.
Pitcher choice and frothing technique
A dedicated frothing pitcher makes a big difference.
For one cappuccino of 6 to 8 ounces, a 10 to 12-ounce pitcher is the right size.
Milk expands as you add air, so 6 ounces of cold milk becomes a lot more by the end.
A pitcher that's too small overflows, and one that's too big makes it hard to reach the milk with the wand.
A measuring cup is a poor substitute, because its shape makes positioning and pouring awkward.
Based on 6 oz of cold milk for a 6–8 oz cappuccino.
| Step | What I did | Why it matters |
|---|---|---|
| 1. Heat up | Press Steam and wait for the lights to stop flashing | Brings the boiler to steam temperature |
| 2. Purge | A short burst into a container | Clears condensed water from the wand |
| 3. Aerate | Tip under the surface, air hole working | Builds foam as the milk rises |
| 4. Control the foam | Raise the jug to cover the air hole when you have enough | Stops more air going in while milk heats |
| 5. Heat | Keep steaming with the hole covered | Warms the milk without extra foam |
| 6. Stop in the milk | Turn steam off with the tip still submerged | Avoids splashing |
| 7. Pour, then brew | Milk into the cup first, espresso on top | Classic cappuccino layers |
The most useful trick is the air hole.
Leave it exposed and the foam keeps growing.
Raise the jug so the milk covers it, and the foam stops growing while the milk keeps heating.
That gave me real control over how tall and airy the foam was.
Cleaning the Pannarello
After steaming, press and hold the Hot Water button with a container under the wand to flush out milk, then press again to stop.
That purge helps, but it doesn't replace a proper rinse.
Slide the Pannarello off and rinse the tube and rubber elbow at the sink, especially the inside.
The plastic parts don't let milk burn on easily, but residue still builds up if you skip it.
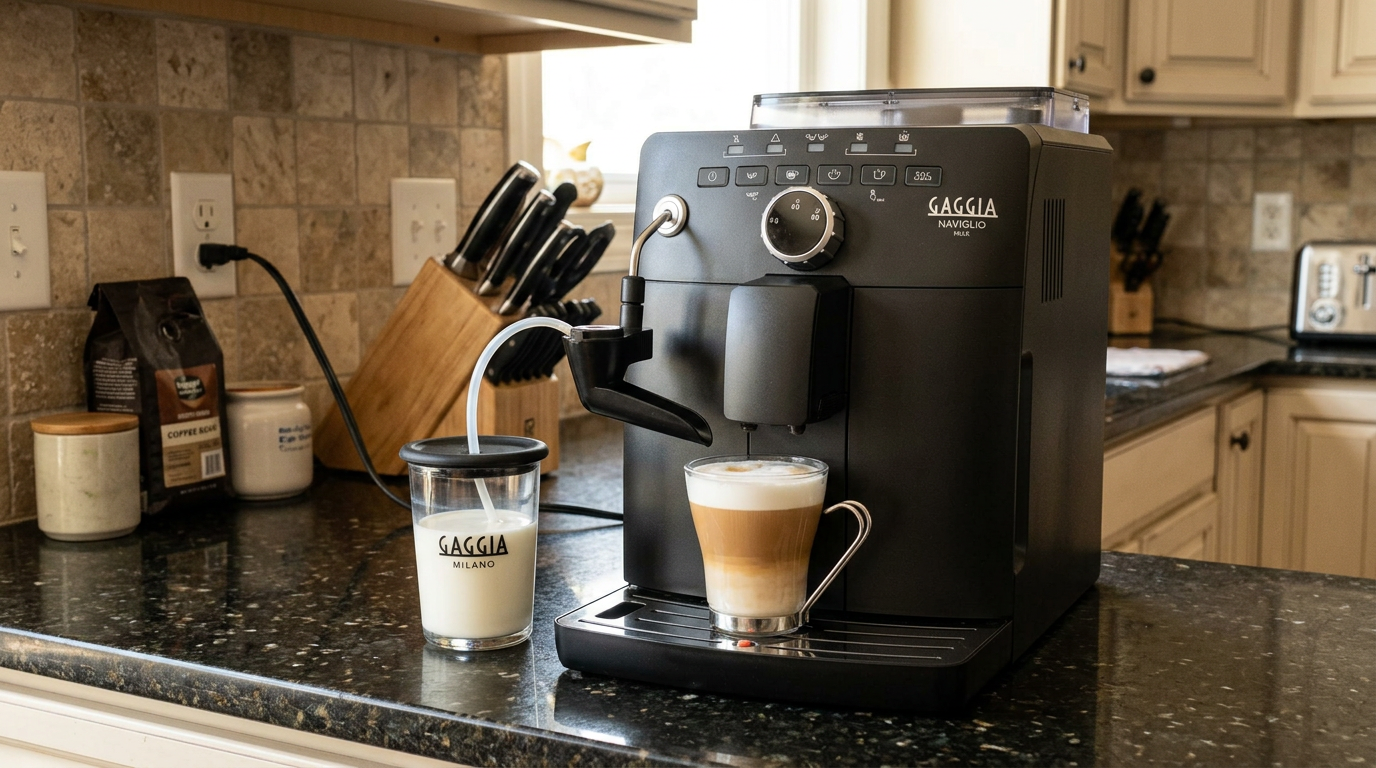
A Naviglio cappuccino in a glass, with the foam cap clearly separated from the espresso.
Cap in Cup or Pannarello: which to use when
Having two milk systems sounds like a gimmick until you live with it.
In practice, I used them for different moments.
On weekday mornings, the Cap in Cup did everything.
It was faster, I could walk away while it worked, and the result was the same every day.
On slow weekend mornings, I swapped to the Pannarello.
It took longer, but I could make the foam a little creamier and the milk a little hotter.
| Situation | Better choice | Why |
|---|---|---|
| Rushed weekday morning | Cap in Cup | One touch, repeatable, hands-free |
| Several cappuccinos in a row | Cap in Cup | Tube stays in the jug between drinks |
| You want hotter milk | Pannarello | You decide when to stop |
| You want smoother, less airy foam | Pannarello | Cover the air hole earlier |
| Hot chocolate for kids | Either | Frothed milk button or a quick steam |
| Guests with different tastes | Pannarello | Adjust each jug by hand |
Swapping between them takes about a minute, so it's not something you'd do between every drink.
Most owners will probably pick one and use it most of the time.
For me, that was the Cap in Cup, with the Pannarello as a weekend treat.
Americano vs long coffee
There's one coffee button, which you can program for a short espresso or a long coffee.
I kept mine on espresso and made Americano✕AmericanoAn espresso topped up with hot water that does not pass through the coffee. It keeps the espresso’s flavor in a longer, milder cup.s by hand instead.
Brew an espresso, then press and hold the Hot Water button to top it up.
The extra water doesn't pass through the coffee, so the drink keeps the espresso's flavor in a longer cup.
A long coffee is different: all of the extra water runs through the puck.
That pulls out some sweeter, juicier notes, but also more bitter and roasty ones.
| Quality | Americano | Long coffee |
|---|---|---|
| How it is made | Espresso, then hot water added | More water through the same puck |
| Flavor | Clean, espresso-like | Rounder, heavier |
| Bitterness | Lower | Higher, more roasty notes |
| Button setup | Coffee button stays on espresso | Coffee button set long |
I preferred the Americano, and I liked not having to reprogram the coffee button every time someone wanted a bigger drink.
In a shared house, it's the simplest way to keep espresso consistent and still offer a long coffee.
Our tip: Keep the coffee button programmed for espresso, and use the Hot Water button for Americanos, so nobody has to reprogram anything.
Beyond the cappuccino
The menu is short, but a few extra drinks are easy once you know the machine.
The Frothed Milk button pours hot foamed milk with no coffee, which made hot chocolate and chai lattes in seconds.
For a latte, I used the Frothed Milk button into a tall glass and then brewed an espresso over it.
The foam is thicker than a café latte, but the kids didn't complain.
For a flat white, the Pannarello works best: steam with less air, keep the jug tilted so the milk spins, and pour over a double espresso.
And for tea, the Hot Water button saves boiling a kettle.
Our tip: For a latte, press Frothed Milk into a tall glass first and then brew an espresso over it, which gives you a soft layered drink without any reprogramming.
Cleaning and maintaining the Gaggia Naviglio Milk
The machine rinses its coffee circuit automatically, and descaling is prompted with a warning light.
Most of your effort goes into the milk parts.
| When | Task | Why it matters |
|---|---|---|
| After cappuccinos | Rinse the milk line with fresh water | Clears milk from tube and outlet |
| After manual steaming | Purge with hot water, rinse Pannarello parts | Stops milk drying inside |
| Daily | Empty the drip tray | Prevents overflow and smells |
| About every 10 drinks | Empty the puck drawer | The machine stops when it is full |
| Every few days | Take apart and rinse the Cap in Cup | Removes milk from small parts |
| Weekly | Rinse the brew group under warm water | Removes coffee oils |
| Monthly | Grease the brew group | Keeps it moving smoothly |
| When the light warns | Descale | Protects the boiler from scale |
The brew group✕Brew groupThe removable unit inside the machine that receives the ground coffee, presses it into a puck, pushes hot water through it and then drops the used puck into the drawer. slides out from a side door, and a weekly rinse under warm water is all it needs.
Use a water filter if your water is hard, to stretch the time between descaling✕DescalingRunning a mild acid solution through the machine to dissolve mineral scale left by hard water. Scale slows heating and can block pipes. cycles.
My estimate of hands-on cleaning time per day.
What daily use is really like
My mornings took about two minutes.
Switch on, drop the tube into a glass of cold milk, press Cappuccino, then rinse the line with water.
On weekends, I sometimes swapped to the Pannarello for a taller, creamier foam.
Tank and drawer
The 51-ounce tank lasted about two days for two cappuccino drinkers, counting rinse water.
The 10-puck drawer needed emptying every two to three days.
Rough maths from a 1.5 L tank, allowing for rinse water.
Noise
The ceramic grinder is moderate and short.
The steam phase hisses for about 30 seconds per cappuccino.
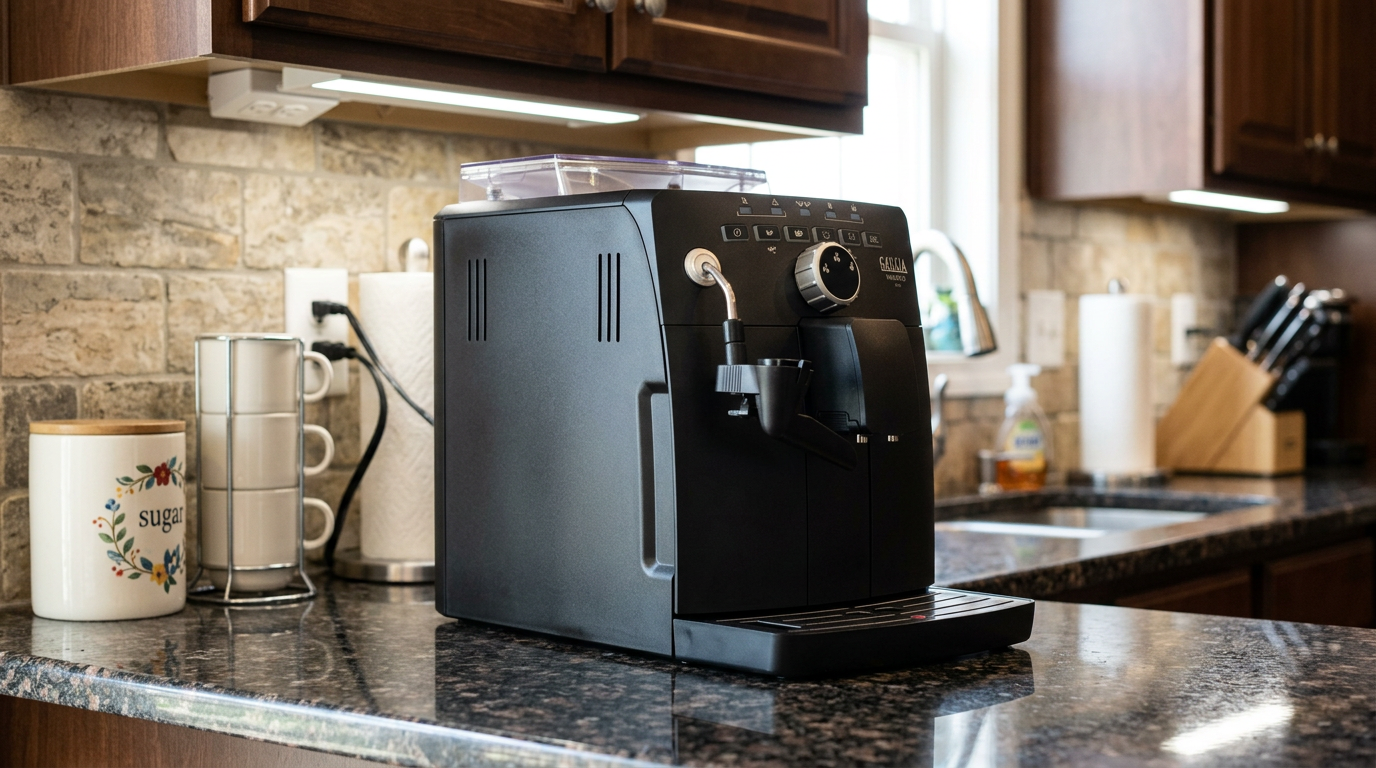
Simple backlit buttons make the Naviglio easy for anyone to use.
Beans, water and milk
Fresh whole beans with a recent roast date make the biggest difference.
Medium-dark espresso blends gave the strongest, sweetest cappuccino base.
Medium roasts made a lighter espresso, and light roasts needed the finest grind.
Avoid very oily beans and flavored beans, which leave residue in the grinder.
| Bean type | Espresso | Cappuccino |
|---|---|---|
| Medium-dark blend | Very good, thick crema | Excellent |
| Medium roast | Good, brighter | Good |
| Light roast | Finest grind, strongest setting | Can taste sharp |
| Very dark, oily | Not recommended | Not recommended |
Milk
Use milk straight from the fridge.
Cold milk gives the Cap in Cup and the Pannarello more time to build foam before it gets hot.
Whole milk made the creamiest foam, and skim made the tallest.
Common mistakes to avoid
The Gaggia Naviglio Milk is simple, but a few habits will hold it back.
| Mistake | What happens | Better habit |
|---|---|---|
| Skipping the milk line rinse | Milk spoils in the tube and outlet | Rinse with fresh water after every session |
| Tube not reaching the milk | Sputtering, little or no foam | Make sure the tip sits in the milk |
| Filling the pitcher too high | Foam overflows | Leave room for the milk to expand |
| Forgetting to purge the wand | Watery milk | A short burst before steaming |
| Reprogramming the coffee button for big drinks | Inconsistent espresso | Use hot water for Americanos |
| Turning the grind with the grinder stopped | Beans jam | Adjust only while grinding |
What I would change
A one-touch latte and flat white, plus a taller spout, would make the Naviglio Milk much more versatile.
I'd also like a self-rinse for the milk line, so it didn't depend on a glass of water.
Is the Gaggia Naviglio Milk worth the money?
The Naviglio Milk is one of the most affordable ways to get a one-touch cappuccino from fresh beans.
It doesn't have a big menu or a touchscreen, but it does the one drink it's built for very well.
The Pannarello option means you're not stuck with one style of foam.
Ask yourself three questions before you buy.
Is the cappuccino your main drink? Are you happy to rinse the milk line every time? And do your cups fit under about 4.3 inches?
If the answers are yes, the Naviglio Milk is a smart, focused buy.
The pickup tube in a simple glass of milk is all it takes for a one-touch cappuccino.
How it compares with other espresso setups
The most useful comparison is with the kinds of machines you are likely choosing between.
The Naviglio Milk stands out for its two milk methods and its simplicity.
| Feature | Gaggia Naviglio Milk | Machine with a milk carafe | Machine with a steam wand only |
|---|---|---|---|
| One-touch cappuccino | Yes | Yes | No |
| One-touch latte and flat white | No | Usually | No |
| Manual frothing option | Yes, Pannarello | Rarely | Yes |
| Milk container | Any glass or jug | Its own carafe | Any pitcher |
| Controls | Simple buttons | Often a screen | Varies |
| Daily milk cleaning | Rinse the line | Quick clean, wash carafe | Wipe and purge |
A carafe machine gives you more one-touch drinks, but you're tied to its carafe and more parts to wash.
A wand-only machine gives the best milk if you have the skill, but no shortcut on busy mornings.
The Naviglio Milk offers both styles in one compact box.
| You mostly drink | Is the Naviglio Milk a fit? | Why |
|---|---|---|
| Cappuccino | Excellent | One touch, programmable, classic foam |
| Espresso | Good | Clean, sweet shots |
| Americano | Good | Espresso plus hot water by hand |
| Lattes and flat whites | Fair | No dedicated buttons, foam is thick |
| Big mugs | Poor | About 4.3 in clearance |
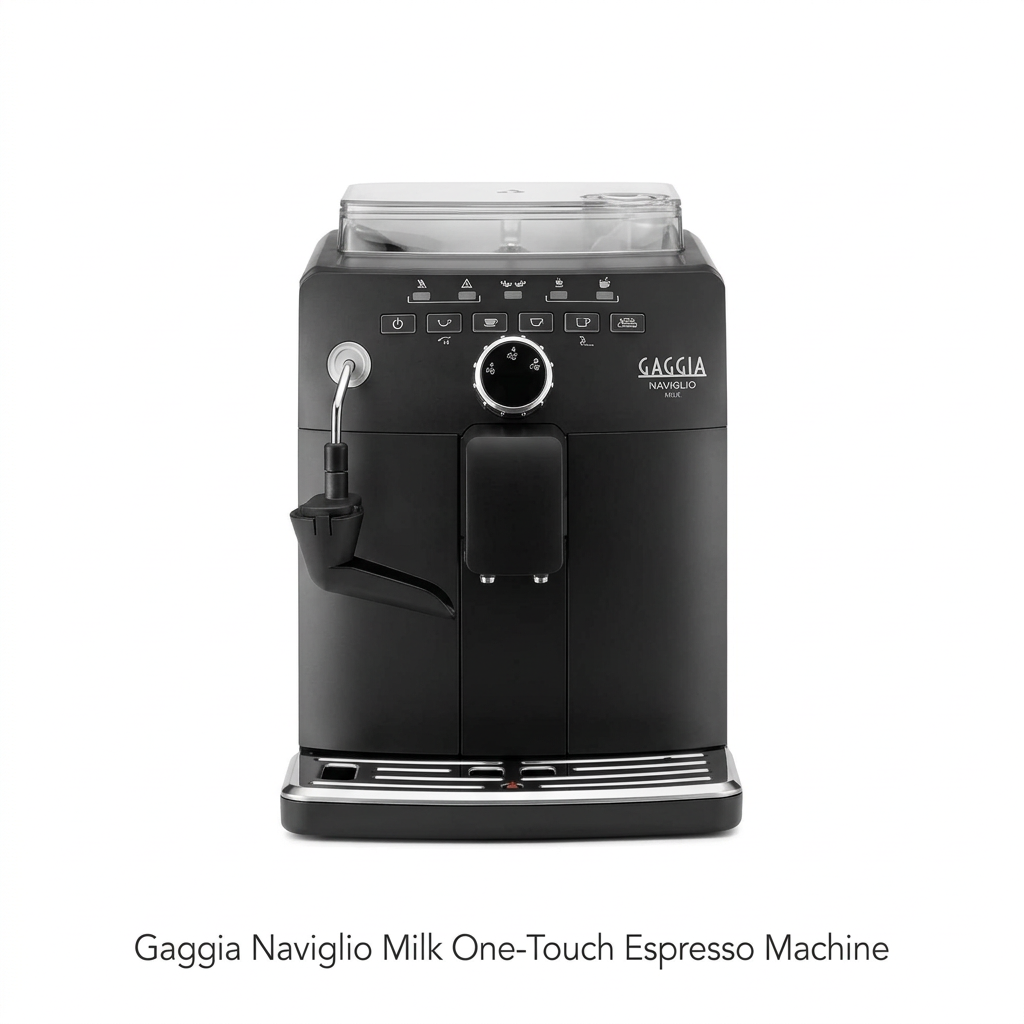
The full package: four simple buttons, the coffee spout and the Cap in Cup milk system.
Other Gaggia machines I tested
If you'd rather skip automatic milk entirely, the Gaggia Brera is a simpler machine with a Pannarello wand.
For one-touch flat whites and lattes in a slim body, read my Gaggia Magenta Prestige review.
For four user profiles, see my Gaggia Cadorna Prestige review.
Which one is right for you: is the Gaggia Naviglio Milk your match?
4 quick questionsGaggia Naviglio Milk specifications
From manufacturer data and my own testing.
How I tested and scored the Gaggia Naviglio Milk
For four weeks, I used the Gaggia Naviglio Milk as my everyday machine for cappuccinos, espresso, Americanos and hot chocolate.
I shared the machine with a second tester from the HouseholdMe team, and we wrote our tasting and usage notes together.
We made one-touch cappuccinos from a glass, a jug and a carton, programmed the milk and espresso amounts and compared Cap in Cup foam with Pannarello foam.
I tried 8, 12 and 20-ounce pitchers, foamed whole, 2%, skim, oat and almond milk and timed the rinse and cleaning routines.
I then checked our notes against Gaggia's specifications and owner documentation.
- Espresso (8.1): body, crema, flavor and consistency.
- Milk drinks (7.7): Cap in Cup foam, Pannarello control and temperature.
- Ease of use (7.9): buttons, programming, swapping milk systems and front access.
- Cleaning (7.1): milk line rinse, Pannarello and Cap in Cup washing, brew group care.
The overall score of 7.7 is an editorial rating that reflects those four areas.
Gaggia Naviglio Milk FAQ
Is the Gaggia Naviglio Milk worth it?
Yes, if cappuccino is your daily drink and you want it at one touch from a compact machine. It also converts to a Pannarello wand for hands-on milk. If you want one-touch lattes and flat whites, look at a machine with a carafe and a longer menu.
Does the Naviglio Milk come with a milk carafe?
The Cap in Cup system and milk pickup tube are included. Gaggia’s dedicated carafe is an optional extra, and the tube works in almost any container, including a glass or pitcher.
How do I program the cappuccino?
Press and hold the Cappuccino button until its light flashes. Press it again when you have enough milk, then again when you have enough espresso. The machine saves both amounts.
How do I clean the Cap in Cup?
Put the pickup tube in fresh water, place a container under the outlet, press Steam and let water run until it comes out clear. Then wipe the outlet with a towel.
Can I froth milk manually?
Yes. Remove the Cap in Cup assembly and fit the Pannarello attachment to the steam wand. It makes foaming easy while still letting you control the texture.
What size milk pitcher should I use?
For one 6 to 8-ounce cappuccino, a 10 to 12-ounce frothing pitcher is ideal. Milk expands as it foams, so leave room.
What drinks does it make?
Espresso (or a long coffee if you program it), cappuccino, frothed milk and hot water. You can make an Americano by adding hot water to an espresso.
What is the difference between an Americano and a long coffee?
A long coffee runs all its water through the coffee puck, which adds bitterness. An Americano is an espresso with hot water added afterward, so it tastes cleaner.
How big is the water tank?
About 1.5 liters, or 51 ounces. It slides out from the front.
How tall a cup fits?
About 4.3 inches under the spout at its highest. Cappuccino cups and standard coffee cups fit, but tall mugs may not.
Why does the espresso taste hotter after steaming?
The boiler is still hot from making steam, so the espresso brews at a higher temperature. That makes a hotter cappuccino.
Kitchen & coffee tester
Michael spent six years as a line cook in restaurants in Chicago and New York, and he has tested kitchen appliances for HouseholdMe since 2018, from air fryers to coffee makers. He holds an SCA certificate in barista skills and used the Gaggia Naviglio Milk as his everyday coffee machine for four weeks for this review.
- Four weeks of hands-on testing of the Gaggia Naviglio Milk One-Touch Espresso Machine
- Gaggia product specifications and owner documentation
- General espresso brewing and maintenance guidance