De'Longhi Classic Matte Black review: a stylish budget espresso machine with a real pressure gauge and an easy upgrade path
The De'Longhi Classic Matte Black Espresso Machine is De'Longhi's compact, gauge-fronted espresso machine in a smart matte black finish, with pressurized baskets, a Panarello steam wand and a big 57 oz tank. I used it daily for three weeks, first as it comes and then with a bottomless portafilter and the wand sleeve removed.
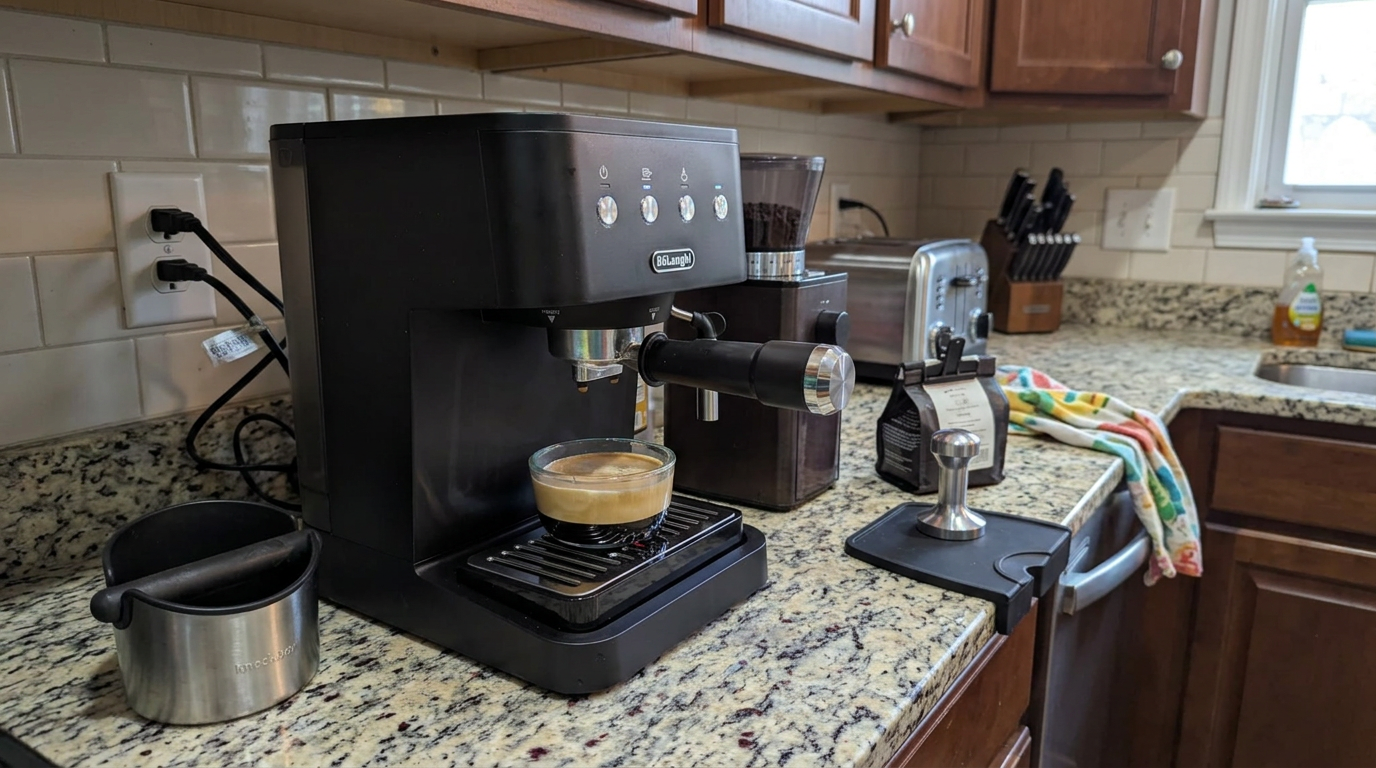

Michael Reynolds
Hands-on review
Hands-on testing, research, specs
3 weeks
20 minutes
Jargon helpNew to espresso? Tap any dotted term to see what it means.
In this review
Yes, if you want a good-looking, easy espresso machine that can grow with you. Out of the box, the De'Longhi Classic makes hot, balanced, chocolatey shots from pre-ground coffee, and its Panarello wand foams milk with zero skill. The stock portafilter feels cheap and the pressurized baskets cap the flavor, but because it uses a common 51 mm fitting, a bottomless portafilter and a single-wall basket turn it into a genuinely good espresso machine.
De'Longhi Classic at a glance
De'Longhi Classic pros and cons
- Hot, balanced shots from pre-ground coffee
- Fits common 51 mm upgrade portafilters
- Big 57 oz tank and a working pressure gauge
- Stock portafilter feels light and cheap
- Panarello makes stiff foam, not microfoam
- Wait to switch from brewing to steam
Who should buy the De'Longhi Classic?
- First-time espresso buyers
- Cappuccino and latte macchiato fans
- Tinkerers who like cheap upgrades
- Latte artists who won't modify the wand
- People who want a heavy, premium build
- Anyone making many milk drinks in a row
First impressions of the De'Longhi Classic
The matte black finish is the first thing everyone noticed in my kitchen.
It's understated, it hides fingerprints, and with the round pressure gauge on the front, the Classic looks more expensive than it is.
Then I picked up the portafilter✕PortafilterThe handle with a metal basket that holds the ground coffee. You lock it into the machine to brew., and the illusion slipped a little.
It's light, made mostly of thin aluminum and plastic, and it feels nothing like the heavy portafilters on pricier machines.
In the box, I found the machine, the portafilter, pressurized baskets, a plastic scoop with a flat tamping end, and the manual.
My first shot used a medium-roast pre-ground coffee, about 14 grams in the double basket.
It ran steadily under a thick layer of foam, and it came out piping hot.
The flavor surprised me: balanced, chocolatey and nutty, with no harsh bitterness.
The Panarello✕Panarello wandA steam wand with a sleeve that sucks in air automatically. It makes foam easily, but big, stiff bubbles rather than silky milk. wand turned cold milk into a tall cap of foam in under a minute, with no technique at all.
As a first-day experience, the De'Longhi Classic is about as easy as espresso gets.
My first shot on the Classic, brewed into a glass mug. The matte black body hides fingerprints well.
What the Classic actually is
The Classic is a compact semi-automatic espresso machine with a thermoblock✕ThermoblockA compact heater that warms water as it flows through, instead of keeping a boiler of hot water ready. heater, a 15-bar pump, a front pressure gauge and a Panarello steam wand.
You fill the basket, tamp, lock the portafilter in and press the one-cup or two-cup button, and the machine stops the shot for you.
| Item | Details | My verdict |
|---|---|---|
| Portafilter | 51 mm, angled tabs, aluminum and plastic | Light, but fits common upgrades |
| Baskets | Pressurized, single exit hole with an inner mesh | Forgiving, flavor-limited |
| Scoop and tamper | Plastic, combined | Fine for pressurized baskets |
| Steam wand | Panarello sleeve over a rubber nozzle | Easy foam, removable sleeve |
| Water tank | About 57 oz, with descaling lines | Generous |
The interesting change is the portafilter.
Older De'Longhi compacts used their own fitting, but this one uses the angled-tab 51 mm design found on many budget machines, which opens up a world of cheap third-party upgrades.
Classic design and setup
The Classic is compact enough for most counters and short enough to sit under standard cabinets.
The controls
The front has illuminated buttons for one cup, two cups, power and steam, with the gauge in the middle.
A rotary knob on the side opens the wand for hot water in brew mode, or steam in steam mode.
The tank
The tank is big for a compact machine, and two molded lines marked A and B show how much descaler and water to add when descaling.
The drip tray
A plastic tray with a perforated metal cover slides out for emptying, and taller glasses fit once you take the insert out.
Setup
Rinse the tank and portafilter, fill the tank, switch on and wait for the flashing buttons to go steady.
Then run water through the group until it flows evenly, and open the side knob briefly to prime the wand.
Our tip: Lock the empty portafilter in and run a blank shot into your cup before every first coffee; it warms both and checks the pump.
Dose, distribute and tamp
With the stock pressurized baskets, prep is simple, but a few details still mattered.
Dose
About 14 grams filled the double basket close to its upper limit.
I used slightly less, 13 grams, with denser beans so the coffee didn't touch the shower screen.
Grind
This surprised me: a slightly coarser grind than normal espresso worked best with the stock baskets.
Very fine coffee clogged the single exit hole and choked the shot.
Tamp
Tap the portafilter to level the grounds, then press firmly and evenly with the plastic tamper.
You don't need heavy pressure; the basket creates the resistance.
Clean the rim
A quick wipe of the basket rim stops grounds getting into the gasket and causing leaks.
Classic espresso performance, out of the box
As it comes, the Classic makes a very respectable everyday espresso.
How it tasted
With a medium-roast pre-ground blend, my shots were hot, balanced and chocolatey, with a soft nougat sweetness.
There was no sourness and only a hint of bitterness at the end.
The foam on top is thick and pale, made by the basket's exit hole rather than by the coffee itself, and it fades quickly.
The gauge
With pressurized baskets, the needle climbs into the middle of the dial on almost every shot, even with an empty basket.
That's because the basket's tiny exit hole creates the pressure, so the gauge looks reassuring without telling you much.
My flavor ratings on a 10-point scale.
| What you taste or see | Likely cause | First change |
|---|---|---|
| Slow drips, bitter | Grind too fine for the stock basket | Go coarser |
| Weak, watery | Too little coffee | Fill to about 14 g |
| Lukewarm | Cold portafilter | Run a blank shot first |
| Leaking at the group | Grounds on the rim | Wipe the rim |
| Flat, one-note | Pressurized basket limit | Try the single-wall upgrade |
Upgrading to a bottomless portafilter
This is where the Classic becomes genuinely interesting.
Because it uses the common angled-tab 51 mm fitting, a third-party bottomless portafilter✕Bottomless portafilterA portafilter with the bottom cut away, so you can see the espresso flow straight from the basket. locked straight in with no changes.
I paired it with a single-wall basket✕Single-wall basketA basket full of small holes. All the resistance comes from the coffee itself, so grind and tamp matter much more., freshly ground beans and a WDT✕WDTShort for Weiss Distribution Technique: stirring the grounds with fine needles to break up clumps before tamping. tool.
What changes
Without the basket's exit hole, the coffee itself has to create all the resistance.
So you need fresh beans, a much finer grind, careful distribution and a firm, level tamp.
What it tasted like
Even before I'd fully dialed in, my first shot gave about 32 grams of espresso with a real, natural crema.
The difference in flavor was big: more depth, more clarity, a gentle spice and a sweet almond note I'd never tasted from the stock basket.
The gauge suddenly became useful too, because the needle now reflected my grind and dose.
| Setup | What you need | Result |
|---|---|---|
| Stock pressurized basket | Pre-ground coffee | Easy, balanced, a bit flat |
| Bottomless + single-wall | Burr grinder, WDT, firm tamp | Rich, complex, real crema |
If you already own a good grinder, this upgrade is the best value change you can make to this machine.
Pre-ground coffee vs fresh beans
The Classic has no grinder, and the best coffee for it depends on which basket you use.
With the stock baskets
Good-quality pre-ground coffee works very well, even if it isn't freshly roasted.
A standard supermarket espresso blend gave me reliable, chocolatey shots every morning.
Fresh beans helped a little, but only if I kept the grind on the coarse side.
With a single-wall basket
Here, fresh beans and a capable burr grinder are essential.
Pre-ground coffee ran straight through the single-wall basket in a few seconds and tasted sour.
| Coffee | Stock pressurized basket | Single-wall basket |
|---|---|---|
| Supermarket pre-ground espresso | Good, reliable | Poor, fast and sour |
| Fresh beans, coarse-ish grind | Good | Too fast |
| Fresh beans, fine espresso grind | Chokes the basket | Excellent |
| Very dark oily roast | Bitter, smoky | Heavy, needs care |
My guide to burr vs blade grinders explains why burrs are worth it if you upgrade.
For most people buying the De'Longhi Classic, good pre-ground coffee is a perfectly sensible start.
Our tip: Keep pre-ground coffee in an airtight canister and finish a bag within two weeks for the best stock-basket shots.
Steaming milk with the Panarello wand
The Classic's wand is De'Longhi's familiar Panarello: a sleeve over a rubber nozzle, with small holes that draw in air automatically.
With the sleeve on
This is foolproof foam.
Dip the wand into cold milk, open the side knob, and the milk heats quickly under a thick, bubbly cap.
It's perfect for tall cappuccinos and layered latte macchiatos, where you pour hot foamy milk first and the espresso through it.
What it can't do is make silky microfoam✕MicrofoamMilk foam with bubbles so small you can't see them. It feels silky and pours well for latte art., because the sleeve keeps adding air and the milk never spins properly.
How long it takes
After pressing the steam button, I waited roughly 30 seconds for the steam light to settle.
Steaming about six ounces of milk then took around 45 seconds.
My ratings on a 10-point scale for texture.
For most cappuccino drinkers, the sleeve-on foam is all they'll ever need from the Classic.
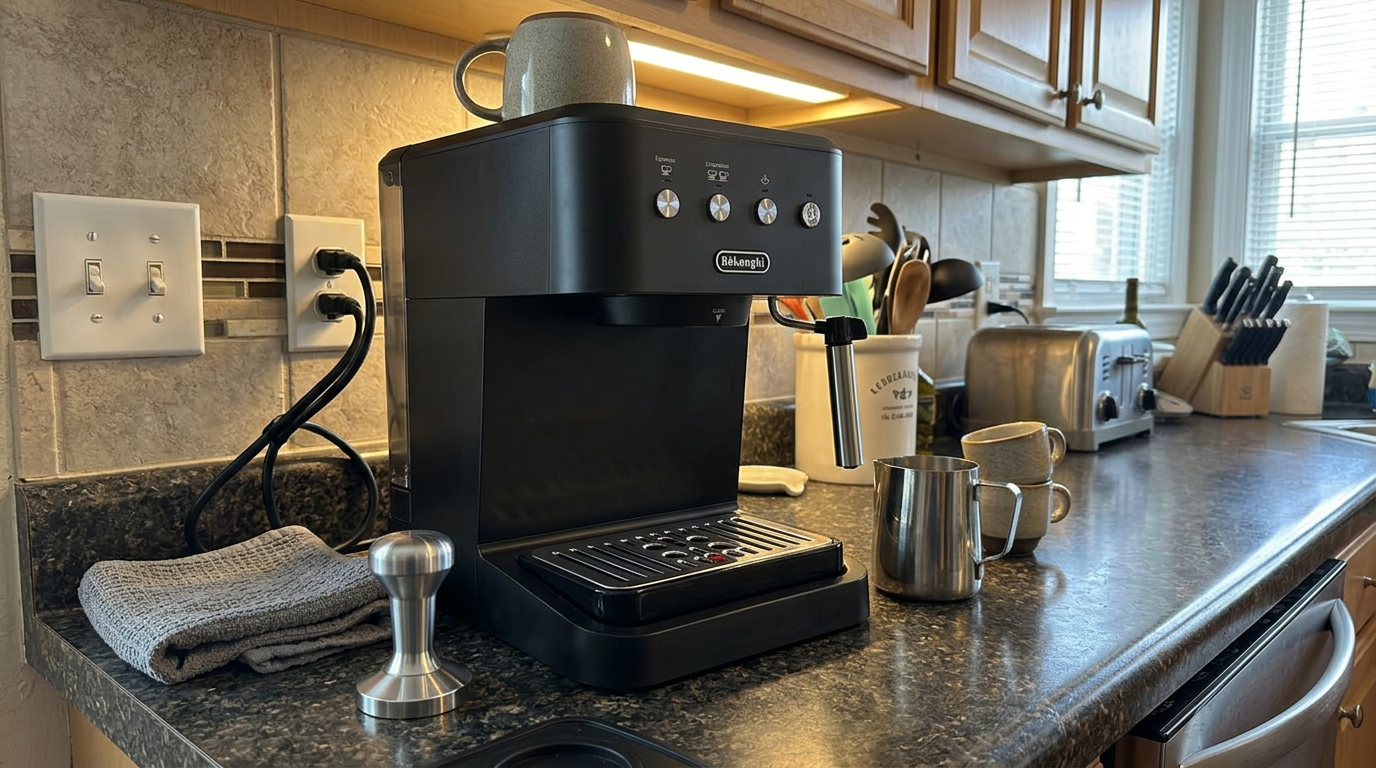
A mug warming on top and a small pitcher ready. The Panarello wand is on the right, with the steam knob on the side.
Better milk: removing the Panarello sleeve
You can get much better milk from the Classic for free.
Twist and pull off the outer Panarello sleeve, and you're left with the inner rubber nozzle, which behaves like a simple manual steam tip.
The catch, and the zip-tie fix
Without the sleeve holding it on, steam pressure can push the rubber nozzle off the metal pipe mid-steam, straight into your milk.
It happened to me on my second try.
The fix is a small four-inch zip tie, pulled tight in the groove at the top of the rubber nozzle and trimmed flush.
After that, the nozzle never moved again.
| Step | What I did | Why |
|---|---|---|
| 1. Remove | Twist and pull off the outer sleeve | Exposes the rubber nozzle |
| 2. Find the groove | Locate the dip near the top of the nozzle | Where the tie sits |
| 3. Tie | Wrap a 4-inch zip tie in the groove and pull tight | Clamps the nozzle on |
| 4. Trim | Cut the tail flush | Neat and safe |
| 5. Steam | Tip just under the surface, off-center | Builds a whirlpool |
The result
With the tip just under the surface and the jug angled, I could stretch the milk briefly, then spin it into glossy microfoam.
By the end of the test, I was pouring hearts and simple tulips.
Our tip: If you remove the Panarello sleeve, secure the rubber nozzle with a zip tie before your first steam.
How I steam milk on the Classic, step by step
| Step | What I do | Why |
|---|---|---|
| 1. Brew | Pull the shot first | It can't brew and steam at once |
| 2. Heat | Press steam and wait for the light | Thermoblock reaches steam temperature |
| 3. Purge | Open the knob briefly over the tray | Clears water from the wand |
| 4. Stretch | Tip just under the surface for a few seconds | Adds air |
| 5. Spin | Sink slightly, angle the jug | Folds bubbles into silky milk |
| 6. Stop | Close the knob when the jug is too hot to hold | Avoids scalding |
| 7. Clean | Wipe and purge right away | Stops milk drying in the nozzle |
With the sleeve on, you can skip steps 4 and 5; just hold the wand in the milk.
Week one vs week three
My milk texture over the test, rated out of 10.
Switching between brewing and steaming
The Classic uses one thermoblock for everything, so it has to change temperature between brewing and steaming.
After a shot, pressing steam meant a wait of about half a minute before the light settled.
Going back to brewing afterwards took a similar pause while the thermoblock cooled.
Time to make two lattes back to back, from switching on, my average.
For one or two drinks a day, it isn't a problem.
For a family making four cappuccinos in a row, the waiting adds up, so I brewed all the shots first and steamed in batches.
Hot water and Americanos
In brew mode, the side knob sends hot water through the wand.
I used it for Americanos most afternoons, adding about five ounces to a double shot.
The stock-basket shots tasted smoother as Americanos, because the water rounded off their slightly flat finish.
| Drink | Water | Notes |
|---|---|---|
| Americano | About 5 oz on a double | Smooth, easy |
| Long black | Water first, shot on top | More aroma |
| Tea | Straight from the wand | Handy for one mug |
| Cup warming | A splash, swirl, pour away | Hotter espresso |
With the Panarello sleeve on, hot water comes out in a softer stream; with it off, it's more of a jet, so use a deeper mug.
How useful is the pressure gauge?
The gauge is one of the Classic's selling points, and it's genuinely rare on a compact De'Longhi.
The dial has no numbers, but the middle of the scale roughly marks the 8 to 9 bar zone you want during a shot.
With pressurized baskets
The needle rises into the middle on nearly every shot, and even during a blank flush with an empty basket.
That's because the basket's single exit hole builds pressure on its own, so the gauge looks good regardless of your coffee.
With a single-wall basket
Here, the manometer✕ManometerA pressure gauge. On espresso machines it shows roughly how much pressure is building during a shot. earns its place.
A needle that barely moved told me my grind was too coarse; one that pinned high told me it was too fine.
| Needle with single-wall basket | What it means | What to change |
|---|---|---|
| Barely moves | Grind too coarse or dose too low | Grind finer, add coffee |
| Steady in the middle | Good resistance | Keep it |
| Pinned high, slow drips | Grind too fine | Go coarser |
| Rises then falls fast | Channeling | Use WDT, tamp level |
Treat the gauge as a guide, and trust taste and shot weight first.
Beans, roast and water
Roast level made a clear difference with both baskets.
Roast level
With the stock baskets, medium and medium-dark blends tasted best: chocolatey, nutty and smooth.
Very dark, oily beans tasted smoky and slightly bitter, and they left more residue in the basket.
With the single-wall basket, medium roasts showed spice and almond notes, and even a light-medium roast was enjoyable.
My guide to coffee roast levels explains the differences.
| Roast | Stock basket | Single-wall basket |
|---|---|---|
| Light | Thin, a little sour | Bright, needs a fine grind |
| Medium | Chocolate and nougat | Spice and almond, my favorite |
| Medium-dark | Bold, smooth | Rich, heavy |
| Dark, oily | Smoky, bitter | Intense, best with milk |
Water
I used filtered water and refreshed the tank every couple of days; the big tank made that easy.
Our tip: Use filtered water to slow scale build-up in the thermoblock and keep the steam strong.
My first-week checklist for new owners
| Day | What to do | Why |
|---|---|---|
| Day 1 | Rinse parts, fill the tank, flush the group and wand | Clean, primed start |
| Day 1 | Use medium-roast pre-ground, about 14 g | Easiest good shot |
| Day 2 | Run a blank shot to warm the portafilter and cup | Hotter espresso |
| Day 2 | Hold the machine when locking in the portafilter | It's light |
| Day 3 | Try a latte macchiato with the Panarello | Plays to its strengths |
| Day 4 | Make an Americano with hot water from the wand | Easy afternoon drink |
| Day 6 | Decide whether you want microfoam | Plan the sleeve removal |
| Day 7 | Consider a bottomless portafilter and single-wall basket | Big flavor upgrade |
What other owners say
Three weeks is a fair test, but I also looked at what other owners and testers report.
The most common praise is for the looks, the compact size, the gauge, the big tank and how easy it is to make a good cappuccino.
Many owners coming from pod machines say it was their first proper espresso machine and an easy one to learn.
The most common complaints are the lightweight portafilter, the stiff Panarello foam and the short wait to switch to steam.
Enthusiasts often mention the same upgrades I tried: a bottomless portafilter, a single-wall basket, and removing the Panarello sleeve with a zip tie on the nozzle.
What that means for you
The Classic is easy and reliable as it comes, and its weaknesses are fixable for little cost.
Cleaning and maintaining the Classic
| When | Task | Why it matters |
|---|---|---|
| After steaming | Wipe the wand and purge | Stops milk drying in the nozzle |
| Daily | Rinse the sleeve if you use it | Milk hides inside |
| Daily | Rinse the portafilter and basket | Removes coffee oils |
| Daily | Empty the drip tray | Prevents odors |
| Weekly | Brush the group head and gasket | Keeps the seal tight |
| Every few months | Descale using the A and B lines | Protects the thermoblock |
Descaling
Fill the tank with descaler to line A, top up with water to line B, and follow the manual's descaling✕DescalingRunning a mild acid solution through the machine to dissolve the mineral scale that builds up from tap water. steps.
It's one of the clearest descaling setups I've seen on a budget machine.
The Panarello sleeve
Milk collects inside the sleeve, so pull it off and rinse it after every milk drink if you keep using it.
My estimate of hands-on cleaning time per day.
What daily use is really like
My weekday routine: switch on, run a blank shot into my cup, dose 14 grams, tamp, brew, then press steam.
A cappuccino took about four and a half minutes from a cold start, including rinsing the wand.
Noise
The pump has a normal buzz during the shot, and the Panarello steam is a soft hiss with the sleeve on, sharper with it off.
Tank life
Rough maths from a 57 oz tank. Actual numbers depend on your cups and purges.
The big tank was a real plus; I refilled it about twice a week.
For a slimmer alternative with stronger steam, see my CASABREWS 5418 PRO review.
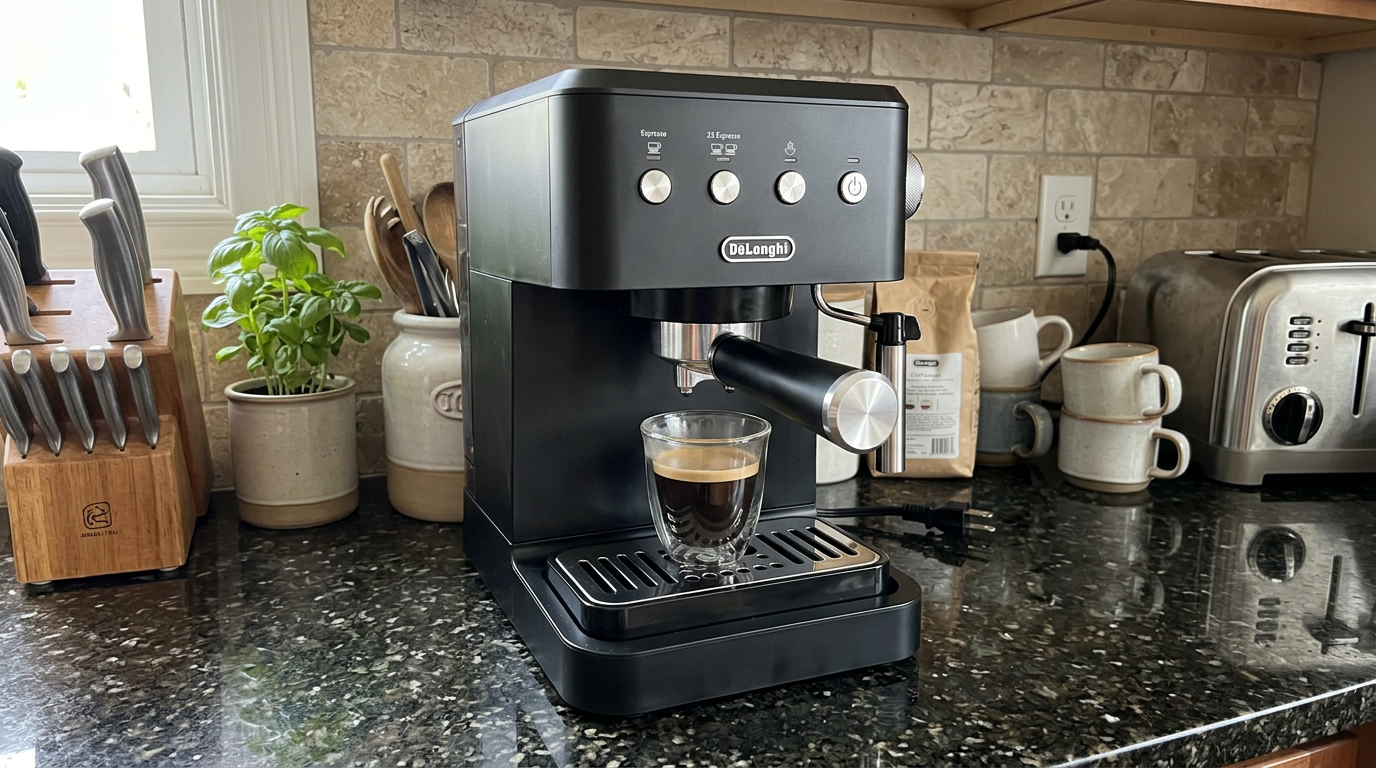
A fresh espresso in a glass cup on the drip tray. The tray insert lifts out for taller glasses.
The drinks I made most often
| Drink | Coffee | How I made it | Notes |
|---|---|---|---|
| Cappuccino | 14 g double, stock basket | Panarello foam, sleeve on | Tall, easy, my early favorite |
| Latte macchiato | 14 g double | Foamy milk first, shot poured through | Pretty layers |
| Flat white | Single-wall basket | Sleeve off, thin silky milk | Best after upgrading |
| Americano | 14 g double | About 5 oz hot water | Smooth afternoon drink |
| Espresso | Single-wall basket, about 32 g out | Fresh beans, WDT | Spice and almond notes |
| Mocha | 14 g double | Cocoa in the cup, Panarello milk | Great for weekends |
The latte macchiato is the drink the Panarello was made for, and it looked lovely in a tall glass.
Once I'd upgraded, the flat white became my daily cup.
Our tip: For a latte macchiato, steam foamy milk into a tall glass first, then pour the shot slowly through the foam to make layers.
Living with it: week one to week three
Week one
I used the De'Longhi Classic exactly as it came: pre-ground coffee, pressurized baskets and the Panarello sleeve on.
Every drink was easy and good, and I learned to grind coarser rather than finer.
Week two
I fitted the bottomless portafilter and single-wall basket, switched to fresh beans and learned to read the gauge properly.
My first upgraded shots were uneven until I started using a WDT tool.
Week three
I removed the Panarello sleeve, zip-tied the nozzle and practiced microfoam.
By the end, I was pouring hearts on my flat whites, on a machine that started the test making stiff cappuccino foam.
How I rated each drink by the end of the test, out of 10.
Build quality
The body is wrapped in metal with a matte black finish that looks and feels smarter than most budget machines.
The top plate holds cups, and the drip tray has a solid metal cover.
The weak point is the stock portafilter: thin aluminum and plastic, very light, and a step down from the proprietary portafilters on older De'Longhi compacts.
It worked reliably for three weeks, with no leaks beyond the odd one from grounds on the rim.
The machine is also light enough to shift on the counter when you twist the portafilter in.
What I liked most, and what bugged me
What I liked most
The look: matte black, compact and smart, with a gauge on the front.
The ease: hot, balanced shots and foolproof foam from day one.
The upgrade path: a common 51 mm fitting that takes cheap bottomless portafilters.
And the tank: 57 ounces meant I rarely thought about water.
What bugged me
The flimsy stock portafilter.
The Panarello's stiff foam until I removed the sleeve.
The rubber nozzle popping off before I zip-tied it.
And the short wait to switch to steam.
Who will enjoy it
If you want an attractive, easy machine for cappuccinos, with room to grow, you'll enjoy the De'Longhi Classic.
If you want premium build and latte-art milk with no tinkering, you'll find it frustrating.
Common mistakes to avoid
| Mistake | What happens | Better habit |
|---|---|---|
| Grinding very fine for the stock basket | Shot chokes, bitter drips | Go coarser |
| Overfilling the basket | Coffee touches the shower screen | About 14 g max |
| Trusting the gauge with pressurized baskets | Always looks perfect | Judge by taste and flow |
| Removing the sleeve without a zip tie | Nozzle blows off into the milk | Zip-tie it first |
| Not holding the machine | It slides when you lock in | Brace it with one hand |
| Skipping descaling | Weaker steam | Use the A and B lines every few months |
What I would change
A heavier portafilter and a single-wall basket in the box would make a big difference.
A manual steam tip option, without needing a zip tie, would welcome latte-art fans.
De'Longhi Classic vs similar budget machines
| Feature | De'Longhi Classic | CASABREWS CM5418 | CASABREWS 5418 PRO |
|---|---|---|---|
| Width | About 8.9 in | About 5.5 in | About 5.5 in |
| Tank | About 57 oz | About 34 oz | About 34 oz |
| Steam wand | Panarello, removable sleeve | Single-hole manual | Single-hole manual, fast |
| Portafilter | 51 mm angled tabs | 51 mm | 51 mm |
| Pressure gauge | Yes | Yes | Yes |
| Best for | Easy cappuccinos, upgrades | Budget lattes | Frequent milk drinks |
If you want a slimmer machine with a manual wand from day one, see my CASABREWS CM5418 review.
If your priority is fast, strong steam, my CASABREWS 5418 PRO review covers the quickest of the three.
The Classic's advantages are its looks, its big tank and the foolproof Panarello foam.
Is the De'Longhi Classic worth the money?
For beginners who want style and simplicity, yes.
You get a smart matte black machine, a working gauge, easy foam, a huge tank and a fitting that takes cheap upgrades.
What you give up is a solid portafilter, silky milk out of the box and quick steam switching.
Ask yourself three questions before you buy.
Do you mostly drink cappuccinos and lattes? Do you use pre-ground coffee? Would you enjoy upgrading later?
If the answers are yes, the De'Longhi Classic is an easy machine to recommend.
If you'd rather learn real espresso from day one, the machine in my CASABREWS Ultra review includes single-wall baskets and a 58 mm portafilter.
How it compares with other entry-level setups
| Feature | De'Longhi Classic | Slim pressurized-basket machine | Machine with single-wall baskets included |
|---|---|---|---|
| Milk | Panarello, easy foam | Manual wand | Manual wand |
| Baskets | Pressurized | Pressurized | Both |
| Tank | Large | Small to medium | Medium to large |
| Upgrade path | Easy, common 51 mm | Varies | Already there |
| Best for | Easy cappuccinos | Budget lattes | Learning real espresso |
| You mostly drink | Is the Classic a fit? | Why |
|---|---|---|
| Cappuccinos | Very good | Foolproof Panarello foam |
| Latte macchiatos | Very good | Tall, foamy milk |
| Latte art | Fair | Remove the sleeve and zip-tie the nozzle |
| Straight espresso, stock | Good | Balanced, a bit flat |
| Straight espresso, upgraded | Very good | Bottomless portafilter, single-wall basket |
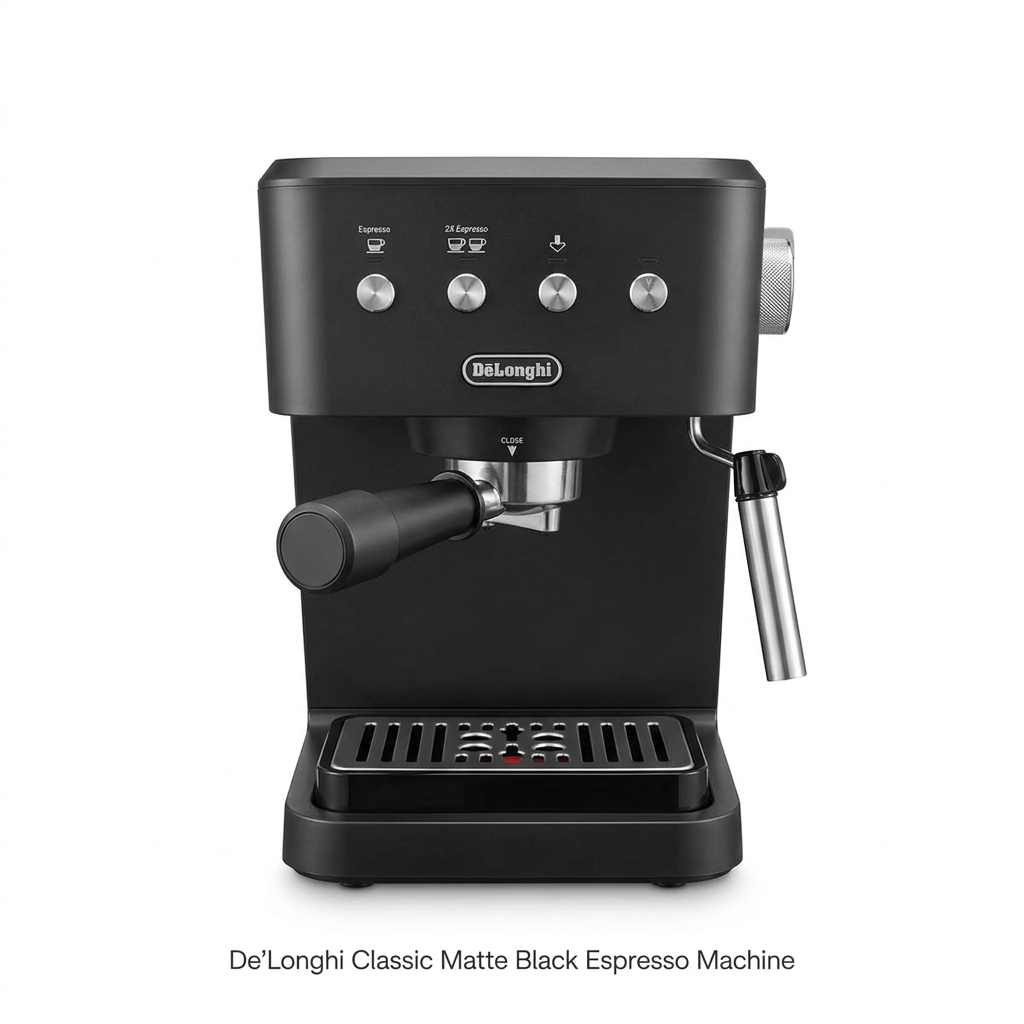
The Classic from the front: one-cup, two-cup, power and steam buttons around the pressure gauge.
Serving guests
For a round of cappuccinos, the Panarello is a real help, because anyone can use it.
A friend who had never touched an espresso machine made her own cappuccino on the Classic after one demonstration.
Four cappuccinos took me about 14 minutes, mostly because of the switch between brewing and steaming.
What helped
I pulled all four shots first, keeping the cups warm on the top plate, then steamed two jugs of milk and split each between two cups.
For Americanos, I simply brewed, topped up with hot water and handed them out one by one.
The big tank meant I never had to stop for a refill, even with six drinks in a row.
Our tip: For guests, use the Panarello sleeve even if you normally remove it; it's faster and anyone can get good foam.
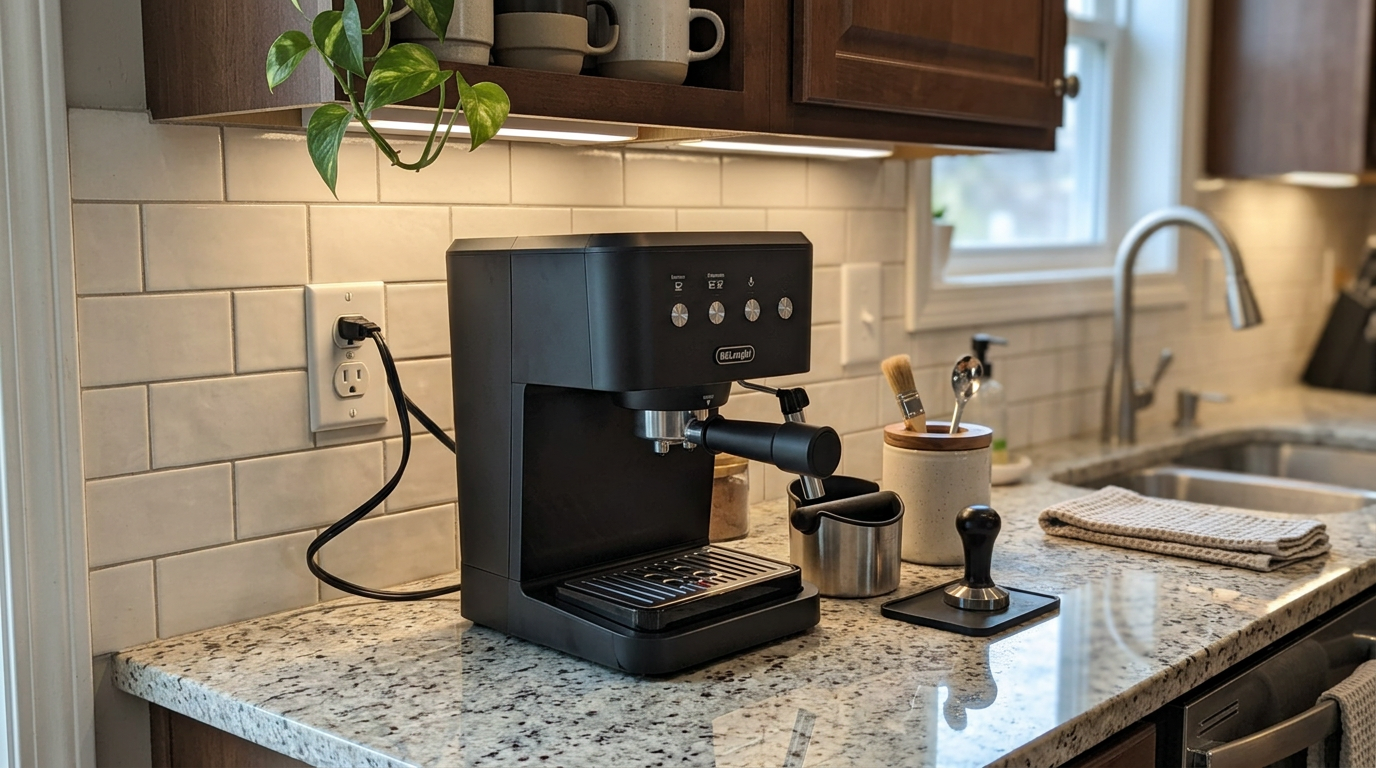
The Classic tucked under my cabinets near the sink, with a tamper ready on its mat.
What to expect long term
Three weeks can't tell you how a machine will age, but some things are predictable.
The thermoblock and pump design are close to De'Longhi's long-running compact machines, which have a good track record when descaled regularly.
The parts most likely to need attention are the ones you handle every day: the group gasket, the rubber steam nozzle and the light portafilter.
Because the portafilter uses a common 51 mm fitting, replacing or upgrading it is easy and inexpensive.
Spare Panarello sleeves and rubber nozzles are widely available too.
| Part | What wears | What I'd do |
|---|---|---|
| Group gasket | Hardens over time | Brush weekly, replace if it leaks |
| Rubber steam nozzle | Can split or loosen | Keep a spare and a zip tie |
| Pressurized basket | Exit hole clogs | Clear it weekly |
| Thermoblock | Scale build-up | Descale every two to three months |
Register the warranty and keep the receipt, as with any appliance.
Which one is right for you: is the De'Longhi Classic your match?
4 quick questionsDe'Longhi Classic specifications
From manufacturer data and my own testing.
How I tested and scored the De'Longhi Classic
For three weeks, I used the De'Longhi Classic as my everyday machine for espresso, cappuccinos, lattes, latte macchiatos and Americanos, usually three or four drinks a day.
For the first ten days, I used it stock, with pre-ground medium-roast coffee in the pressurized baskets and the Panarello sleeve on.
I then fitted a third-party 51 mm bottomless portafilter with a single-wall basket, used freshly ground beans and a WDT tool, and steamed with the Panarello sleeve removed and the inner nozzle secured with a zip tie.
I checked my notes against De'Longhi's specifications, other hands-on reviews and owner feedback.
- Espresso (7.2): crema, body and flavor with stock and upgraded baskets.
- Milk drinks (7.4): foam with and without the Panarello sleeve, wait time and milk types.
- Ease of use (8.0): controls, gauge, tank, setup and learning curve.
- Cleaning (7.4): daily cleaning, wand care, drip tray and descaling.
The overall score of 7.5 is an editorial rating that reflects those four areas.
De'Longhi Classic FAQ
Is the De'Longhi Classic Matte Black worth it?
Yes, for beginners who want a stylish, easy machine. It gets much better with a bottomless portafilter and single-wall basket.
What size is the portafilter?
51 mm, with angled tabs that fit many common third-party 51 mm portafilters.
Are the baskets pressurized?
Yes. They use a single exit hole with a mesh screen inside, which makes them forgiving with pre-ground coffee.
Can I use a bottomless portafilter?
Yes. A third-party 51 mm bottomless portafilter locked in without modification in my testing.
Does the pressure gauge work?
Yes. With pressurized baskets it always reads high, so it becomes far more useful with a single-wall basket.
Can it make latte art?
Not with the Panarello sleeve on. Remove the sleeve, secure the inner nozzle with a zip tie, and you can make microfoam.
Why does the steam nozzle pop off?
Without the outer sleeve, steam pressure can push the rubber nozzle off. A small zip tie in its groove fixes it.
Can it brew and steam at once?
No. It switches the thermoblock to steam temperature, which takes a short wait.
How big is the water tank?
About 57 ounces, roughly 1.7 liters.
What are the A and B lines on the tank?
They mark how much descaler and water to add when descaling.
How much coffee fits in the basket?
About 14 grams fills the double basket close to the top.
Does it make hot water?
Yes, through the steam wand using the side knob.
Kitchen & coffee tester
Michael spent six years as a line cook in restaurants in Chicago and New York, and he has tested kitchen appliances for HouseholdMe since 2018, from air fryers to coffee makers. He holds an SCA certificate in barista skills and used the De'Longhi Classic as his everyday coffee machine for three weeks for this review.
- Three weeks of hands-on testing of the De'Longhi Classic
- De'Longhi product specifications and manual
- Independent hands-on reviews of the Linea Classic EM450
- Owner feedback on upgrades and steaming