CASABREWS Ultra review: a 58 mm, PID-controlled espresso machine that punches above its price
The CASABREWS Ultra Espresso Machine brings features I rarely see at this level: a commercial-size 58 mm portafilter, adjustable PID temperature control, a built-in shot timer and a mostly stainless body. I made it my daily machine for three weeks to see whether those features add up to better coffee.

Michael Reynolds
Hands-on review
Hands-on testing, research, specs
3 weeks
23 minutes
Jargon helpNew to espresso? Tap any dotted term to see what it means.
In this review
Yes, if you care most about espresso and want room to learn. The CASABREWS Ultra gives you a 58 mm portafilter, four brewing temperatures, a shot timer and both single-wall and pressurized baskets, and with a good grinder it made the best straight espresso of any budget machine I've tested recently. The weak spot is milk: one thermoblock means a wait before steaming, and the wand is modest, so lattes take patience. There's no milk pitcher in the box, either.
CASABREWS Ultra at a glance
CASABREWS Ultra pros and cons
- 58 mm portafilter fits standard accessories
- PID with four temperatures and a shot timer
- Single-wall and pressurized baskets included
- Modest steam power
- Wait to switch between brewing and steaming
- No milk pitcher, basic plastic tamper
Who should buy the CASABREWS Ultra?
- Espresso and Americano drinkers
- Beginners who want to learn properly
- People upgrading from capsule machines
- Households making many lattes in a row
- Anyone who wants automatic milk
- People without a decent grinder
First impressions of the CASABREWS Ultra
The Ultra is a different kind of budget machine from the slim models I've tested.
It's wider, heavier and more solid, with brushed stainless panels, angled edges and a small LCD screen on the front.
On my counter, it looked like a machine from a much higher price bracket.
The first thing I picked up was the portafilter, and it's a proper 58 mm portafilter✕PortafilterThe handle with a metal basket that holds the ground coffee. You lock it into the machine to brew. with real weight to it.
In the box, I found four baskets, a 58 mm plastic tamper, a coffee spoon and a cleaning tool, but no milk pitcher.
It warmed up in about a minute.
My first shot, using the double single-wall basket and freshly ground medium-roast beans, ran too fast and tasted sour.
Two grind steps finer, the second shot ran in 28 seconds on the built-in timer and tasted sweet and rounded.
That moment, adjusting, watching the timer and tasting the difference, is what the CASABREWS Ultra is really about.
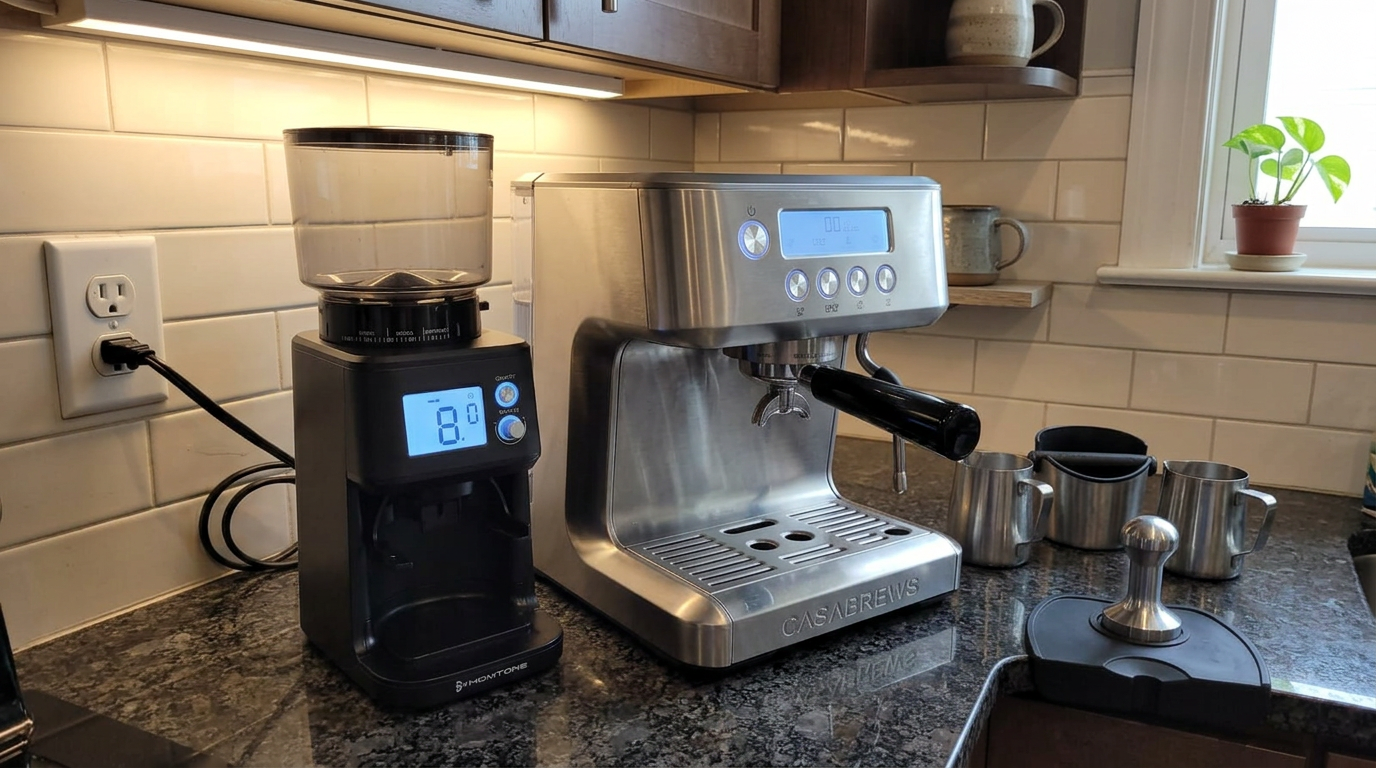
The Ultra next to my grinder. It's wider than the slim budget machines, but still fits under standard cabinets.
What the Ultra actually is
The Ultra is a semi-automatic espresso machine with a manual steam wand and no grinder.
A 20-bar✕BarA unit of pressure. One bar is about the air pressure at sea level. Espresso is usually brewed at around 9 bar at the coffee. pump pushes the water, and a 1,350-watt thermoblock✕ThermoblockA compact heater that warms water as it flows through, instead of keeping a boiler of hot water ready. heats it, with a PID✕PIDA smart temperature controller that keeps brewing water closer to a set temperature than a simple thermostat. controller keeping the temperature on target.
What sets it apart at this level is the combination of features usually spread across pricier machines.
| Item | Details | My verdict |
|---|---|---|
| Portafilter | 58 mm stainless steel | Excellent at this level |
| Single-wall baskets | 1 cup and 2 cup | What I used most |
| Pressurized baskets | 1 cup and 2 cup | Handy for pre-ground |
| Tamper | 58 mm plastic | Usable, worth upgrading |
| Extras | Coffee spoon, cleaning tool | Basic but useful |
| Milk pitcher | Not included | Buy one separately |
The 58 mm size matters more than it sounds: it's the standard in cafés, so tampers, funnels, baskets and distribution tools are easy to find.
Ultra design and build
The Ultra is mostly stainless steel, and it feels it.
The panels are brushed, the edges are angled, and even the underside uses metal parts.
The water tank
At about 74 ounces, the tank is huge for a home machine.
I refilled it every two or three days, even making four or five drinks a day.
The drip tray
The drip tray is large and slides out easily.
When you switch back from steam to brewing, the machine vents water and steam into it, so it fills faster than you'd expect.
The top tray
The flat top holds several cups, and they warm up gently while the machine is on.
Warm cups kept my espresso hot for noticeably longer.
Our tip: Keep your espresso cups on the top tray while the machine warms up; they'll be warm by the time you brew.
Controls, display and shot timer
The control panel is simple, with dedicated buttons for one cup, two cups, hot water and steam, plus power.
The LCD in the middle shows what the machine is doing and, during a shot, counts the seconds.
The shot timer
A built-in shot timer✕Shot timerA clock on the display that counts the seconds of each shot, so you can repeat a recipe. is one of the most useful features any espresso machine can have.
It meant I never needed a phone stopwatch, and I could see straight away if a shot ran fast or slow.
I always counted from the moment the pump started, including pre-infusion✕Pre-infusionA short, gentle wetting of the coffee before full pressure. It helps water soak the puck evenly., and stuck to that so my shots were comparable.
Learning curve
The basics take five minutes to learn.
The hidden functions, programming shot length and changing temperature, use long presses, so keep the manual handy for the first week.
| Button | Short press | Long press (about 5 s) |
|---|---|---|
| One cup | Brews a single | Program single shot time |
| Two cups | Brews a double | Program double shot time |
| Hot water | Hot water from the wand, return to brew mode | Enter temperature setting |
| Steam | Heats for steam | — |
| Power | On or off | Confirms temperature choice |
It's a tidy, logical layout once you know the long-press tricks.
PID and brewing temperature
The CASABREWS Ultra lets you choose between four brewing temperatures: 194, 198, 201 and 205 °F.
To change it, hold the hot water button for about five seconds, choose a setting, and press power to confirm.
Why it matters
Different roasts like different temperatures.
Light roasts are dense and need hotter water to taste sweet, while dark roasts can turn bitter if the water is too hot.
The PID keeps the water close to the setting you choose, so the change is real rather than cosmetic.
| Roast | Setting I used | What changed |
|---|---|---|
| Light | 205 °F | Sweeter, less sour |
| Medium | 201 °F | Balanced, my default |
| Medium-dark | 198 °F | Smoother, less bite |
| Dark | 194 °F | Less bitter, more chocolate |
My flavor ratings out of 10, same dose, grind and shot time.
The differences were clear enough that even a friend who doesn't drink espresso picked the cooler shot as smoother.
Our tip: Start at 201 °F, then go hotter for light roasts and cooler for dark ones.
Single-wall vs pressurized: the four baskets
The Ultra comes with two kinds of basket, which makes it unusually flexible.
Single-wall baskets
The two single-wall basket✕Single-wall basketA basket full of small holes. All the resistance comes from the coffee itself, so grind and tamp matter much more. options are for freshly ground coffee from a grinder that can go fine enough for espresso.
All the resistance comes from the coffee, so grind, dose and tamp matter, but the flavor ceiling is much higher.
Pressurized baskets
The two pressurized baskets✕Pressurized basketA double-wall basket with one tiny exit hole. It builds pressure for you, so even pre-ground coffee makes a foamy crema. look the same from the front, but have a tiny exit hole on the back.
They build pressure for you, so pre-ground coffee still makes a thick crema✕CremaThe golden-brown foam on top of an espresso. It forms when pressure pushes oils and gases out of the coffee..
Swapping them
To remove a basket, pry it out with the edge of another basket or a spoon; to fit one, press it in firmly with your palm.
It takes a few seconds once you've done it twice.
| Basket | Use it when | My result |
|---|---|---|
| Double single-wall | Fresh beans, good grinder | Best espresso, my daily choice |
| Single single-wall | You want a small, short shot | Trickier to dial in |
| Double pressurized | Pre-ground coffee or guests | Bold, consistent, a bit flat |
| Single pressurized | One small drink from pre-ground | Fine, rarely used |
I'd use the single-wall double for daily drinks and keep a pressurized basket for pre-ground decaf in the evening.
Dose, distribute and tamp
With single-wall baskets, prep is where good shots are won or lost.
Dose
The double single-wall basket worked best for me with 17 to 18 grams of coffee.
I weighed every dose✕DoseThe weight of ground coffee you put in the basket, usually measured in grams. on a small scale; a gram either way changed the shot time by several seconds.
Distribute
Freshly ground coffee clumps, and clumps create weak spots that water rushes through.
I stirred the grounds with a WDT✕WDTShort for Weiss Distribution Technique: stirring the grounds with fine needles to break up clumps before tamping. tool for about ten seconds, then gave the portafilter a gentle tap to level it.
A 58 mm dosing funnel on top kept the grounds off the counter.
Tamp
The included plastic tamper is light but does the job if you press straight down.
The key is to keep it level; a tilted tamp makes water favor one side of the puck.
After a week, I switched to a 58 mm metal tamper, and my shots became more consistent.
Clean the rim
Brush stray grounds off the rim before locking in to protect the gasket and avoid leaks.
Ultra espresso performance
This is the Ultra's strongest area.
My recipe
| Setting | My starting point | Notes |
|---|---|---|
| Dose | 18 g | Double single-wall basket |
| Yield | 36 g | A 1:2 brew ratio✕Brew ratioDose compared with yield. A 1:2 ratio means 18 grams of coffee makes 36 grams of espresso. |
| Time | 25 to 30 s after pre-infusion | Watch the on-screen timer |
| Temperature | 201 °F | Adjust by roast |
| Pre-infusion | About 5 s, automatic | Gently wets the puck |
How it tasted
Once dialed in, my medium-roast doubles were rich and syrupy, with caramel sweetness, a bit of fruit and a long finish.
The crema was thick and hazelnut-colored, and it held for well over a minute.
Dark roasts at 194 °F were chocolatey and smooth, without the bitter bite I get from many budget machines.
The pressurized baskets made bold, foamy shots from pre-ground coffee, good for milk drinks but noticeably flatter.
My flavor ratings on a 10-point scale.
| What you taste or see | Likely cause | First change |
|---|---|---|
| Sour, thin | Grind too coarse or temperature too low | Grind finer or go hotter |
| Bitter, harsh | Grind too fine or temperature too high | Grind coarser or go cooler |
| Fast shot, pale crema | Too little coffee | Dose 17 to 18 g |
| Spurting, uneven flow | Clumps or tilted tamp | Stir with WDT, tamp level |
| Very bubbly crema | Beans roasted only days ago | Let beans rest a week |
With fresh beans and a good grinder, the CASABREWS Ultra made better straight espresso than any budget machine I've used recently.
Dialing in the Ultra, step by step
Dialing in✕Dialing inAdjusting grind, dose and shot length until the espresso tastes the way you want. means changing one thing at a time until the shot tastes right.
The Ultra makes this easier than most budget machines because the timer and the temperature control give you two clear dials to turn.
My process
Keep the dose at 18 grams and aim for 36 grams in the cup.
If the shot runs fast and tastes sour, grind finer.
If it runs slow and tastes bitter, grind coarser.
Once the time is right, use temperature to fine-tune the taste.
Shot time on my first morning with a new bag of medium roast.
Attempt three was the keeper, and I only nudged the grind once more that week as the beans aged.
Fresh beans and bubbles
Beans roasted only a few days earlier gave a big, bubbly crema and slightly uneven shots, because they were still releasing gas.
Letting them rest for about a week made the shots calmer and more consistent.
Programming shot length
The one-cup and two-cup buttons brew for a set time, and you can change that time.
To program it, hold the button for about five seconds, press it again to start, then press once more to stop when the shot is done.
The machine remembers that length for next time.
How I used it
I set my double to about 33 seconds, which covered the five-second pre-infusion✕Pre-infusionA short, gentle wetting of the coffee before full pressure. It helps water soak the puck evenly. plus a 28-second shot.
After that, my morning routine was one press and a glance at the scale.
Its limits
The buttons work by time, not by weight, so a change of beans or grind changes the result.
I kept a small scale under the cup and stopped the shot by hand if it reached 36 grams early.
For people who want a repeatable routine, it's a genuinely useful feature; for people who like to watch every shot, the timer on its own is enough.
| Approach | Pros | Cons |
|---|---|---|
| Programmed button | One press, repeatable | Ignores changes in grind |
| Manual stop with a scale | Exact yield | Needs attention |
| Programmed button plus scale | Best of both | An extra tool on the tray |
Steaming milk with the Ultra
Milk is the Ultra's weakest area, though it's far from hopeless.
How it works
Press steam, wait for the thermoblock to heat up, then open the knob.
The wand has a single-hole tip, which is easy to control but not powerful.
What the milk is like
With a 12 ounce pitcher a third full of cold milk, I could get a whirlpool going after about ten seconds and finish in 50 to 60 seconds.
The result was dense, smooth milk that was good enough for hearts and simple tulips once I'd practiced.
With a larger pitcher or more milk, the steam struggled to spin it, and the foam came out stiffer and less even.
Some other testers have found the wand unable to make good microfoam✕MicrofoamMilk foam with bubbles so small you can't see them. It feels silky and pours well for latte art. at all, and I can see why: the technique window is narrow.
My ratings on a 10-point scale for texture and stability.
If you mostly drink lattes, it'll do the job, but it won't be the highlight of the Ultra.
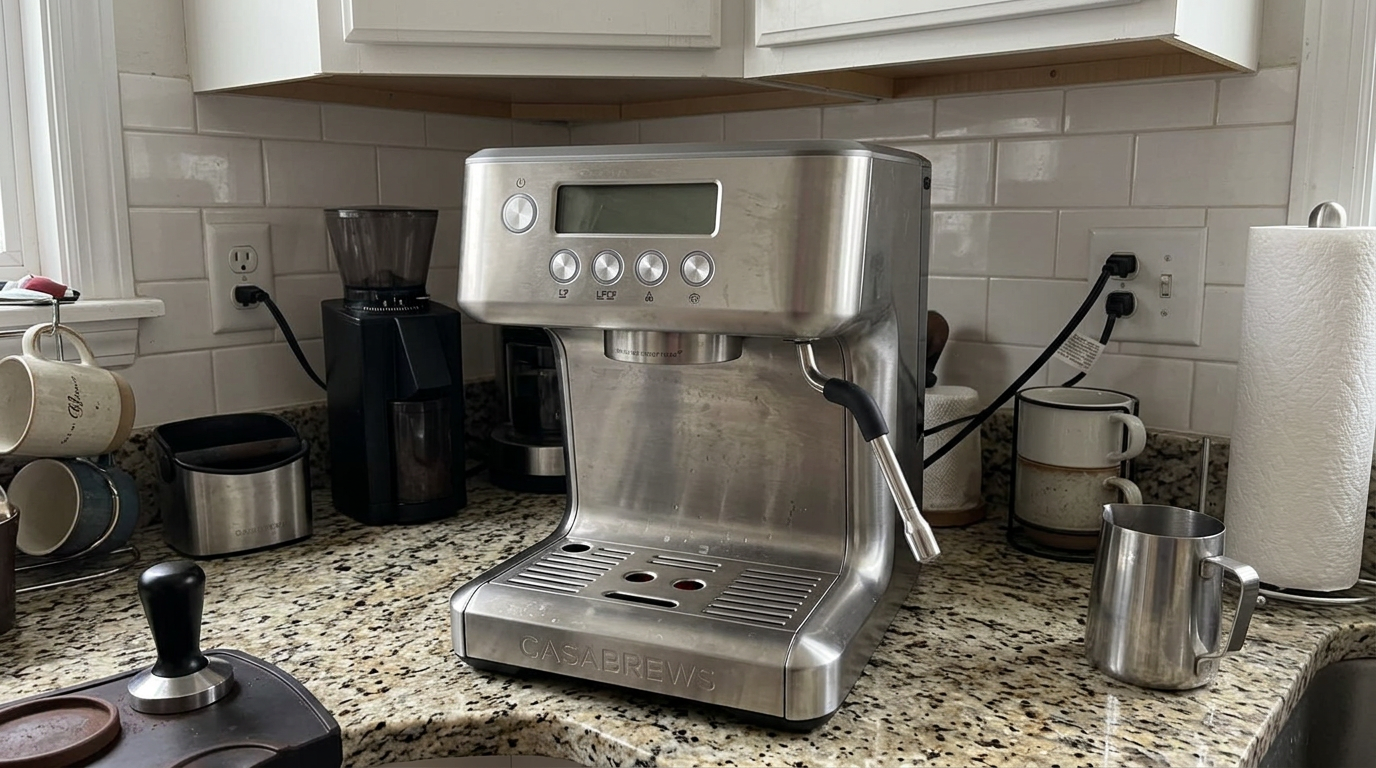
A small steel pitcher makes a big difference with the Ultra's modest steam. You'll need to buy one, as none is included.
How I steam milk on the Ultra, step by step
The Ultra rewards a careful routine more than most machines, so here's mine.
| Step | What I do | Why |
|---|---|---|
| 1. Brew | Pull the shot first | It can't brew and steam at once |
| 2. Heat | Press steam and wait for it to be ready | The thermoblock needs to get hotter |
| 3. Purge | Open the knob briefly over the drip tray | Clears water from the wand |
| 4. Position | Wand near the spout, tip at 3 or 9 o'clock, just under the surface | Sets up the spin |
| 5. Stretch | Hold steady while it hisses | Adds air |
| 6. Lower | When the milk rises about 3/8 inch, sink the tip slightly | Folds foam into the milk |
| 7. Finish | Stop when the jug is too hot to hold, after 50 to 60 s | Avoids scalding |
| 8. Clean | Wipe and purge right away | Stops milk drying on the tip |
The biggest mistake I made was moving the jug around too much.
With modest steam, keeping the jug still let the whirlpool build on its own.
Week one vs week three
My milk texture over the test, rated out of 10.
Our tip: Use a small 12 ounce pitcher and keep it still; the Ultra's steam can't spin a big jug.
Switching between brewing and steaming
The Ultra uses one thermoblock for everything, so it has to change temperature between brewing and steaming.
Shot to steam
After pressing steam, I waited roughly 25 to 30 seconds before the wand was ready.
That's normal for a thermoblock machine, but it means your espresso sits while you wait.
Steam back to brewing
Pressing the hot water button returns the machine to brew mode.
It then vents steam and water into the drip tray as the temperature drops, which is noisy for a few seconds but means you don't have to manage it yourself.
I waited around 30 to 40 seconds before the next shot.
Time to make two lattes back to back, from switching on, my average.
For one or two milk drinks, that's fine.
For a family making four lattes in a row, the waiting adds up, and that's the main reason the Ultra's milk score is lower than its espresso score.
Hot water
The hot water button sends water through the steam wand.
The flow is slow, but it saved me boiling the kettle for Americanos and tea.
How I used it
For an Americano, I brewed a double into a mug and topped it up with about five ounces of hot water.
With the Ultra's sweet, rounded shots, Americanos were one of my favorite drinks on this machine.
I also used it to warm cups when I hadn't left them on the top tray.
| Drink | Water | Notes |
|---|---|---|
| Americano | About 5 oz on a double | Water after the shot keeps the crema |
| Long black | Water first, shot on top | More aroma |
| Tea | Straight from the wand | Slow but handy |
| Cup warming | A splash, swirl, pour away | Hotter espresso |
The hot water button also doubles as the way back to brew mode after steaming, which took me a day to get used to.
How loud is it?
One thing I didn't expect: the CASABREWS Ultra is quieter than most budget machines I've tested.
Its vibration pump✕Vibration pumpThe small, buzzing pump used in most home espresso machines. It pushes water through the coffee in quick pulses. still buzzes during the shot, but it's a lower, softer hum than on the slim machines, and I could talk over it easily.
CASABREWS says there's sound insulation inside, and it shows.
The loudest moments were the steam itself and the short burst of venting when switching back to brew mode.
How loud each moment felt to me, compared with the slim budget machines I've tested.
If you make coffee early while others are asleep, the Ultra is easier to live with than most.
Beans, roast and freshness
With single-wall baskets and PID, the Ultra shows the difference between coffees much more clearly than a pressurized-only machine.
Roast level
Medium roasts were the sweet spot: sweet, fruity and balanced at 201 °F.
Light roasts worked at 205 °F with a fine grind, which is rare at this level.
Dark roasts were best at 194 °F, smooth and chocolatey rather than bitter.
My guide to coffee roast levels explains how roast changes flavor.
Freshness
Beans roasted within the last month, rested for about a week, and ground just before brewing gave the best shots.
Pre-ground coffee only made sense with the pressurized baskets.
Water
I used filtered water and refreshed the big tank every couple of days.
| Coffee | Basket | Result |
|---|---|---|
| Fresh medium roast, rested a week | Single-wall | Best, sweet and syrupy |
| Fresh light roast | Single-wall, 205 °F | Bright, a little tricky |
| Dark roast | Single-wall, 194 °F | Smooth, chocolatey |
| Pre-ground espresso | Pressurized | Bold, a bit flat |
Our tip: Let freshly roasted beans rest for about a week before brewing; the shots become calmer and more even.
My first-week checklist for new owners
These steps got me to good espresso quickly.
| Day | What to do | Why |
|---|---|---|
| Day 1 | Rinse parts, fill the tank, run water through the group and wand | Clean start |
| Day 1 | Start with the double single-wall basket, 18 g in, 36 g out | Best flavor ceiling |
| Day 2 | Leave cups on the top tray while it warms up | Hotter espresso |
| Day 2 | Use the timer and a scale on every shot | Learn what changes what |
| Day 3 | Try 198 and 205 °F with your usual beans | Learn the PID |
| Day 4 | Program the double button to your shot length | One-press mornings |
| Day 5 | Practice steaming in a small pitcher | Better whirlpool |
| Day 7 | Consider a metal tamper and WDT tool | More consistent pucks |
What other owners say
Three weeks is a solid test, but I also looked at what other owners and testers report.
The most common praise is for the 58 mm portafilter, the stainless build, the PID and the shot timer, all features that are rare at this level.
Many owners say it was the machine that finally let them make espresso they'd happily drink straight.
The most common complaints are about milk: modest steam, a narrow technique window and the wait between brewing and steaming.
A few testers had a much harder time getting good microfoam than I did, and some report the machine struggling with pressure when the grind is far too fine.
Owners also mention the missing milk pitcher and the basic plastic tamper.
What that means for you
If espresso is your priority, the strengths are real and consistent.
If lattes are your priority, go in with realistic expectations and a small pitcher.
Cleaning and maintaining the Ultra
Cleaning is straightforward, and the stainless panels wipe clean with a soft cloth.
| When | Task | Why it matters |
|---|---|---|
| After steaming | Wipe the wand, then purge | Stops milk drying inside the tip |
| Daily | Rinse the portafilter and baskets | Removes coffee oils |
| Daily | Empty the drip tray | It fills faster because of venting |
| Every few days | Refresh the tank water | Keeps coffee tasting clean |
| Weekly | Brush the group head and gasket | Keeps the seal tight |
| Weekly | Clear the pressurized basket hole if you use it | Keeps shots flowing |
| Every few months | Descale | Protects the thermoblock and pump |
Descaling
Follow the manual's descaling✕DescalingRunning a mild acid solution through the machine to dissolve the mineral scale that builds up from tap water. steps with a proper descaler every two to three months, more often with hard water.
The steam wand
Wipe the wand with a damp cloth immediately after steaming, then purge✕PurgeOpening the steam wand briefly to blow out water or milk left inside it. it for a second or two.
Milk dries quickly on hot steel, and dried milk inside the tip will weaken the already modest steam.
My estimate of hands-on cleaning time per day.
What daily use is really like
My weekday routine: switch on, grind 18 grams while it warms, stir and tamp, then press my programmed double with a scale under the cup.
For an Americano, that was it: add hot water and go.
A latte added a minute or so for the switch to steam and another minute of steaming.
From a cold start, an Americano took about three minutes and a latte about five.
Tank life
Rough maths from a 74 oz tank. Actual numbers depend on your cup size and purges.
That huge tank is one of the Ultra's underrated strengths; I rarely had to think about water.
If you'd like a machine that grinds for you, my AMZCHEF CM5560 review covers a budget model with a built-in grinder.
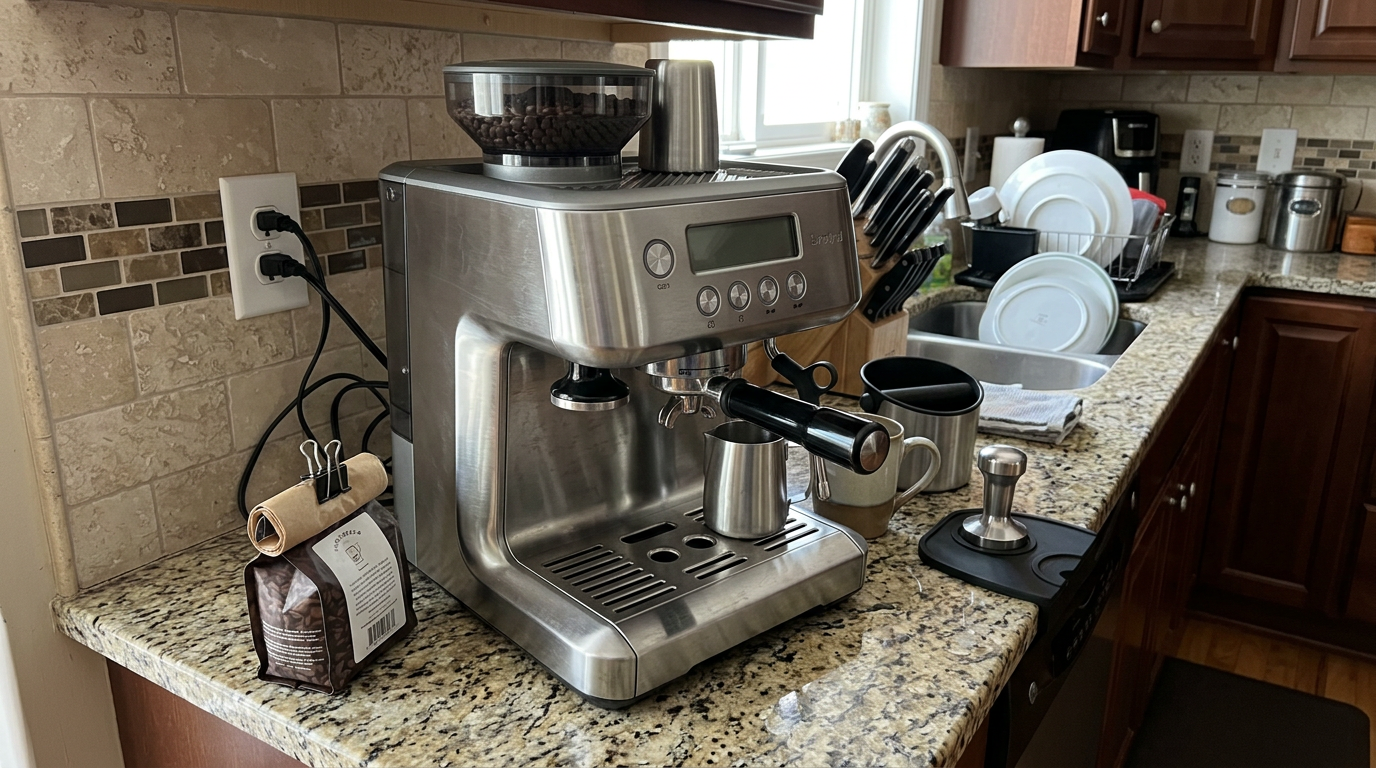
My grinder lived on the top tray for a few days. The big, flat top is handy for cups or small accessories.
The drinks I made most often
These are the recipes I settled on with the double single-wall basket.
| Drink | Coffee | How I made it | Notes |
|---|---|---|---|
| Double espresso | 18 g in, 36 g out | 201 °F, 25 to 30 s | Sweet, syrupy |
| Americano | 18 g double | About 5 oz hot water from the wand | My favorite on this machine |
| Flat white | 18 g double | Thin layer of dense milk, small jug | Shows off the espresso |
| Latte | 18 g double | About 8 oz steamed whole milk | Good, takes patience |
| Cortado | 18 g double | Equal parts milk | Quick, little steaming |
| Iced Americano | 18 g double | Over ice, cold water | Bright with light roasts |
The drinks with little or no milk were consistently the best, which matches the machine's strengths.
A cortado or flat white needs only a small jug of milk, which suits the modest wand perfectly.
Our tip: For milk drinks on the Ultra, choose a flat white or cortado; they need less milk, so the modest steam copes easily.
Living with it: week one to week three
Week one
I learned the buttons, found my grind and tried each basket.
My espresso was good by day three, but my milk was stiff and bubbly all week.
Week two
I explored temperature with light, medium and dark roasts and programmed the shot buttons.
I also switched to a small pitcher and stopped moving it around, and my milk improved quickly.
Week three
I used the CASABREWS Ultra for a busy household, with weekend guests and five drinks a day.
The espresso stayed excellent and consistent, while the wait to steam was the only thing that slowed me down.
How I rated each drink by the end of the test, out of 10.
Serving guests
For espresso and Americanos, the Ultra handled four guests easily, with the big tank and a quick shot every minute or so.
Milk drinks were a different story.
Four lattes took me about 16 minutes, because of the switch to steam, the modest steam power and the venting back to brew mode.
What helped
I pulled all four shots first, kept them warm on the top tray, and steamed two small jugs, splitting each between two cups.
I also suggested flat whites, which use less milk and came out better.
Our tip: For guests, brew all the shots first, then steam once for every two drinks.
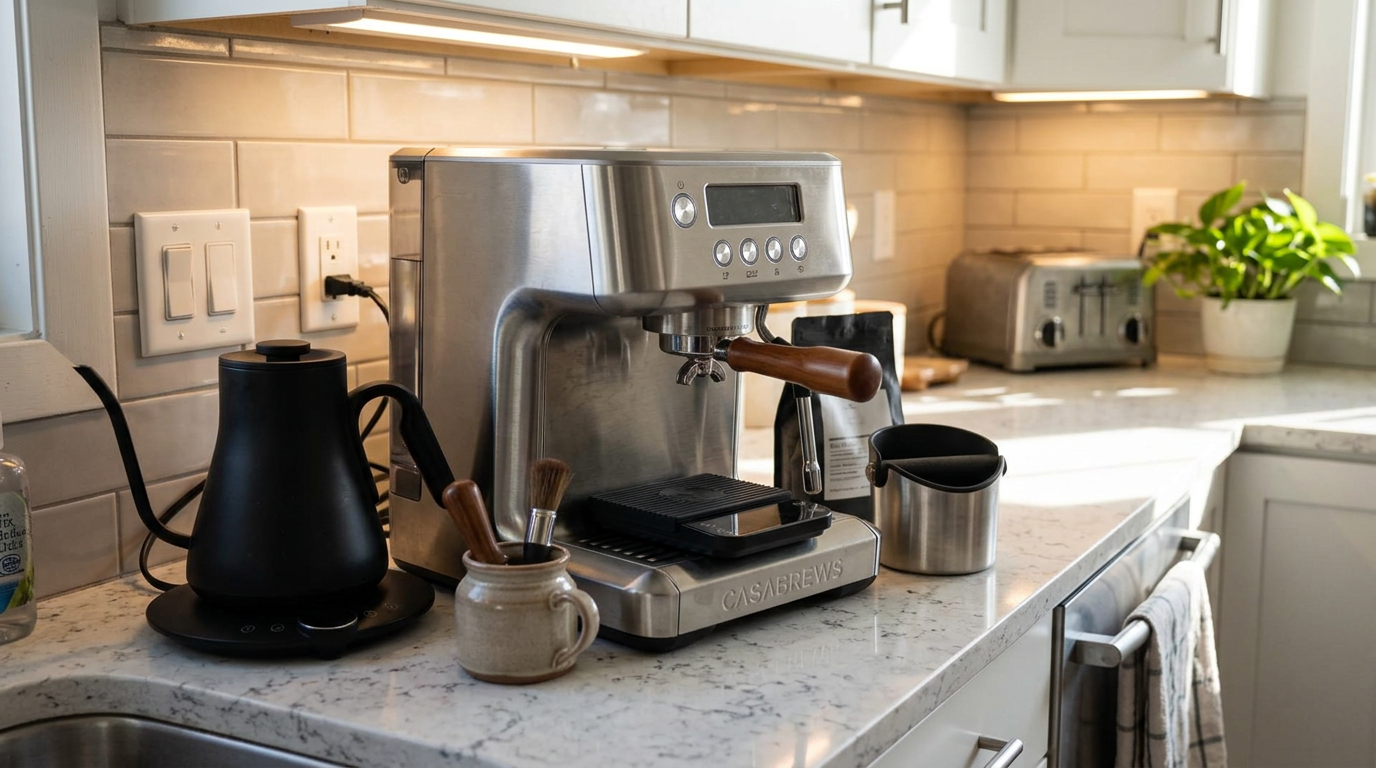
A scale on the drip tray and a kettle nearby: weighing every shot is what makes the Ultra's timer and PID worth having.
Accessories worth adding
The 58 mm size means the Ultra works with the same accessories cafés use, which is a real advantage.
These are the ones that made the biggest difference for me, in order.
| Accessory | Why | Impact |
|---|---|---|
| Burr grinder for espresso | Fine, even grounds for the single-wall baskets | Essential |
| Small stainless milk pitcher | None in the box, small suits the steam | Essential for milk |
| Coffee scale | Weigh dose and yield | Big |
| 58 mm metal tamper | Level, consistent pucks | Medium |
| WDT tool | Breaks up clumps | Medium |
| 58 mm dosing funnel | Less mess when grinding | Small but nice |
A grinder matters most; without one, you're limited to the pressurized baskets and the Ultra's best feature goes unused.
My guide to burr vs blade grinders explains why burrs are the right choice for espresso.
What you can skip
You don't need a bottomless portafilter✕Bottomless portafilterA portafilter with the bottom cut away, so you can see the espresso flow straight from the basket. or fancy distribution tools to get great results.
They're fun once you're hooked, but they won't change much at first.
Build quality and long-term ownership
The Ultra feels sturdier than any other machine I've tested at this level.
The stainless panels are thick enough not to flex, the portafilter is heavy, and the machine stays put when you lock the portafilter in.
The plastic tamper is the only part that feels cheap.
Reliability
Over three weeks of heavy use, I had no faults, and temperature and pressure stayed consistent.
Some owners and testers have reported problems over longer periods, so register the warranty and keep the receipt.
What I liked most, and what bugged me
What I liked most
The espresso: rich, sweet and consistent once dialed in, with real crema.
The 58 mm portafilter: solid, standard and compatible with everything.
The shot timer and PID: they turned guesswork into a simple, repeatable process.
And the details: a huge tank, a quiet pump and a stainless body that looks far more expensive than it is.
What bugged me
The steam is modest, and the technique window is narrow.
Switching between brewing and steaming takes time.
There's no milk pitcher, and the plastic tamper doesn't match the quality of the rest.
And the long-press menus aren't obvious without the manual.
Who will enjoy it
If you love espresso, Americanos and small milk drinks, the CASABREWS Ultra is a brilliant way to learn.
If you live on big lattes, you'll find the milk side frustrating.
Common mistakes to avoid
The Ultra is easy to use, but these habits hold it back.
| Mistake | What happens | Better habit |
|---|---|---|
| Using pre-ground in single-wall baskets | Fast, sour shots | Use the pressurized baskets for pre-ground |
| Changing grind and temperature together | You can't tell what helped | Change one thing at a time |
| Grinding far too fine | Pump struggles, bitter shots | Aim for 25 to 30 s, not 45 |
| Steaming a big jug | Weak whirlpool, stiff foam | Use a small pitcher |
| Moving the pitcher around | Spin never builds | Hold it still |
| Forgetting the drip tray | Overflows after venting | Empty it daily |
| Skipping descaling | Weaker steam and flow | Descale every few months |
What I would change
A stronger steam wand, or faster switching to steam, would fix the Ultra's main weakness.
A metal tamper and a milk pitcher in the box would make it a complete package.
Ultra vs the slimmer CASABREWS machines
CASABREWS makes several machines at this level, and they suit different people.
| Feature | CASABREWS Ultra | CASABREWS 5418 PRO | CASABREWS CM5418 |
|---|---|---|---|
| Portafilter | 58 mm stainless | 51 mm | 51 mm |
| Baskets | Single-wall and pressurized | Pressurized | Pressurized |
| Temperature control | PID, 4 settings | No settings | No settings |
| Shot timer | Yes | No | No |
| Steam | Modest | Strong, very fast to start | Modest |
| Width | About 10.3 in | About 5.5 in | About 5.5 in |
| Best for | Espresso lovers | Frequent milk drinks | Budget lattes, upgrading later |
If milk drinks are your priority, my CASABREWS 5418 PRO review covers the fastest of the three.
If you want the cheapest, slimmest start, my CASABREWS CM5418 review explains how far upgrades can take it.
For straight espresso, the Ultra is the clear pick of the three.
Is the CASABREWS Ultra worth the money?
For espresso lovers on a budget, absolutely.
You get a 58 mm portafilter, PID with four temperatures, a shot timer, four baskets, a huge tank and a stainless body.
What you give up is quick, powerful steaming.
Ask yourself three questions before you buy.
Is espresso or an Americano your main drink? Do you have, or will you buy, a decent burr grinder? Do you have room for a mid-size machine?
If the answers are yes, the CASABREWS Ultra is one of the best-value espresso machines I've tested.
If you'd rather have faster heating and a premium name in a smaller body, my Breville Bambino review is worth reading.
How it compares with other entry-level setups
| Feature | CASABREWS Ultra | Slim pressurized-basket machine | Machine with automatic milk |
|---|---|---|---|
| Portafilter | 58 mm | 51 mm | Varies |
| Baskets | Single-wall and pressurized | Pressurized | Usually pressurized |
| Temperature control | PID, 4 settings | Fixed | Fixed or presets |
| Shot timer | Yes | Rarely | Rarely |
| Milk | Modest manual wand | Manual wand | Automatic |
| Espresso ceiling | Very good | Good | Good |
| Best for | Learning real espresso | Simple lattes | Hands-off milk drinks |
| You mostly drink | Is the Ultra a fit? | Why |
|---|---|---|
| Straight espresso | Excellent | 58 mm, PID and timer |
| Americanos | Excellent | Sweet shots, hot water |
| Flat whites and cortados | Good | Small jugs suit the steam |
| Big lattes | Fair | Modest steam, slow switching |
| Pre-ground only | Fair | Pressurized baskets work, but miss the point |
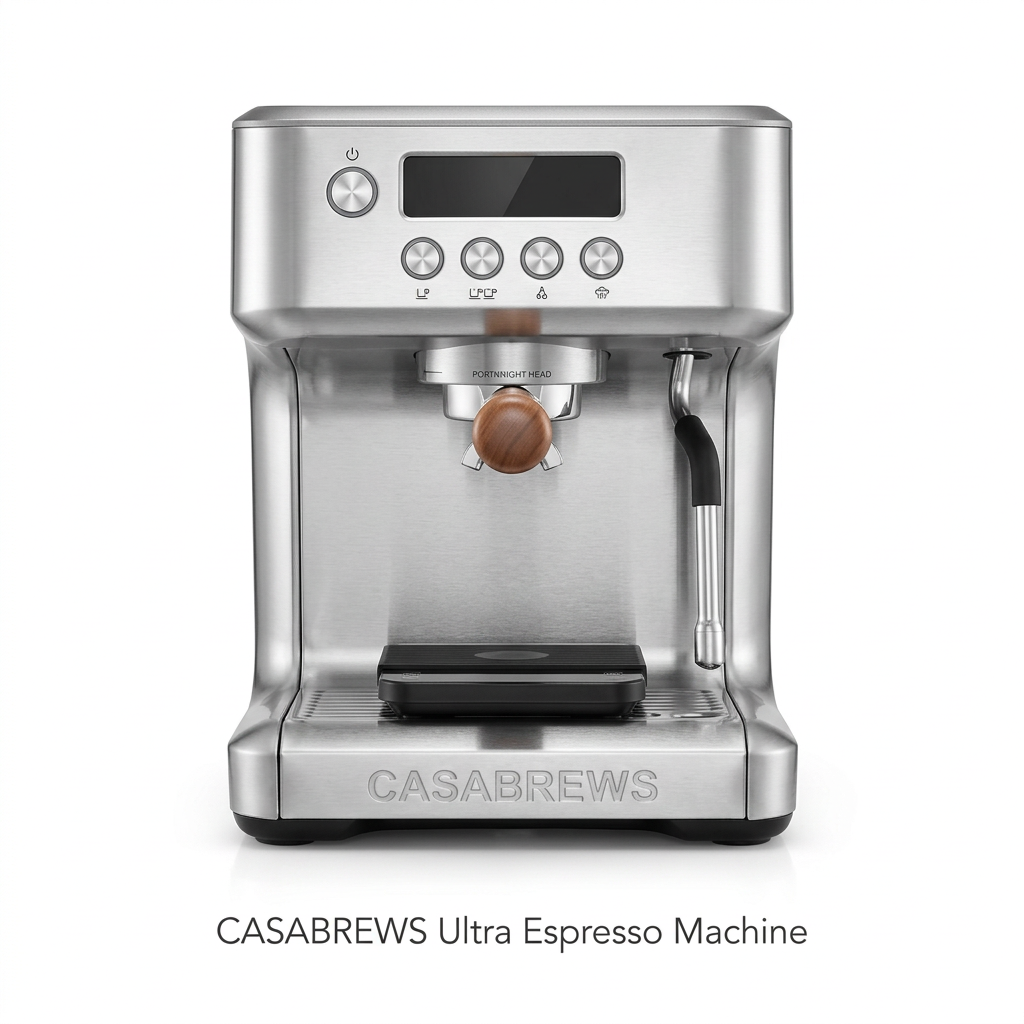
The Ultra from the front: LCD with timer in the middle, buttons around it and the 58 mm portafilter below.
Which one is right for you: is the CASABREWS Ultra your match?
4 quick questionsCASABREWS Ultra specifications
From manufacturer data and my own testing.
How I tested and scored the CASABREWS Ultra
For three weeks, I used the CASABREWS Ultra as my everyday machine for espresso, Americanos, lattes, cappuccinos and flat whites, usually four or five drinks a day.
I used both the single-wall and pressurized baskets, a capable burr grinder, a scale, and all four temperature settings with light, medium and dark roasts.
I timed warm-up, the switch to steam and the return to brewing, and steamed whole, 2% and barista oat milk.
I then checked my notes against CASABREWS' manual and specifications, other hands-on reviews and owner feedback.
- Espresso (8.0): crema, body, flavor and consistency across baskets, roasts and temperatures.
- Milk drinks (6.8): steam power, microfoam, wait time and milk types.
- Ease of use (8.2): warm-up, display, timer, programming and tank size.
- Cleaning (7.6): daily cleaning, drip tray, wand care and descaling.
The overall score of 7.7 is an editorial rating that reflects those four areas.
CASABREWS Ultra FAQ
Is the CASABREWS Ultra worth it?
Yes, if espresso is your priority and you have a decent grinder. Milk-drink fans who make several lattes in a row may prefer a machine with faster steaming.
What size is the portafilter?
58 mm stainless steel, the standard commercial size, so tampers, baskets and funnels are easy to find.
Which baskets are included?
Four: single and double single-wall baskets, and single and double pressurized baskets.
Does it have PID?
Yes. You can choose 194, 198, 201 or 205 °F by holding the hot water button for about five seconds.
Does it have a shot timer?
Yes. The LCD shows the brewing time during every shot.
Can I program the shot length?
Yes. Hold the one-cup or two-cup button for about five seconds, then press it to start and stop timing.
Can it brew and steam at the same time?
No. It has one thermoblock, so it switches between brewing and steaming.
How long does it take to warm up?
About a minute from switching on.
Can it make microfoam?
Yes, with technique and a small pitcher, though the steam is modest and it takes about 50 to 60 seconds.
Is a milk pitcher included?
No. Buy a small stainless steel pitcher separately.
How big is the water tank?
About 74 ounces, roughly 2.2 liters.
Is it loud?
It was quieter than most vibration-pump machines I've tested.
Kitchen & coffee tester
Michael spent six years as a line cook in restaurants in Chicago and New York, and he has tested kitchen appliances for HouseholdMe since 2018, from air fryers to coffee makers. He holds an SCA certificate in barista skills and used the CASABREWS Ultra as his everyday coffee machine for three weeks for this review.
- Three weeks of hands-on testing of the CASABREWS Ultra
- CASABREWS Ultra user manual and product specifications
- Independent hands-on reviews of the Ultra
- Owner feedback on steaming, temperature and reliability