The Science of Steamed Milk: Microfoam, Temperature, Sweetness and How to Steam Like a Barista
Great steamed milk is glossy, sweet and silky, and it turns a good espresso into a great cappuccino or flat white. Behind it is real science: proteins that trap air, fats that shape texture and a temperature window where milk tastes sweetest. I've steamed thousands of pitchers on everything from small single boilers to café machines. Here's how milk foam works and how to make it well every time.
We choose products independently. We may earn a commission through links on this page; your price stays the same. Affiliate policy
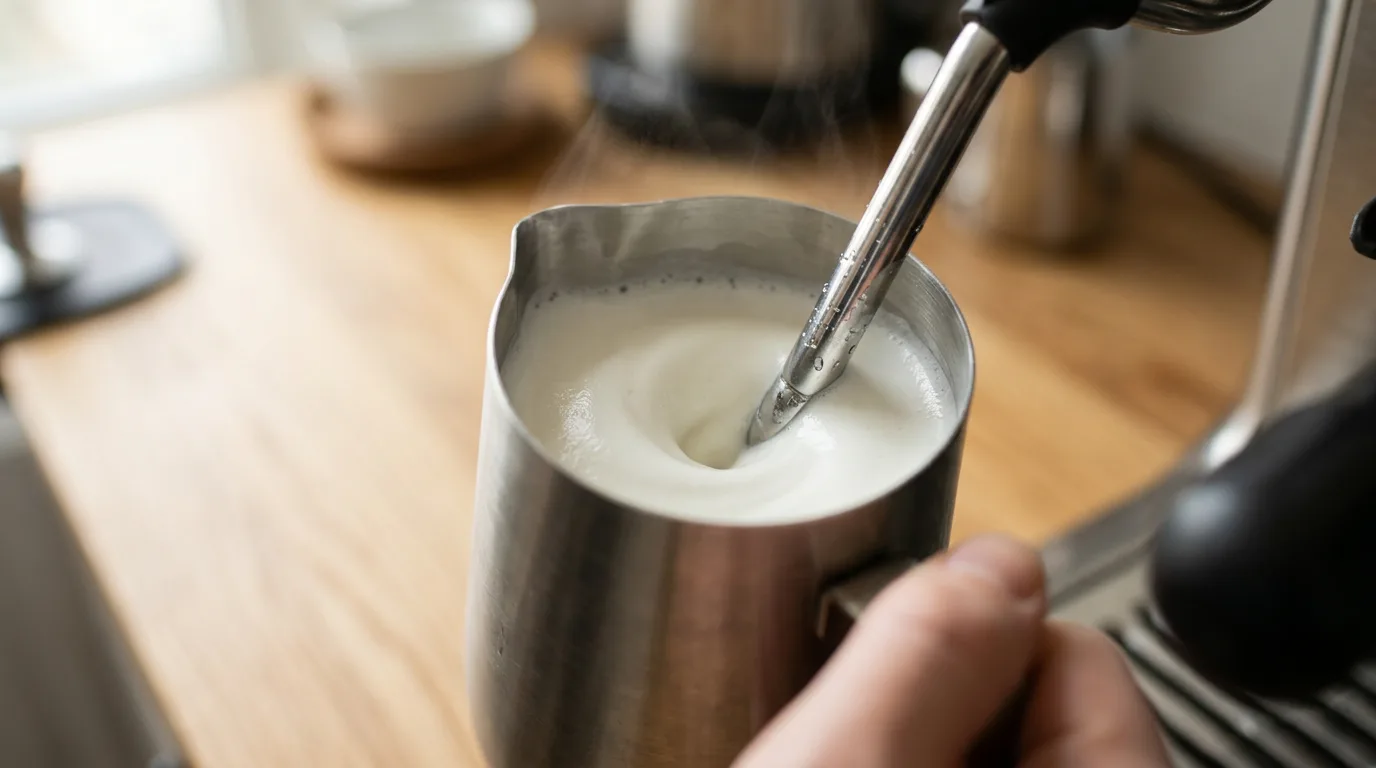
Great steamed milk does three things at once: it adds the right amount of air, breaks that air into tiny bubbles to make silky microfoam, and heats the milk to about 135 to 145°F (57 to 63°C), where it tastes sweetest. Start with cold, fresh milk in a cold pitcher. Stretch the milk with the wand tip at the surface until it grows by 20 to 30 percent for a latte or flat white, or 50 to 80 percent for a cappuccino. Then sink the tip and spin a vortex until the pitcher is too hot to hold, plus a few seconds. Never go above about 150°F, or the milk loses sweetness and turns flat or eggy.
Why steamed milk matters so much
In a latte, milk makes up most of the drink. Even in a small cappuccino, there's more milk than coffee. So the quality of the milk shapes the whole experience as much as the espresso does.
Badly steamed milk is easy to recognize: big bubbles that pop on your lip, a stiff, dry foam that sits on top like shaving cream, or milk so hot it tastes flat and slightly burnt.
Well-steamed milk is different. It's glossy like wet paint, pours smoothly, blends into the espresso, and tastes naturally sweet without any sugar.
Milk also forgives less than espresso does. A slightly sour shot can still make a pleasant latte, but scorched or bubbly milk ruins even the best coffee. That is why so many baristas say the milk is where a good drink is won or lost.
The good news is that steaming is a learnable skill. Once you understand what's happening inside the pitcher, you can make café-quality milk on almost any machine with a steam wand.
A short history of milk and espresso
People have added milk to coffee almost as long as they've drunk it. Viennese coffeehouses served coffee with whipped cream and milk long before espresso existed.
The steam wand arrived with early espresso machines. Steam was already there to push water through the coffee, so it was a natural step to use it to heat milk too.
The cappuccino, with its thick cap of foam, became an Italian breakfast staple in the twentieth century. Later, Australian and New Zealand cafés popularized the flat white, with its thin, silky microfoam.
Latte art grew out of that silkier style. Once baristas could make glossy microfoam consistently, pouring hearts and rosettas became a way to show off milk quality, and a craft of its own.
The three goals of steaming milk
Great steamed milk depends on three things happening at the same time:
- AerationAdding the right amount of air to increase the milk's volume and create foam.
- TexturingBreaking that air into tiny, even bubbles and folding it into the milk, so it becomes silky microfoam rather than a separate layer of froth.
- HeatingBringing the milk to the right temperature, sweet and warm but not scalded.
The steam wand does all three at once, which is why steaming feels tricky at first. The technique below separates them into phases, so you can control each one.
Milk drinks at a glance
| Drink | Foam amount | Volume increase | Texture |
|---|---|---|---|
| Flat white | Very thin layer | About 15-20% | Silky, glossy |
| Latte | Thin layer | About 20-30% | Smooth, pourable |
| Cortado | Minimal | About 10-20% | Silky |
| Cappuccino | Thick layer | About 50-80% | Airy but fine |
| Macchiato | A spoonful | Varies | Light foam |
My guide to cappuccino vs latte vs flat white covers these drinks in more detail.
Equipment: the steam wand
The steam wand is a metal tube that releases pressurized steam through small holes in its tip. The steam heats the milk and, when the tip sits near the surface, draws in air.
Tips vary. One-hole tips release a gentle, focused jet that gives you more time. Two-, three- and four-hole tips release more steam and work faster, which is great on powerful machines but less forgiving for beginners.
Many modern wands are "cool touch," with insulation that keeps the outside from getting hot. That stops milk from baking onto the wand and makes cleaning much easier.
Some entry-level machines use a panarello, a sleeve over the wand that pulls in air automatically. It makes foam easily but tends to produce big, stiff bubbles. If you want silky microfoam, removing the sleeve often helps, if your wand allows it.
Choosing a pitcher
A stainless steel milk pitcher with a spout is the standard tool. Stainless steel transfers heat well, so you can feel the temperature through the side.
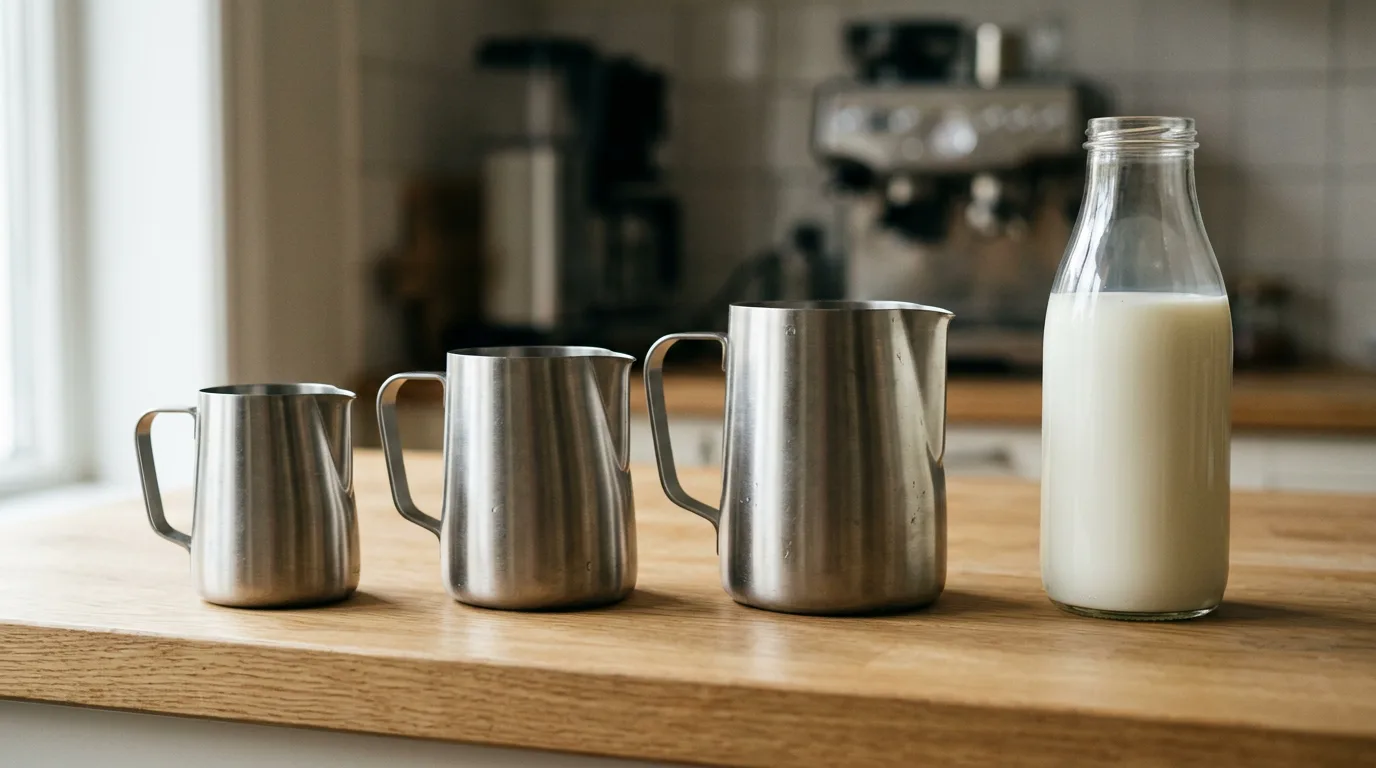
Size matters. A medium pitcher of around 12 ounces comfortably holds enough milk for one 8-ounce drink, or two smaller 5-ounce drinks. A larger 20-ounce pitcher suits two lattes or cappuccinos.
The rule of thumb: fill the pitcher to just below where the spout begins. Too little milk and the wand can't form a vortex; too much and there's no room for the milk to expand.
Our tip: Use the smallest pitcher that fits your drink. Less milk means less waste, and a pitcher that's about one-third full is easiest to control.
Start cold, and purge the wand
Always start with milk straight from the fridge, ideally around 38 to 40°F (3 to 4°C). Cold milk gives you more time to stretch and texture before it gets too hot.
A cold pitcher helps too. Some baristas keep pitchers in the fridge for exactly this reason.
Before you put the wand in the milk, purge it. Open the steam valve for a second or two over the drip tray. This clears out any condensed water sitting in the wand, so you don't dilute your milk, and it confirms full steam pressure is ready.
After steaming, purge again and wipe the wand immediately with a damp cloth, before milk dries onto it.
Step-by-step steaming technique
- Position the wand and pitcherHold the pitcher by the handle, tilt it slightly, and place the wand tip just below the surface, a little off-center toward the side of the pitcher.
- Open the steam fullyTurn the steam valve to full power in one smooth motion. Partial steam makes control harder.
- StretchKeep the tip at the surface so it draws in air with a gentle, paper-tearing hiss. Lower the pitcher slowly as the milk rises.
- TextureOnce you have enough volume, raise the pitcher so the tip sinks slightly below the surface and the milk spins in a vortex.
- Stop at the right temperatureKeep spinning until the pitcher is too hot to hold, then a few seconds more, and close the valve before removing the wand.
- GroomTap the pitcher on the counter to pop any big bubbles, then swirl until the milk looks glossy.
Pitcher and wand position in detail
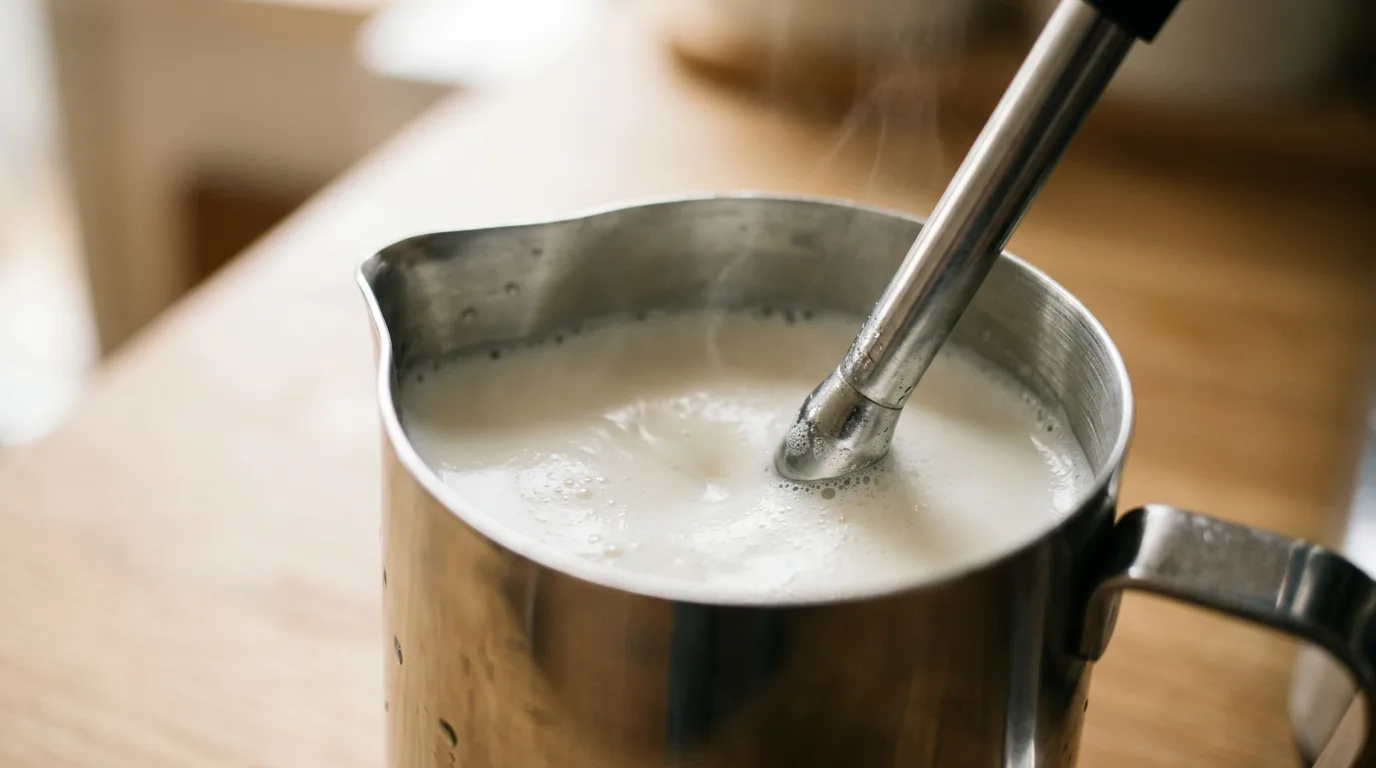
Small changes in position make a big difference to the vortex. Here's what works on most machines.
- Off-center: place the tip about halfway between the center and the edge of the pitcher, so the steam pushes the milk around the wall.
- Slight tilt: tilt the pitcher a little toward you to help the milk roll.
- Spout against the wand: many baristas rest the spout lightly against the wand to keep the angle steady.
- Depth: just below the surface for stretching, a little deeper for texturing, never touching the bottom.
Once you find a position that spins well on your machine, keep it the same every time. Consistency in position is the fastest route to consistent milk.
Stretching: adding air
Stretching is when you introduce air. With the tip just at the surface, the steam pulls air into the milk, and you'll hear a soft, steady hiss, like paper tearing.
How long you stretch decides how much foam you get:
- Thick, foamy cappuccino: keep the tip at the surface until the milk's volume grows by roughly 50 to 80 percent.
- Silky flat white or latte for latte art: stretch much less, only about 20 to 30 percent, for a thin, glossy layer.
Do all your stretching early, while the milk is still cold. Proteins form stable foam best at lower temperatures, and air added late tends to create big, loose bubbles that won't integrate.
Loud screeching means the tip is too deep. Big gulping or spitting means it's too high. Aim for a calm, rhythmic hiss.
Texturing: the churning vortex
Once you've added enough air, raise the pitcher slightly so the tip sits just below the surface. The hissing stops, and the milk should start spinning in a smooth whirlpool.
This vortex is where the magic happens. It breaks large bubbles into tiny ones and folds the foam evenly through the milk. The result is microfoam: milk and air combined so finely that the surface looks shiny and smooth, with no visible bubbles.
Positioning is everything. Place the tip a little off-center and angle the pitcher so the steam pushes the milk around the wall. If the milk bounces or splashes instead of spinning, adjust the angle slightly until it rolls.
Our tip: Watch the surface, not the wand. When the milk is rolling smoothly and the foam is disappearing into it, your angle is right.
Listening to the milk
Experienced baristas steam as much by ear as by sight. Each sound tells you where the wand is and what it's doing.
- A soft, steady hiss like tearing paper: perfect stretching.
- Loud slurping or spitting: the tip is too high, pulling in big gulps of air.
- A high screech: the tip is too deep, or the milk is getting very hot.
- A quiet, low rumble: the tip is submerged and the vortex is texturing the milk.
When I was learning, closing my eyes for a few seconds during stretching helped me focus on the sound. It's a surprisingly effective way to find the right depth.
Temperature control: knowing when to stop
You don't need a thermometer to steam milk well. Your hand is a surprisingly reliable gauge.
Keep your free hand flat against the side of the pitcher while you steam. When the metal becomes too hot to keep your hand on comfortably, the milk has reached roughly 122 to 131°F (50 to 55°C).
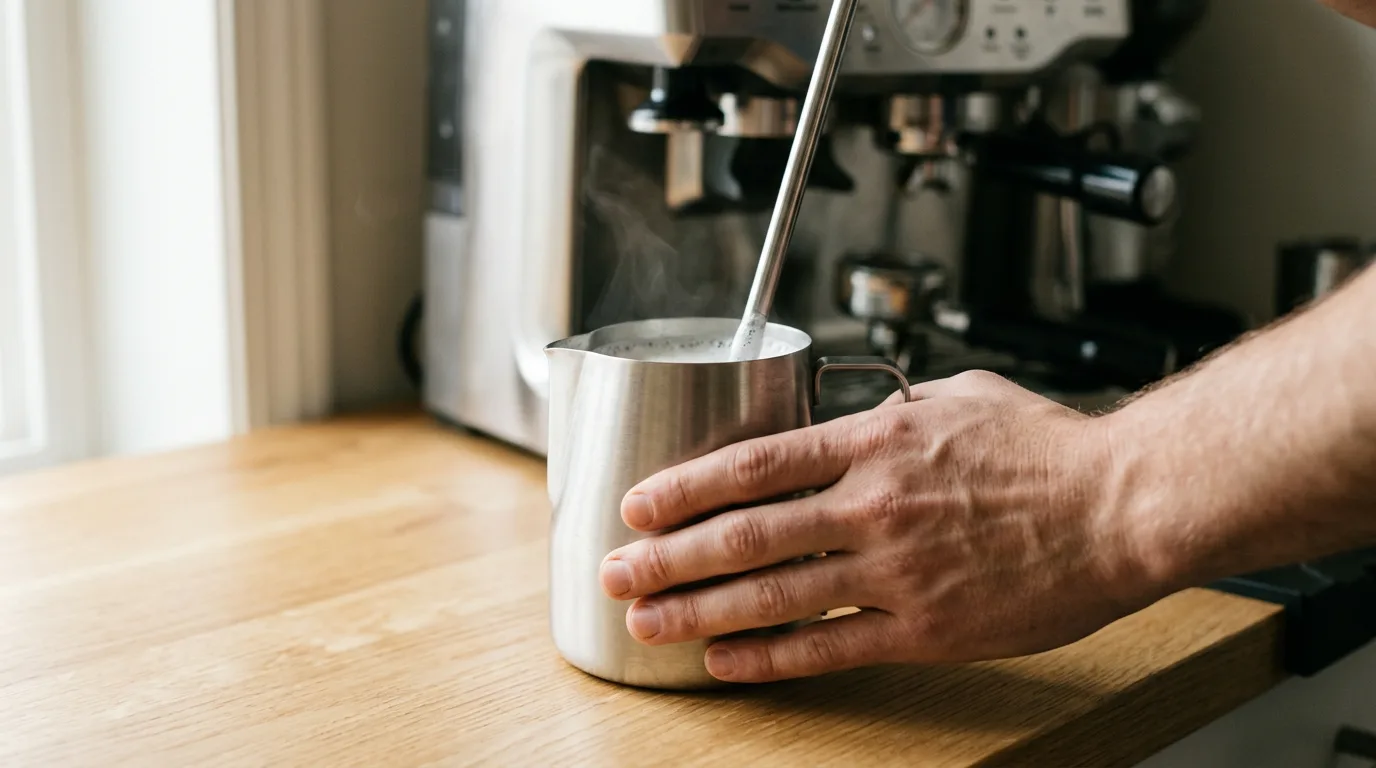
Keep steaming for about three to four seconds after that point and you'll reach around 140°F (60°C), the sweet spot for most drinks.
If you like your drink hotter, go two or three seconds more for a ceiling of about 149°F (65°C). Beyond that, quality drops quickly.
A clip-on thermometer is useful while you learn to calibrate your hand. Just remember that thermometers lag behind the actual milk temperature, so stop a few degrees before your target.
Grooming: resting, tapping and swirling
Steaming doesn't end when you close the valve. A few seconds of grooming turns good milk into great milk.
- Purge and wipe the wand right away.
- Tap the pitcher firmly on the counter once or twice to pop any visible bubbles.
- Swirl the milk in small circles so the foam stays combined with the liquid. It should look glossy, like wet paint.
- Pour soon. If milk sits, foam separates and rises. Keep swirling until you pour.
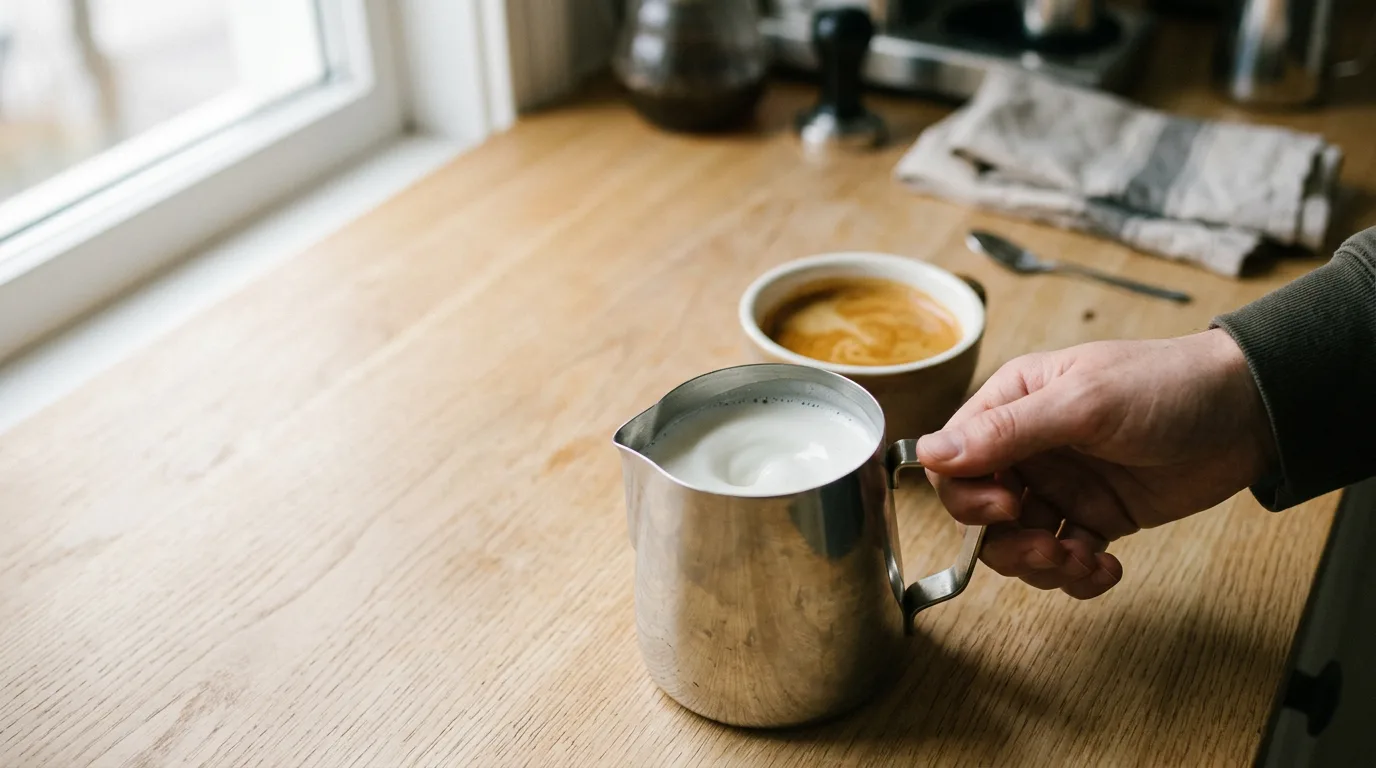
If you have extra foam on top, you can scoop a little away with a spoon for a flat white, or keep it for a cappuccino.
Steaming for two drinks at once
Making two milk drinks from one pitcher saves time, but the foam tends to separate between the first and second pour.
- Use a bigger pitcher with enough room for the milk to expand.
- Stretch a little more than for a single drink, because some foam is lost while you pour the first cup.
- Swirl continuously between pours to keep foam and milk combined.
- Split smartly: pour half into a second pitcher, then pour each drink from its own pitcher for better art.
For a cappuccino and a latte from one pitcher, pour the latte first, while the milk is most fluid, then the cappuccino with the foamier remainder.
Practice without wasting milk
Learning to steam can use a lot of milk. A classic barista trick is to practice with water and a drop of dish soap.
Fill the pitcher with cold water, add a tiny drop of washing-up liquid, and steam it exactly as you would milk. The soap lets the water foam, so you can practice positioning, stretching and creating a vortex without wasting anything.
It won't behave exactly like milk, and you obviously won't drink it, but it's excellent for building muscle memory. Rinse the wand thoroughly afterward.
Another trick is to practice with the same milk twice: steam it, let it cool completely in the fridge, then use it for cooking. It saves money while you learn the motion.
Choosing dairy milk
Not all dairy milk behaves the same in a pitcher.
- Whole milk: the best balance of foam, sweetness and body. My default for every drink.
- Semi-skimmed: foams easily, lighter body, slightly less sweet.
- Skimmed: lots of dry, stiff foam with little flavor.
- Lactose-free: the lactose is split into simpler sugars, so it often tastes sweeter. It usually steams well.
- Barista or high-protein milks: some dairies sell milk tuned for steaming, with stable foam and consistent texture.
- Ultra-pasteurized milk: long shelf life, but heat treatment can make foam slightly less stable and add a cooked note.
Seasonal changes matter too. The protein and fat in milk vary through the year with the cows' diet, which is why your milk might steam slightly differently in summer and winter.
The science: proteins as foam builders
Why does milk foam at all? The answer lies mainly in its proteins.
Milk contains two main protein groups: caseins and whey proteins. When air is introduced, these proteins act as surfactants. They move to the boundary between air and liquid and partly unfold, forming a thin, elastic film around each bubble.
That film keeps the bubbles from merging and popping. The more evenly the proteins coat small bubbles, the more stable and silky the foam.
Heat plays a role too. Gentle warming helps the whey proteins unfold and stabilize the foam. But too much heat damages them, which is one reason overheated milk produces weak, collapsing foam.
This is also why low-protein milks foam poorly, and why barista versions of plant milks add proteins or stabilizers to imitate dairy's behavior.
The role of fat
Fat has a big effect on texture and flavor, but it actually makes foaming harder.
Fat molecules interfere with the protein film around bubbles, so high-fat milk produces less foam and slightly weaker structure. Skim milk, with almost no fat, foams up huge and stiff, but the foam is dry and short-lived, and it tastes thin.
Whole milk sits in the sweet spot for most baristas. It foams well enough to make beautiful microfoam, and its fat gives a rich, creamy, rounded mouthfeel that carries espresso flavors.
How milk type affects foam and body (my experience)
Semi-skimmed milk falls in between: easier foam than whole milk, but less body and sweetness.
Fat also carries flavor. Many aroma compounds in coffee dissolve in fat, so a little milk fat helps the chocolate and caramel notes of espresso linger on the palate. That is one reason a whole milk flat white tastes richer than the same drink made with skimmed milk, even when the foam looks similar.
Cream sits at the other extreme. It is so rich in fat that it barely foams with a steam wand, which is why classic cream-topped coffees use whipped cream rather than steamed foam.
Milk freshness and fat breakdown (lipolysis)
Have you ever noticed milk that won't foam properly even though it isn't sour? Often the cause is lipolysis.
Over time, and especially when milk is warmed and cooled repeatedly or shaken a lot, enzymes break fats into free fatty acids. These compounds interfere with the protein film and stop bubbles from forming stable foam. They can also add a faintly soapy or rancid taste.
That's why fresh milk foams best, and why re-steaming leftover milk rarely works well.
- Use fresh milk, well within its date.
- Keep it cold and return it to the fridge right after use.
- Don't re-steam milk that has already been heated.
- Pour only what you need into the pitcher.
Temperature and sweetness
Milk contains lactose, a natural sugar. How sweet it tastes depends heavily on temperature.
Our taste buds perceive sweetness most strongly around body temperature, about 98.6°F (37°C). As milk gets much hotter, perceived sweetness drops.
A drink served scorching hot at 170°F will taste flat and slightly bitter compared with one served at 135 to 140°F. It's the same milk with the same lactose; the heat simply hides the sweetness.
There's a practical bonus too: a drink at 140°F is ready to sip almost immediately, while one at 170°F has to cool for minutes before you can drink it. By then, the foam has started to collapse.
Why overheated milk tastes cooked or eggy
Once milk passes roughly 154°F (68°C), its proteins begin to break down permanently, a bit like an egg white turning solid in a pan.
Above that temperature, sulfur-containing compounds in the proteins break apart and release a distinct cooked or eggy aroma. That's the "burnt milk" smell many people associate with bad café coffee.
The foam also suffers. Damaged proteins can't hold bubbles as well, so the foam becomes thin, bubbly and quick to collapse.
This is why "extra hot" drinks are a compromise. If you like hotter coffee, warm your cup instead, and keep the milk below about 150°F.
| Temperature | What happens |
|---|---|
| Under 100°F | Best for adding air; milk still cold |
| 122-131°F | Pitcher too hot to hold |
| 135-145°F | Sweet spot: sweet, silky, ready to drink |
| Up to 149°F | Hot drinks, slightly less sweet |
| 154°F+ | Proteins break down, cooked flavor |
Plant-based milks
Plant milks steam very differently from dairy because their protein and fat content varies so widely. Standard versions often have little protein and plenty of water, so they foam poorly and separate quickly.
Barista editions solve much of this with added plant proteins, oils and stabilizers that mimic dairy's foam-building behavior.
- Oat milk steams most like whole milk and is the easiest for latte art.
- Soy milk foams well thanks to its protein but can curdle in acidic coffee.
- Almond milk tastes lovely but is harder to steam and best kept cooler.
- Coconut milk is light and thin, with decent foam in barista versions.
Most plant milks prefer slightly lower temperatures, around 130 to 140°F, to avoid curdling or bitterness. My guide to plant-based milks in coffee compares them in detail.
Troubleshooting: steam pressure vs steam flow
If your milk heats up too fast to texture properly, or takes forever, the issue is usually steam power.
If milk reaches 145°F in just five or six seconds, you don't have enough time to add air and spin a vortex. If it takes a minute, you'll over-aerate or lose patience.
Understanding pressure vs flow
- Steam pressure is set by the boiler, usually around 1.0 to 1.5 bar (about 14.5 to 22 psi) on most machines.
- Steam flow is how much steam actually leaves the tip, set by the tip's hole size and number.
Two machines with the same boiler pressure can steam very differently because of their tips. A four-hole tip on a powerful machine is fast; a one-hole tip on the same machine gives you more time.
If steaming is too fast, try a tip with fewer or smaller holes, or a larger pitcher with more milk. If it's too slow, try a bigger tip, a smaller amount of milk, or make sure the machine has fully reached steam pressure.
Cold foam and iced milk drinks
Not all milk foam is hot. Cold foam, popular on iced coffees and cold brew, is made without steam.
The same science applies: proteins wrap around air bubbles. Without heat, though, foam forms more slowly and is less stable, so cold foam is usually made with a handheld frother, a French press plunged quickly, or a dedicated cold-foam device.
Skim and low-fat milk make the most stable cold foam because fat interferes less. Many people add a little sweetener or cream for flavor and body.
For iced lattes, you don't need foam at all. Pour cold milk over ice and espresso, or shake them together for a lighter, frothier texture. My guide to iced coffee vs cold brew covers iced drinks more broadly.
Steaming on different machines
Single boiler machines
Steam is gentler and pressure drops as you go. Start with very cold milk and a small pitcher, and switch to steam mode early so the boiler is fully ready.
Heat exchanger and dual boiler machines
Steam is strong and steady. Milk heats fast, so stretch early and decisively. These machines make silky microfoam easy once you're comfortable with the speed.
Thermoblock machines
Steam can be wetter and weaker. Purge well, use less milk, and be patient.
Automatic milk systems
Super-automatic machines and automatic wands handle temperature and foam for you. They're consistent but usually produce airier foam than a skilled hand.
My guide to espresso machine types explains how boiler design affects steam.
How milk changes the taste of espresso
Milk doesn't just dilute espresso; it changes how we perceive it.
Milk fat coats the tongue and softens bitterness. Proteins can bind with some bitter and astringent compounds. Lactose adds gentle sweetness. Together, they turn sharp or bitter espresso notes into chocolate, caramel and toffee.
This is why many cafés use slightly darker, chocolatey blends for milk drinks. Bright, fruity light roasts can taste wonderful in milk too, often like strawberry milkshake or berry yogurt, but some disappear under a big latte.
The ratio matters. A cortado or flat white keeps espresso front and center; a large latte makes the drink mostly about the milk. If your coffee tastes lost, try a smaller drink or a slightly stronger shot.
Small tools that help
- A clip-on thermometer to calibrate your hand while you learn.
- A dedicated wand cloth, damp and kept only for the steam wand.
- Two pitchers so you can split milk for two drinks or practice pouring.
- A latte art pen for fine details once you've mastered the basics.
- A milk jug with a sharp spout for more precise latte art.
None of these are essential, but each one makes good milk a little easier and more consistent.
If you only buy one, choose the thermometer. A week of checking your hand against it is usually enough to steam accurately by touch for good.
Milk for latte art
Latte art needs a specific texture: microfoam that's fluid enough to pour, with just enough foam to hold a design on the surface.

- Stretch modestly, about 20 to 30 percent.
- Texture thoroughly so no bubbles are visible.
- Swirl until glossy right up to the pour.
- Pour high, then low: start a few inches above the cup to sink the milk under the crema, then lower the spout close to the surface to draw the design.
Thick cappuccino foam is too stiff for detailed art. Thin, under-stretched milk sinks without a trace. The sweet spot takes practice, but once you find it, simple hearts and tulips come quickly.

Keeping the steam wand clean
A clean wand is essential for good milk and for hygiene.
- Purge before steamingClears condensed water.
- Wipe immediately afterA damp cloth reserved only for the wand removes milk before it dries.
- Purge againBlows out milk that may have been drawn back into the tip.
- Soak the tip regularlyUse a milk-system cleaner and clear the tip holes with a pin if needed.
Milk residue inside the wand spoils quickly and affects the taste of every drink. It takes ten seconds to prevent and much longer to fix.
How I learned to steam milk
My first months of steaming produced what I'd now call milk soup with a hat: hot liquid milk with a stiff layer of big bubbles on top.
The breakthrough came from two changes. First, I started doing all my stretching in the first few seconds, while the milk was still cold. Second, I focused on getting a smooth vortex rather than worrying about the foam.
Within a couple of weeks, the milk started to look glossy. My first recognizable heart followed soon after. Today it's the part of making coffee I enjoy most.
If you're struggling, be patient with yourself. Everyone goes through the milk soup phase.
Consistency is the real secret
Once you can make good milk, the next step is making it the same way every time. Use the same pitcher, the same amount of milk and the same wand position. Start cold, stretch for the same few seconds, and stop at the same feel of heat in your hand.
That consistency is what lets you pour reliable latte art and make drinks that taste the same every morning. It is also what makes problems easy to spot: when something changes, you will know it is the milk, the machine or the coffee, not your technique.
Steamed milk troubleshooting
| Problem | Likely cause | Fix |
|---|---|---|
| Big bubbles | Tip too high, air added too late | Lower the tip slightly; stretch early only |
| No foam | Tip too deep, old milk | Bring tip to the surface; use fresh milk |
| Stiff, dry foam | Too much air, poor vortex | Stretch less; texture longer |
| Screeching | Tip too deep or milk too hot | Raise tip slightly; check temperature |
| Milk tastes flat or eggy | Overheated | Stop around 140°F |
| Foam separates quickly | Not enough texturing or swirling | Longer vortex; swirl before pouring |
| Heats too fast | Very strong steam | Smaller tip or more milk |
Steamed milk glossary
Common mistakes
- Starting with warm milk. You lose precious stretching time.
- Adding air too late. Hot milk makes big, unstable bubbles.
- Overheating. Past about 150°F, sweetness and foam quality drop.
- Too much or too little milk. Fill to just below the spout.
- Re-steaming leftovers. Reheated milk rarely foams well.
- Not purging the wand. Water dilutes milk, and dried milk is unhygienic.
- Letting milk sit. Swirl and pour quickly.
Myths about steamed milk
"Hotter coffee is better coffee"
Milk tastes sweetest well below scalding. Hotter drinks taste flatter and wait longer before you can drink them.
"Skim milk makes the best foam"
It makes the most foam, but it's dry and short-lived. Whole milk makes better microfoam.
"More foam means a better cappuccino"
A great cappuccino has fine, velvety foam, not a stiff dome of big bubbles.
"You need a café machine for good milk"
Technique matters more than power. Good microfoam is possible on most home machines with a real steam wand.
The bottom line
Steamed milk is a small piece of food science you can master at home. Proteins trap air, fat adds richness, and temperature decides sweetness.
Start with cold, fresh milk. Stretch early and just enough for your drink. Spin a smooth vortex to make silky microfoam. Stop around 140°F, then tap, swirl and pour.
Do that consistently and your lattes, flat whites and cappuccinos will taste sweeter, feel silkier and look far better.
Remember that every machine and every pitcher behaves a little differently. The numbers in this guide are starting points, not rules carved in stone. Pay attention to the sound, the look of the surface and the feel of the pitcher in your hand, and adjust until the milk looks like wet paint.
Once that becomes second nature, you can start playing with milk types, cup sizes and latte art designs. That is when steaming stops being a chore and becomes one of the most satisfying parts of making coffee at home.
Frequently asked questions
What temperature should steamed milk be?
About 135 to 145°F (57 to 63°C). Avoid going above about 150°F.
Why does my steamed milk have big bubbles?
The wand tip is usually too high, or you're adding air after the milk is already warm.
What's the best milk for steaming?
Fresh whole milk gives the best balance of foam, sweetness and body.
Can I steam milk twice?
It's not recommended. Reheated milk foams poorly and can taste cooked.
How much should milk expand when steaming?
About 20 to 30 percent for lattes and flat whites, 50 to 80 percent for cappuccinos.
Why does overheated milk smell eggy?
Above about 154°F, proteins break down and release sulfur compounds.
How do I practice steaming without wasting milk?
Steam water with a tiny drop of dish soap to practice positioning and the vortex.
Which plant milk steams best?
Barista oat milk behaves most like whole milk.

- Michael Reynolds, years of steaming milk at home and behind the bar
- Milk, Wikipedia
- Casein, Wikipedia
- Whey protein, Wikipedia
- Latte art, Wikipedia
Related guides
Cappuccino vs latte vs flat white Plant-based milks in coffee compared Espresso machine types explainedWritten by Michael Reynolds. Last updated November 20, 2026.