Breville Bambino Plus review: hands-free milk, café-quality shots and a 3-second heat-up in a compact machine
The Breville BES500BSS Bambino Plus Espresso Machine takes the tiny Bambino and adds an automatic steam wand with temperature and foam settings, a bigger tank and a three-way valve. It makes excellent espresso and genuinely silky milk with almost no skill, but it needs a good grinder, the tamper is plastic and the drip tray fills fast.

Michael Reynolds
Hands-on review
Hands-on testing, research, specs
3 weeks
21 minutes
Jargon helpNew to espresso? Tap any dotted term to see what it means.
In this review
Yes, if you want café-quality espresso and silky, hands-free milk from a compact machine. The Breville Bambino Plus heats up in about 3 seconds, pulls rich, balanced shots and textures milk automatically with three temperature and three foam levels. You still need a good grinder, the plastic tamper deserves an upgrade, and the drip tray needs emptying often, but it's the easiest way I know to make a proper flat white at home.
Breville Bambino Plus at a glance
Breville Bambino Plus pros and cons
- Automatic steam wand makes silky milk hands-free
- Rich, balanced espresso with steady temperature
- Ready in about 3 seconds, with a drier puck
- Needs a good burr grinder for its best shots
- Plastic tamper feels cheap for the price
- Drip tray fills quickly and needs frequent emptying
Who should buy the Breville Bambino Plus?
- Daily latte and flat white drinkers
- Households where one person tinkers and another wants it easy
- Small kitchens that still want café-quality milk
- Anyone without a capable espresso grinder
- People who want everything at one button
- Buyers who want a heavy, all-metal build
First impressions of the Breville Bambino Plus
The Bambino Plus looks almost identical to the regular Bambino from a distance.
Same brushed stainless front, same compact footprint, same 54 mm group head.
The difference shows up the moment you look at the right-hand side.
There's a steam wand above a small metal plate, with buttons for milk temperature and foam level.
That plate is a temperature sensor, and it's what turns the Breville Bambino Plus into a hands-free milk machine.
My first shot, with fresh beans ground fine, was dark, glossy and sweet, with a thick hazelnut crema✕CremaThe golden-brown foam on top of an espresso. It forms when pressure pushes gases and oils out of freshly ground coffee..
My first latte was the real surprise.
I set the jug on the plate, pressed one button and walked away.
Forty-odd seconds later the wand stopped, purged itself, and the milk in the jug was glossy and smooth, like wet paint.
I've spent years learning to steam milk by hand, and this machine matched my everyday results on the first try.
The Bambino Plus beside my grinder. The grinder matters as much as the machine.
What the Bambino Plus actually is
The Bambino Plus is a semi-automatic espresso machine with an automatic steam wand.
You grind, dose and tamp the coffee into the portafilter✕PortafilterThe handle with a metal basket that holds the ground coffee. You lock it into the machine, and hot water is pushed through the coffee inside it., lock it in and press a shot button.
For milk, you can let the machine steam automatically or swing the wand out and steam by hand.
The parts that matter
Breville's ThermoJet✕ThermoJetBreville's fast heating system. It heats only the water needed for the next step, so the machine is ready to brew or steam in about 3 seconds. heating system is ready to brew in about 3 seconds.
PID control holds the brew temperature steady, and every shot starts with low-pressure pre-infusion✕Pre-infusionA short, gentle soak at low pressure before full pressure kicks in. It wets the whole coffee puck first, so water flows through it more evenly. before rising to about 9 bar.
A three-way solenoid valve✕Three-way solenoid valveA valve that releases leftover pressure after a shot and sends it to the drip tray. It leaves a drier puck and lets you remove the portafilter straight away. releases leftover pressure after the shot, so the puck comes out drier and you can knock it out straight away.
What's in the box
| Item | Details | My verdict |
|---|---|---|
| Portafilter | 54 mm | Solid, standard size |
| Baskets | Single-wall and dual-wall, 1 and 2 cup | Use single-wall with a good grinder |
| Tamper | Plastic, 54 mm | Works, but upgrade it |
| Razor dosing tool | Trims the puck to height | Useful for consistency |
| Milk jug | Stainless steel | Sized for the sensor plate |
| Cleaning tools | Steam tip tool and cleaning disc | Handy for maintenance |
Bambino Plus vs the regular Bambino
If you're choosing between the two, here's what the Plus adds.
I tested both back to back, and you can read my full Breville Bambino review for the smaller model.
| Feature | Bambino Plus (tested) | Bambino |
|---|---|---|
| Steam wand | Automatic, with manual option | Manual only |
| Milk settings | 3 temperatures, 3 foam levels | None |
| Auto purge after steaming | Yes | No |
| Three-way solenoid valve | Yes | No |
| Water tank | About 64 oz | About 47 oz |
| Heat-up | About 3 s | About 3 s |
| Espresso quality | Excellent | Excellent |
The espresso is essentially the same: same heating, same pressure, same 54 mm portafilter.
What you're paying for is the milk system, the drier puck and the bigger tank.
If you drink milk drinks most days and don't want to learn a steam wand, the Plus is worth it.
If you drink mostly espresso, or you already enjoy steaming by hand, the regular Bambino gives you the same shots for less.
Bambino Plus design and setup
The Bambino Plus is built around a small footprint.
The water tank
The removable tank holds about 64 ounces, which is big for a machine this size.
It sits at the back and has a clear max line.
The controls
Buttons on the front cover one-cup and two-cup shots, steam and hot water.
Separate buttons on the right set milk temperature and foam level, with little lights to show your choice.
I didn't need the manual after the first morning.
The sensor plate
The jug sits on a small metal plate under the wand.
It reads the jug temperature and stops steaming when the milk reaches your chosen setting.
Cup clearance
Espresso cups and smaller cappuccino cups fit under the spouts easily.
Tall mugs don't, so I brewed into a small cup and poured into my mug.
First-time setup
Setup took about 10 minutes: rinse the tank and jug, fill the tank, flush water through the group and the wand, then pull two blank shots.
Our tip: Flush a blank shot through the empty portafilter each morning to warm the group and your cup.
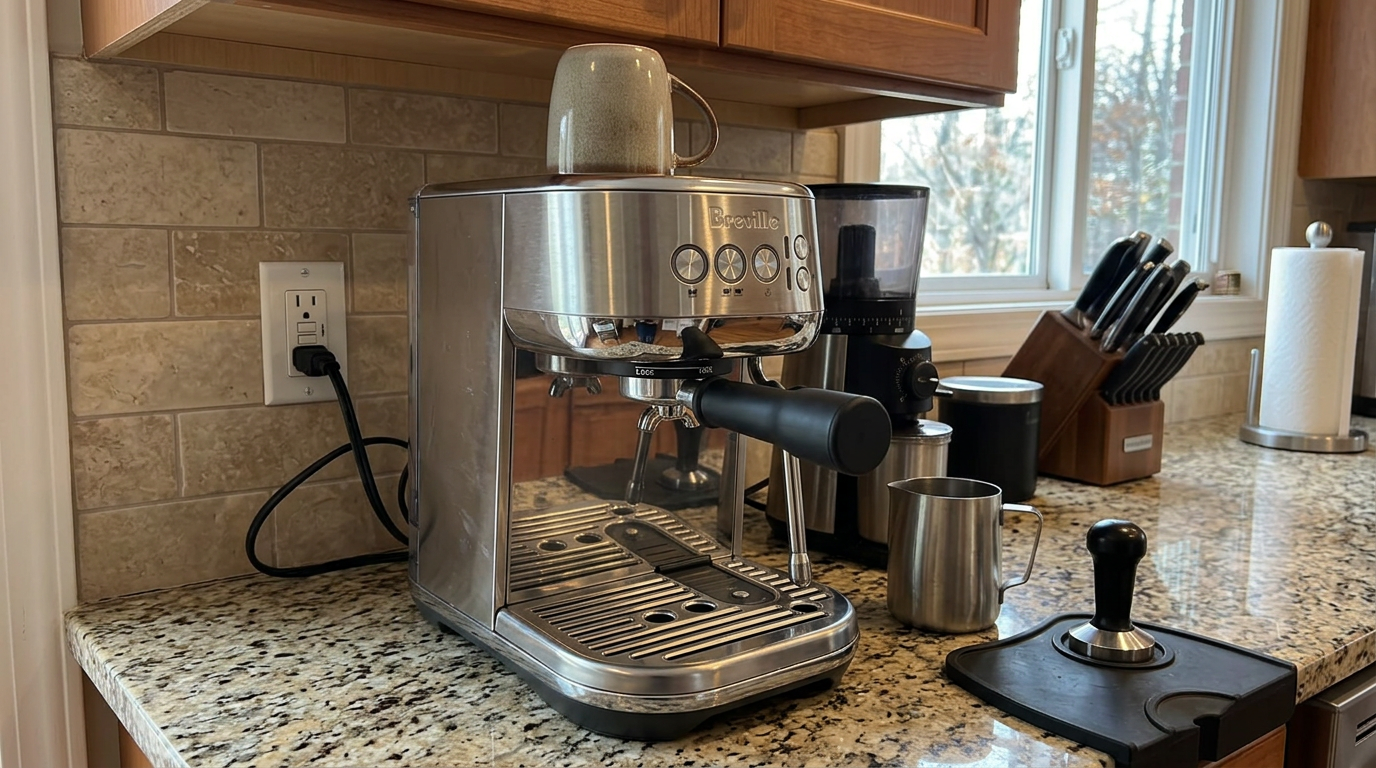
The milk jug sits on the sensor plate, which tells the machine when to stop steaming.
Grind, dose and tamp
The Bambino Plus has no grinder, and the grinder you pair it with decides how good your espresso can be.
With the single-wall baskets✕Single-wall basketA basket full of small holes. All the resistance comes from the coffee itself, so grind and tamp matter more, but flavor is clearer and more complex., the machine is honest: good beans and a fine, even grind give great shots, and anything less shows up immediately.
Dose
Start with 18 grams in the double basket.
I weighed every dose for the first week, which made dialing in far quicker.
The Razor tool
After tamping, the Razor dosing tool✕Razor dosing toolA flat-bladed trimming tool. After tamping, you twist it across the basket to shave off excess coffee, so the puck sits at the right height every time. trims the puck to the right height.
It's a small step, but it made my doses more consistent from day to day.
Tamp
The included tamper is plastic and a little light.
It works, but I got flatter, more even pucks with a 54 mm metal tamper, and a spring-loaded tamper would make it even more consistent.
For more on grinders, see my guide to burr vs blade grinders.
Bambino Plus espresso performance
With a good grinder, the Bambino Plus makes espresso that holds up against far bigger machines.
How it tasted
With a medium-dark blend, 18 grams in and about 36 grams out in 28 seconds, my doubles were rich and balanced.
I tasted dark chocolate, brown sugar and a light, ripe-fruit sweetness.
The crema was thick and long-lasting, and the shots were consistent from morning to morning.
Pressure and temperature
The machine brews at about 9 bar, the classic espresso pressure.
Bigger numbers on other machines' boxes don't mean better coffee; steady pressure and temperature do.
PID control kept back-to-back shots tasting the same.
The three-way valve
After every shot, the valve released pressure into the drip tray with a little hiss.
The puck came out firm and fairly dry, and I could remove the portafilter straight away.
My flavor ratings on a 10-point scale with the same machine and beans.
| What you taste or see | Likely cause | First change |
|---|---|---|
| Sour, thin, fast | Grind too coarse | Grind finer |
| Bitter, slow, dark | Grind too fine | Grind slightly coarser |
| Sour and bitter together | Uneven tamp | Level the bed, tamp straight |
| Watery, pale crema | Stale beans or low dose | Fresh beans, 18 g |
| Wet, muddy puck | Overdosed basket | Trim with the Razor tool |
Dialing in a recipe
The shot buttons are volumetric, but I got better results by brewing to weight.
My starting recipe
18 grams in, about 36 grams out, which is a 1:2 ratio✕Brew ratioThe weight of espresso in the cup compared with the dry coffee you used. 18 g of coffee making 36 g of espresso is a 1:2 ratio, a classic starting point., in roughly 24 to 30 seconds.
I put a small scale under the cup and watched the weight.
Brewing manually
Hold the two-cup button to start the shot, and release it to stop.
That let me stop each shot at exactly 36 grams and compare grind settings fairly.
| Shot time at 36 g out | What it tastes like | Change |
|---|---|---|
| Under 20 s | Sour, thin, salty | Grind finer |
| 20 to 24 s | Bright, a bit sharp | Grind slightly finer |
| 24 to 30 s | Sweet, balanced | Keep it |
| 30 to 35 s | Heavy, a little bitter | Grind slightly coarser |
| Over 35 s | Bitter, dry | Grind coarser |
Then save it
Once I'd found the right grind, I reprogrammed the two-cup button to that volume, so everyday shots didn't need the scale.
Same 18 g dose and 36 g yield, different grind settings.
If you're choosing beans, my guide to coffee roast levels explains how roast changes the grind you need.
Our tip: Brew to weight for the first week, then program the button once your recipe tastes right.
Automatic milk: the reason to buy the Plus
The automatic steam wand is what sets the Bambino Plus apart.
How it works
Fill the jug with cold milk, set it on the sensor plate under the wand, choose a temperature and foam level, and press steam.
The wand heats and textures the milk, then stops at your chosen temperature.
When you lower the jug, the wand purges itself automatically to clear milk from the tip.
What the milk is like
The texture is genuinely good: smooth, glossy microfoam✕MicrofoamMilk foam with bubbles so small you can't see them. It feels silky, looks like wet paint and blends into the coffee. on the lower foam settings and a thicker cap on the higher ones.
It's consistent, drink after drink, which is hard to match by hand on a busy morning.
Getting the best result
Don't overfill the jug; I stayed just below the bottom of the spout.
Purge the wand briefly before steaming to clear any water.
Push the jug all the way back on the plate, so the wand sits near the rear of the jug and the milk can spin.
My ratings on a 10-point scale for texture and stability, temperature 2, foam 2.
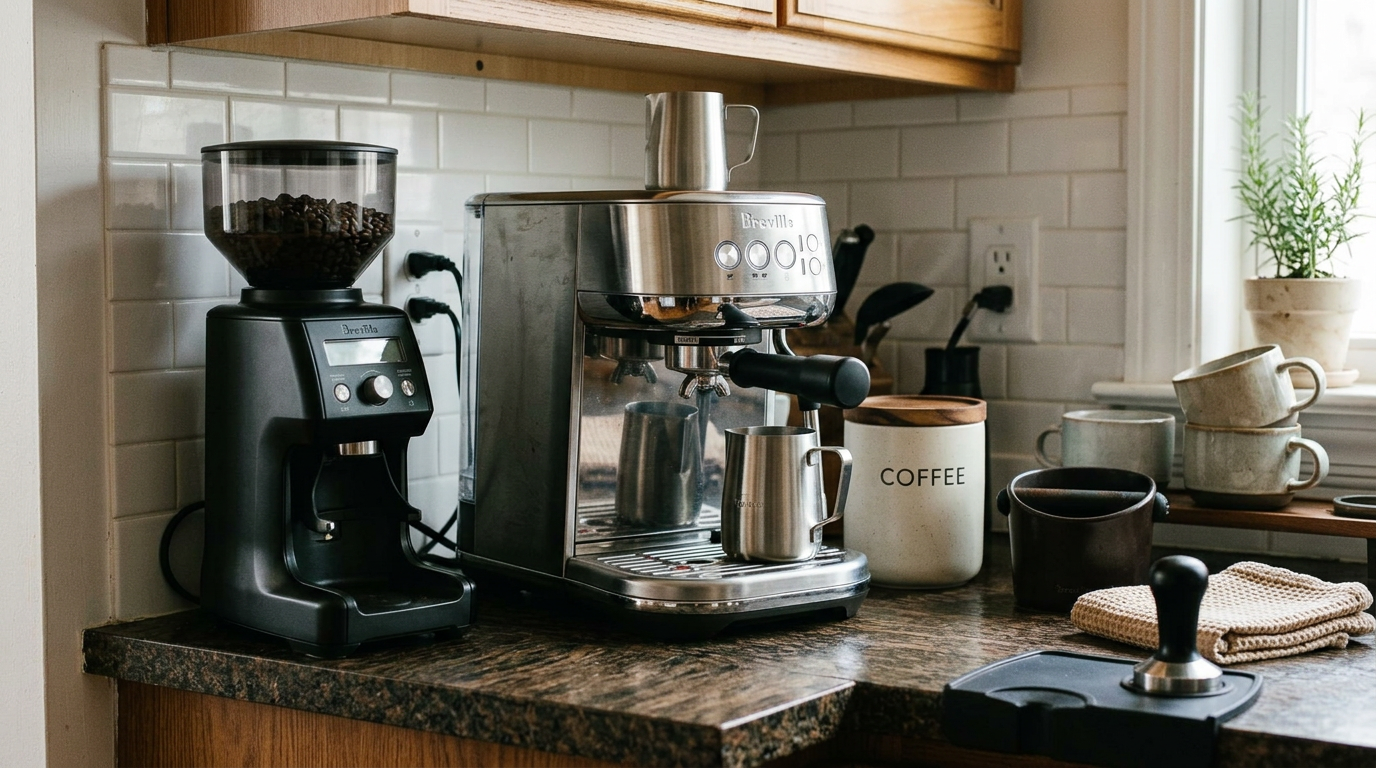
The Bambino Plus with my grinder. The milk is hands-free; the espresso still depends on the grind.
Milk temperature and foam settings compared
There are three temperature levels and three foam levels, so nine combinations.
I tried them all with whole milk.
| Setting | What I got | Best for |
|---|---|---|
| Foam 1 | Thin, silky, very little foam | Flat whites, latte art |
| Foam 2 | Smooth with a moderate foam layer | Lattes |
| Foam 3 | Thick, airy foam cap | Cappuccinos |
| Temp 1 | Warm, easy to drink right away | Kids' steamers, quick sips |
| Temp 2 | Hot and sweet | Most drinks |
| Temp 3 | Very hot | People who sip slowly |
A medium temperature with a moderate foam level, temperature 2 and foam 2, was my everyday favorite.
It kept the milk sweet, smooth and hot enough without scalding.
My ratings for each combination with cold whole milk, out of 10.
Our tip: Start at temperature 2 and foam 2, then change one setting at a time.
Manual steaming and latte art
You're not locked into automatic mode.
Swing the wand out, hold the jug yourself and steam manually, just like a regular steam wand.
How I did it
Set the tip just below the surface for a few seconds to add air, then sink it slightly so the milk rolls.
Stop when the jug is too hot to hold comfortably.
Auto or manual for latte art?
Foam level 1 on auto gave me milk that poured simple hearts easily.
For more complex patterns, manual steaming gave me slightly finer control.
Single-wall vs dual-wall baskets
The Bambino Plus comes with both basket types, and choosing the right one matters.
| Dual-wall basket | Single-wall basket | |
|---|---|---|
| Best for | Pre-ground coffee | Freshly ground beans |
| Grinder needed | Any | A good espresso burr grinder |
| Forgiveness | Very forgiving | Needs careful prep |
| Crema | Thick, foamy | Natural, finer |
| Flavor | Bold but flat | Sweet, clear, complex |
The dual-wall baskets✕Dual-wall basketA pressurized basket with a double floor and one tiny exit hole. It builds pressure for you, so pre-ground or uneven coffee still makes a thick crema. are fine for pre-ground coffee or a basic grinder.
Once you have a proper espresso grinder, switch to the single-wall baskets for the best flavor.
Our tip: Switching to single-wall? Grind noticeably finer, then fine-tune by taste and time.
Beans, water and freshness
Because the Bambino Plus is so consistent, the beans you use show up clearly in every cup.
I tested the same machine and recipe with beans at different ages and roasts.
My flavor ratings on a 10-point scale with the same machine and dose.
| Bean type | Result on the Bambino Plus | My approach |
|---|---|---|
| Medium-dark blend | Chocolatey, rich, great in milk | 18 g in, 36 g out, about 28 s |
| Medium roast | Sweeter, more fruit | Grind slightly finer |
| Light roast | Bright and juicy when dialed in | Finer grind, aim for 30 s |
| Very dark, oily roast | Bitter edge, quicker to stale | Grind slightly coarser, shorter shot |
| Pre-ground | Decent in dual-wall baskets | Use the pressurized basket |
Storing beans
Keep beans in a sealed, opaque container away from heat, and grind just before brewing.
Buying smaller bags more often made a bigger difference than any setting on the machine.
Water
Use fresh, cold, filtered water and change it daily.
Filtered water also slows scale build-up inside the ThermoJet heater.
Avoid distilled water, because coffee needs some minerals to extract properly.
Our tip: Buy beans in bags you'll finish within two to three weeks of the roast date.
What I liked most, and what bugged me
After three weeks of daily use, a few things stood out clearly.
What I liked most
The automatic milk is genuinely good, not just convenient.
It matched my everyday hand-steamed milk on the first try and never had a bad morning.
The 3-second heat-up meant I never had to plan my coffee in advance.
The three-way valve left tidy, dry pucks and let me pull back-to-back shots without waiting.
And the machine suited two very different people in my house: I could tinker with recipes, while my partner just pressed steam.
What bugged me
The drip tray filled faster than I expected and overflowed once when I forgot it.
The plastic tamper felt out of place on a machine this good.
Tall mugs don't fit under the spouts.
And without a capable grinder, the single-wall baskets can't show what the machine can do, so the real cost is higher than the machine alone.
One machine, two kinds of coffee drinker
The Bambino Plus turned out to be a rare machine that suits both a coffee tinkerer and someone who just wants a good latte.
For the tinkerer
I weighed doses, brewed to a ratio, timed shots and compared grind settings every morning.
The PID temperature control and steady pressure made those experiments meaningful, because the machine wasn't adding its own variation.
I could also steam by hand when I wanted to practice latte art.
For the person who wants it easy
My partner never touched the scale.
They used my saved two-cup volume, set the jug on the plate, pressed steam and had a smooth latte in a couple of minutes.
The milk was just as good as mine, and they never had to learn the wand.
| Task | Tinkerer | Easy mode |
|---|---|---|
| Dose | Weighed, 18 g | Grinder timer, Razor trim |
| Shot | Brewed to 36 g by weight | Saved two-cup button |
| Milk | Manual steaming for art | Auto, temp 2, foam 2 |
| Time per latte | About 4 minutes | About 2.5 minutes |
Where it falls short of fully automatic
You still grind, dose and tamp every shot, so it isn't a one-button machine.
If nobody in your house wants to touch a portafilter, a bean-to-cup machine is the better fit.
Our tip: Save one shot volume and one milk setting as the household default, and let the tinkerer change them only when needed.
Cleaning and maintaining the Bambino Plus
Daily cleaning is quick, and the automatic purge helps a lot.
The drip tray
The three-way valve and the automatic purge both send water to the drip tray.
That's good for the machine, but the tray fills quickly, and I emptied it every day, sometimes twice.
| When | Task | Why it matters |
|---|---|---|
| After steaming | Wipe the wand (it purges itself) | Stops milk drying on the outside |
| Daily | Empty the drip tray | Fills fast from purges |
| Daily | Rinse the portafilter and basket | Removes coffee oils |
| Weekly | Wipe the group head and gasket | Keeps the seal clean |
| Weekly | Wash the milk jug and sensor plate | Removes milk film |
| When prompted | Descale | Protects ThermoJet and the pump |
Descaling
Descale when your water hardness and the manufacturer's instructions call for it, more often with hard water.
My estimate of hands-on cleaning time per day.
What daily use is really like
My mornings: switch on, grind 18 grams, trim with the Razor, tamp and press two cups.
While the shot ran, I poured milk into the jug and set it on the plate.
As soon as the shot finished, I pressed steam and wiped the portafilter while the milk textured itself.
A flat white took under three minutes from switching on.
Noise
The pump buzzes briefly, and the valve gives a short hiss after each shot.
The auto steam is a steady hiss that stops on its own.
Rough maths from a 64 oz tank. Actual numbers depend on your cup sizes.
If you'd prefer fully automatic milk without a steam wand at all, my AIRMSEN 20 Bar review covers a machine with a milk container.
The drinks I made most often
| Drink | Coffee | Milk setting | Notes |
|---|---|---|---|
| Flat white | 18 g in, 36 g out | Temp 2, foam 1 | My daily drink |
| Latte | 18 g in, 36 g out | Temp 2, foam 2 | Smooth and sweet |
| Cappuccino | 18 g in, 36 g out | Temp 2, foam 3 | Tall foam cap |
| Espresso | 18 g in, 36 g out | None | Rich and balanced |
| Americano | 18 g double | Hot water button | Clean and simple |
| Iced latte | 18 g double | Cold milk, no steaming | Pour over a full glass of ice |
A quick iced latte
Pour a fresh double over a glass packed to the top with ice, then add cold milk.
A hot shot over a few cubes melts them and dilutes the drink.
Our tip: For iced drinks, fill the glass to the top with ice before you pour the shot.
Living with it: week one to week three
In the first week, I dialed in my grinder, brewed to weight and set my recipe at 18 grams in and 36 out.
In the second week, I worked through all nine milk combinations and settled on temperature 2 and foam 2.
In the third week, I used it like a busy household: two people, four milk drinks a day and some manual steaming for latte art.
The milk stayed consistent, and the shots tasted the same every morning.
How I rated each drink by the end of the test, out of 10.
Serving guests
Because the milk steams itself, the Bambino Plus handles guests better than most small machines.
I pulled a shot, set the milk going, then ground and tamped the next dose while the milk steamed.
Four lattes took me about 10 minutes.
Our tip: While the milk steams on auto, grind and tamp the next shot; it nearly halves the time for a group.
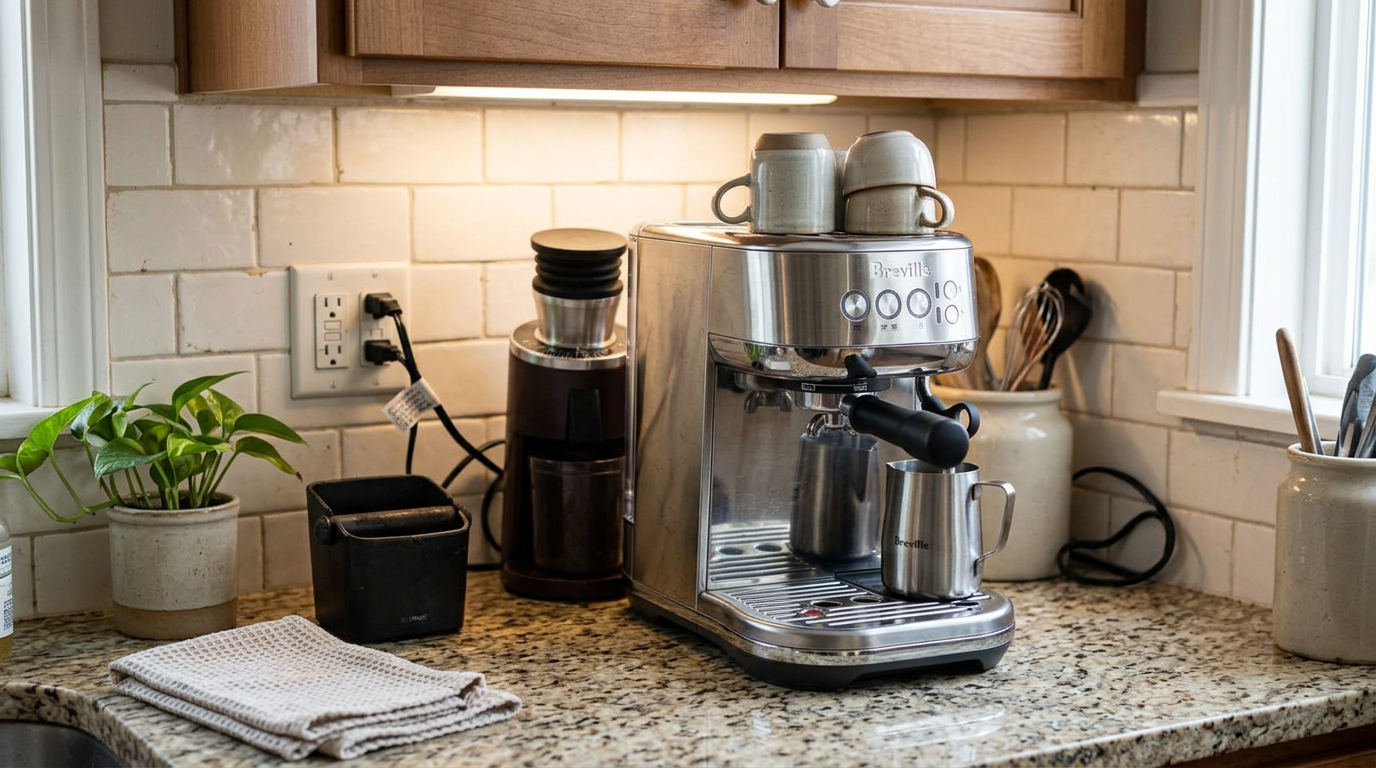
Cups warming on top and the jug ready on the plate before a weekend round.
Build quality and long-term ownership
Metal parts are used where they matter, including the front and the group head, with plastic panels elsewhere.
It feels solid on the counter, though not as hefty as larger machines.
The 54 mm portafilter is a common size, so baskets, tampers and portafilters are easy to upgrade.
Common mistakes to avoid
The Bambino Plus is easy to use, but these habits will hold it back.
| Mistake | What happens | Better habit |
|---|---|---|
| Using a basic grinder with single-wall baskets | Sour, fast shots | Use a good burr grinder or dual-wall baskets |
| Overfilling the milk jug | Milk overflows, poor texture | Fill to just below the spout |
| Not pushing the jug back | Milk doesn't spin | Push it fully back on the plate |
| Forgetting the drip tray | Overflow on the counter | Empty it daily |
| Using warm milk | Thinner foam | Use milk straight from the fridge |
| Relying on volume only | Inconsistent shots | Dial in by weight first |
What I would change
A metal tamper in the box would suit the machine's quality.
A bigger drip tray would cut down on emptying.
And a little more cup clearance would let mugs fit under the spouts.
Is the Bambino Plus worth the money?
For daily milk drinkers, yes.
You get the same excellent espresso as the Bambino, plus hands-free, consistent milk, a drier puck and a bigger tank.
What you give up is a built-in grinder, and you'll need to budget for a good one.
Ask yourself three questions before you buy.
Do you drink lattes or flat whites most days? Do you have, or will you buy, a capable burr grinder? And do you want café-quality milk without learning a steam wand?
If the answers are yes, the Bambino Plus is one of the best compact espresso machines you can buy.
If you mostly drink espresso, the regular Bambino gives you the same shots for less.
How it compares with other home espresso setups
| Feature | Bambino Plus | Bambino | Machine with automatic milk container |
|---|---|---|---|
| Milk | Automatic wand, with manual option | Manual wand | Automatic container |
| Milk texture | Silky microfoam | Silky with practice | Airy foam |
| Milk settings | 3 temperatures, 3 foam levels | None | Usually time-based |
| Heat-up | About 3 s | About 3 s | Usually longer |
| Three-way valve | Yes | No | Varies |
| Grinder | No | No | Usually no |
| Best for | Easy café-quality milk | Espresso and learning | Hands-off convenience |
| You mostly drink | Is the Bambino Plus a fit? | Why |
|---|---|---|
| Lattes and flat whites | Excellent | Hands-free silky milk |
| Espresso | Excellent | PID, pre-infusion, 9 bar |
| Latte art | Very good | Auto foam 1 or manual steaming |
| Milk drinks for guests | Very good | Steam while you prep the next shot |
| Pre-ground coffee | Good | Dual-wall baskets included |
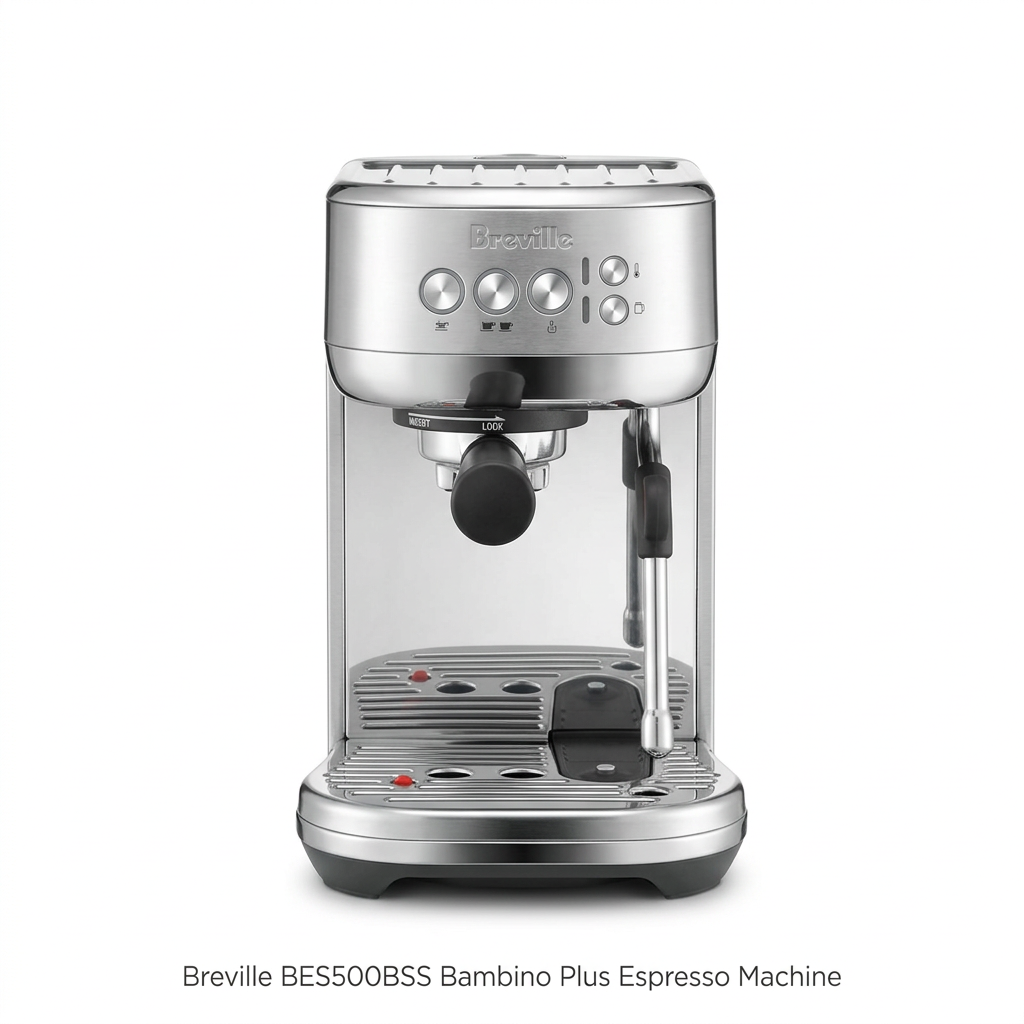
The Bambino Plus from the front, with the auto steam wand and milk settings on the right.
Which one is right for you: is the Breville Bambino Plus your match?
4 quick questionsBreville Bambino Plus specifications
From manufacturer data and my own testing.
How I tested and scored the Breville Bambino Plus
For three weeks, I used the Breville Bambino Plus as my everyday machine for espresso, flat whites, lattes, cappuccinos, Americanos and iced drinks.
I dialed in two grinders, brewed to weight with a scale, compared single-wall and dual-wall baskets and swapped the plastic tamper for a metal one.
I tried all nine milk temperature and foam combinations, steamed whole, 2%, barista oat and almond milk, practiced manual steaming and latte art, and compared it side by side with the regular Bambino.
I then checked my notes against Breville's specifications and owner documentation.
- Espresso (8.6): body, crema, temperature stability, puck dryness and consistency.
- Milk drinks (8.8): automatic microfoam, settings range, manual steaming and consistency.
- Ease of use (8.6): buttons, heat-up, milk settings, programming and setup.
- Cleaning (7.8): auto purge, drip tray, daily cleaning and descaling.
The overall score of 8.5 is an editorial rating that reflects those four areas.
Breville Bambino Plus FAQ
Is the Breville Bambino Plus worth it?
Yes, if you drink milk drinks most days. It makes silky milk automatically and excellent espresso, as long as you pair it with a good grinder.
What is the difference between the Bambino and the Bambino Plus?
The Plus adds an automatic steam wand with temperature and foam settings, an auto purge, a three-way solenoid valve and a bigger tank. The espresso is essentially the same.
How fast does it heat up?
About 3 seconds, thanks to ThermoJet.
Can I steam milk manually?
Yes. Swing the wand out and steam by hand, like a regular steam wand.
What milk settings does it have?
Three temperature levels and three foam levels.
What settings are best for a latte?
Temperature 2 and foam 2 worked best for me. Use foam 1 for flat whites and foam 3 for cappuccinos.
Does it have a grinder?
No. A good burr grinder is essential for the single-wall baskets.
Can I use pre-ground coffee?
Yes, with the dual-wall pressurized baskets.
What dose and ratio should I use?
Start with 18 grams in and about 36 grams out, in roughly 24 to 30 seconds.
Does it have a three-way solenoid valve?
Yes. It releases pressure after the shot, leaving a drier puck.
Why does the drip tray fill so fast?
The auto purge and the pressure-release valve both send water to it. Empty it daily.
How big is the water tank?
About 64 ounces.
Can it make latte art?
Yes. Auto foam level 1 or manual steaming both give pourable milk.
Does it come with a tamper?
Yes, a plastic one. A 54 mm metal tamper is a worthwhile upgrade.
Kitchen & coffee tester
Michael spent six years as a line cook in restaurants in Chicago and New York, and he has tested kitchen appliances for HouseholdMe since 2018, from air fryers to coffee makers. He holds an SCA certificate in barista skills and used the Breville Bambino Plus as his everyday coffee machine for three weeks for this review.
- Three weeks of hands-on testing of the Breville BES500BSS Bambino Plus
- Side-by-side testing with the Breville Bambino
- Breville product specifications and owner documentation
- General espresso brewing and maintenance guidance