Kismile Automatic review: bean-to-cup espresso and one-touch lattes in a 7-inch-wide body
The Kismile Automatic Espresso Machine grinds, brews and froths milk at one touch in a body only about 7 inches wide. It makes a good espresso once you raise the dose and lower the volume, but its hopper is small and its milk foam is airy.

Michael Reynolds
Hands-on review
Hands-on testing, research, specs
4 weeks
23 minutes
Jargon helpNew to espresso? Tap any dotted term to see what it means.
In this review
Yes, if you want bean-to-cup convenience on a narrow counter. The Kismile Automatic grinds, tamps, brews and disposes of the grounds in a body about 7 inches wide, with one-touch espresso, Americano and milk drinks from a detachable milk container. Once I lowered the volume, raised the coffee amount and set the grinder around 4 or 5, it made a rich, consistent espresso and properly hot lattes. The default settings are weak, the bean hopper is small, settings lock once a drink starts, the milk foam is on the airy side and a little steam escapes from the side while frothing.
Kismile Automatic at a glance
Kismile Automatic pros and cons
- Slim bean-to-cup design, about 7 inches wide
- One-touch espresso, Americano and milk drinks
- Removable brew unit and automatic grounds disposal
- Default drinks are weak until you adjust them
- Small bean hopper needs frequent refills
- Milk foam is airy rather than silky
Who should buy the Kismile Automatic?
- Small kitchens and apartments
- Beginners who want one-touch drinks
- Couples who mix espresso and lattes
- Latte art fans who want silky microfoam
- Large households with heavy daily use
- Espresso purists chasing the deepest shots
First impressions of the Kismile Automatic
Bean-to-cup machines have a reputation for being big, boxy and expensive.
The Kismile Automatic Espresso Machine tries to prove that doesn't have to be true.
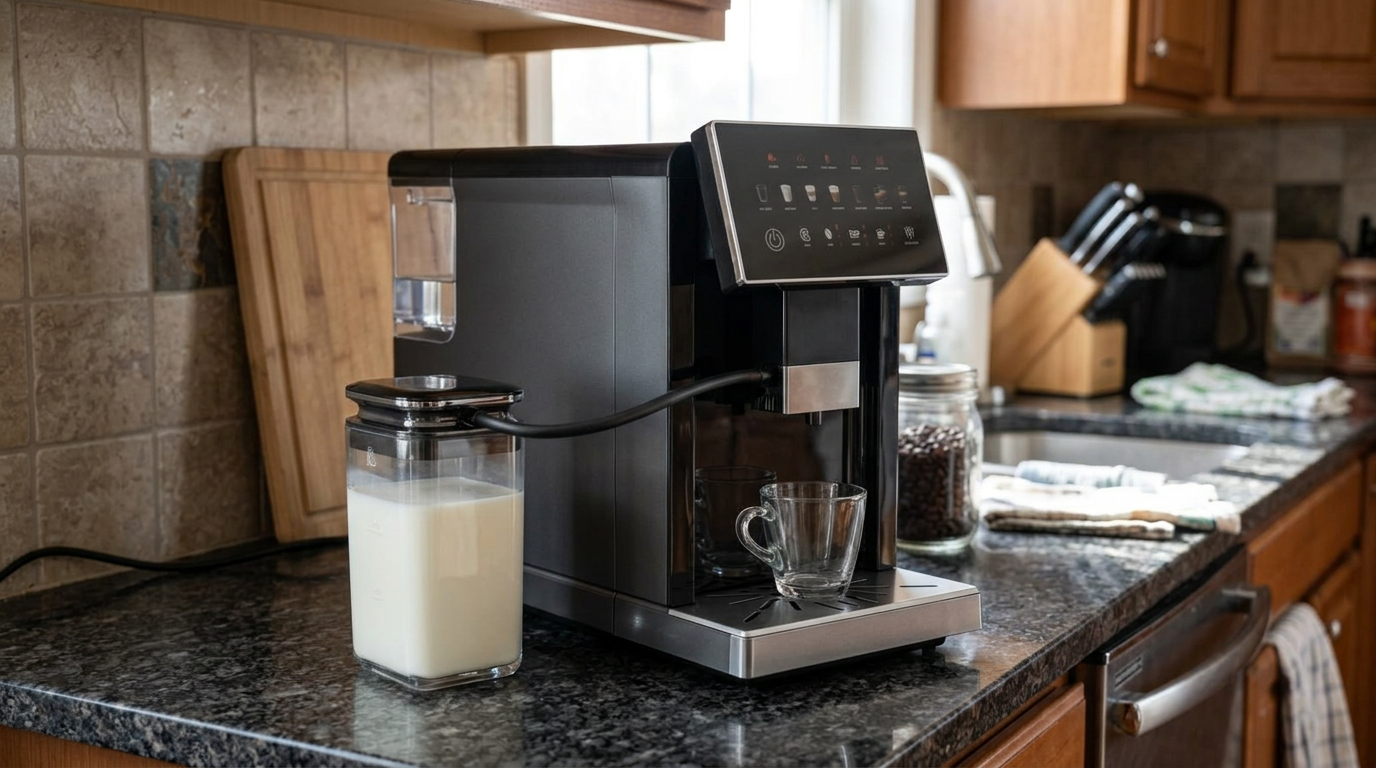
It's a narrow, black, upright machine, only about 7 inches wide, with a glossy touch panel angled up at the top.
Next to it sits a small clear milk container with a lid, connected by a thin tube to the coffee spout.
Michael and I unpacked it on a crowded counter between a knife block and a cutting board, and it fit without moving anything.
That's not something I can say about most automatic machines.
Inside, it does everything a bigger bean-to-cup machine does.
It grinds beans, doses and tamps them, brews, and drops the used puck into a hidden container.
On paper, that's a lot of machine in a small space.
My first espresso, on the default grind, came out quickly and looked a little thin.
After two grind changes, the same beans gave me a darker, more attractive crema and a fuller taste.
That turned out to be the theme of the whole test: the Kismile is good, but it rewards a few minutes of setup.
The Kismile’s narrow body fits between other appliances on a busy counter.
What the Kismile Automatic actually is
The Kismile is a fully automatic, bean-to-cup✕Bean-to-cupA machine that grinds whole beans, doses and tamps the coffee, brews it and disposes of the used grounds automatically, all at the press of a button. espresso machine.
You fill the hopper with whole beans and the tank with water, choose a drink and it does the rest.
It has a built-in conical burr✕Conical burrsA cone-shaped cutting part that turns inside a ring. They grind evenly at fairly low speed, which keeps heat and noise down. grinder with 15 settings.
A direct-drive brew unit✕Brew unitThe chamber inside an automatic machine that receives the ground coffee, presses it into a puck, pushes hot water through it and then ejects the used grounds. handles grinding, tamping, brewing and ejecting the grounds.
For milk drinks, it draws milk from the detachable container and froths it with steam on its way to your cup.
Kismile Automatic design and setup
The Kismile Automatic measures about 7.1 inches wide, 12.4 inches tall and 18.3 inches deep.
It's narrow and short, but deeper than it looks, so measure your counter before you buy.
The bean hopper sits on top, the water tank at the back, and the touch panel at the front.
The bean hopper is fairly small, which keeps the machine compact but means more frequent refills.
On the plus side, the lid seals, which helps beans stay fresh between refills.
The spout slides up and down, from about 3.35 to 4.53 inches above the tray.
That's enough for an espresso cup at the bottom or a mid-size mug at the top.
Tall latte glasses were a squeeze at full height.
First-time setup
Setup took about fifteen minutes.
Fill the tank to the marked line, add beans and switch on.
The machine primes and rinses itself, and the indicators tell you if anything is missing.
I ran three or four espressos before judging anything, because the first few drinks from any new grinder are rarely representative.
Our tip: Run three or four drinks before you judge the taste, so the grinder and brew unit settle in.
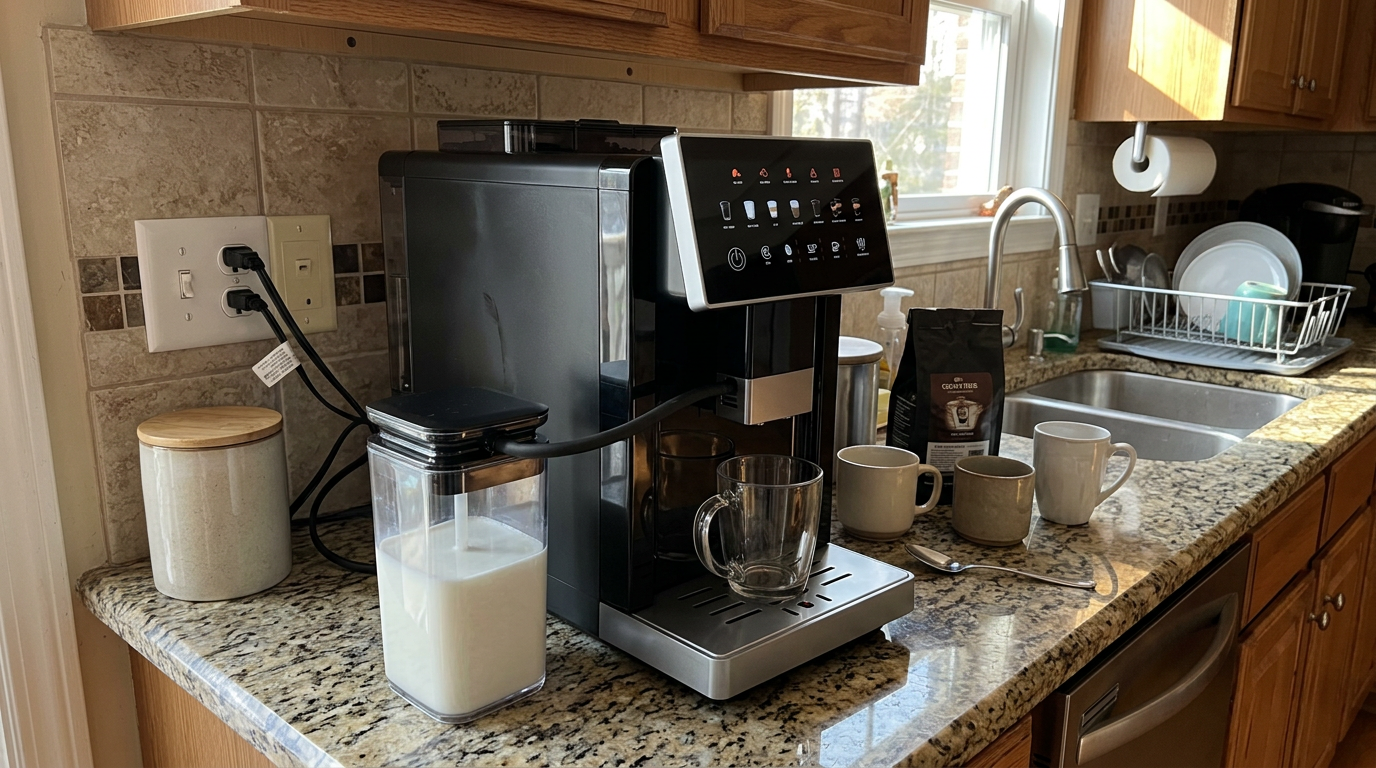
With the water tank at the back, leave room to slide it out.
The built-in grinder
The grinder has 15 settings, numbered 1 to 15.
Lower numbers are finer and higher numbers are coarser.
The dial uses two numbered markers that line up, so you can read the setting at a glance without digging into the beans.
With a fresh medium-dark blend. Your sweet spot depends on your beans.
On a coarse setting, the espresso ran fast and looked thin, with little crema.
Moving to around 5 slowed the flow and gave a richer, darker crema and a fuller taste.
Going much finer than 3 started to taste harsh with my beans.
Noise
The grinder is moderate rather than loud, a short whir that wouldn't wake a sleeping house.
Oddly, the first rush of water through the pump was more noticeable than the grinding.
Our tip: Change the grind by one or two steps at a time, and pull two drinks before deciding if it helped.
The bean hopper and freshness
The hopper on top is small, which is the price of a compact body.
For two of us, I topped it up every few days.
The upside is that beans don't sit for weeks going stale, and the sealed lid helps keep air out between refills.
| Habit | Why it helps |
|---|---|
| Fill only a few days of beans at a time | Beans stay fresher |
| Keep the rest of the bag sealed and dark | Slows staling |
| Use the bean-clearing function when switching | No old beans mixed with new |
| Avoid oily, shiny beans | Less sticking in the grinder |
If you drink a lot of coffee, the small hopper is the one design choice you'll notice most.
Our tip: Only fill the hopper with a few days of beans at a time, and keep the bag sealed in a cupboard.
Touch panel and drink settings
The angled touch panel shows icons for each drink and lights up clearly.
You get single and double espresso, Americano, milk drinks and hot water, each at one tap.
Before you start a drink, you can change two things: how much coffee it grinds and how much liquid it pours.
| Setting | What it changes | When to use it |
|---|---|---|
| Coffee amount | How much is ground per drink | More for a stronger cup |
| Volume | How much liquid goes into the cup | Less for a denser espresso |
| Grind dial | How fine the coffee is | Finer for slower, richer shots |
| Single or double | One or two portions | Double for milk drinks |
One quirk to know: you can't change anything once a drink has started.
The panel locks while the machine works, and the icons dim until it finishes.
At first that annoyed me, because I'd notice a cup looked too small halfway through.
After a few days, I just set everything first, and it stopped being an issue.
Alerts and error codes
The Kismile tells you clearly when it needs something.
It warns about low water, low beans, a full grounds box and cleaning reminders.
It also checks that the brew unit, drip tray, brew door and grinder knob are properly in place before it starts.
That's reassuring for anyone new to automatic machines, because it stops you brewing with a part missing.
In practice, the alerts came up most often for beans, because of the small hopper.
Water and grounds alerts appeared every couple of days for two of us, which felt about right.
Kismile Automatic espresso performance
With the grind dialed in, the Kismile Automatic makes a pleasant, everyday espresso.
I tested it with a medium-dark blend, a medium roast and a lighter single origin.
| Beans | Grind | Coffee amount | Volume | How it tasted |
|---|---|---|---|---|
| Medium-dark blend | 5 | High | Short | Chocolatey, good crema |
| Medium roast | 4 | High | Short | Balanced, nutty, sweet |
| Light single origin | 3 | High | Short | Bright, slightly thin |
| Medium-dark blend | 9 | Default | Default | Thin, fast, pale |
The best shots had a darker crema✕CremaThe golden-brown foam on top of an espresso. It forms when pressure pushes gases and oils out of freshly ground coffee., a round body and a mild sweetness.
They didn't have the syrupy intensity of a high-end machine, but they were clearly better than most pod or budget automatic coffees I've tried.
The default settings were the weak point.
They produced a longer, thinner drink than I'd call espresso.
Raising the coffee amount and lowering the volume made the biggest difference, more than any grind change.
My taste ratings after each change, on a relative scale.
| What you taste or see | Likely cause | First change |
|---|---|---|
| Thin and watery | Volume too high | Lower the volume |
| Weak but not sour | Coffee amount too low | Raise the coffee amount |
| Sour, fast, pale | Grind too coarse | Go one or two settings finer |
| Bitter and harsh | Grind too fine or dark beans | Go one setting coarser |
| Crema fades fast | Stale beans | Use beans roasted in the last few weeks |
Our tip: For a richer espresso, raise the coffee amount and lower the volume before you touch the grind dial.
How I dialed in my perfect cup
Because the defaults are mild, it's worth spending ten minutes on setup in the first week.
Here's the exact order I followed, and I'd recommend it to anyone.
| Step | What I changed | What happened |
|---|---|---|
| 1 | Nothing, default espresso | Long, thin, pale crema |
| 2 | Lowered the volume | Shorter, more concentrated |
| 3 | Raised the coffee amount | Fuller body, better crema |
| 4 | Grind from about 8 to 5 | Slower flow, richer taste |
| 5 | Tried 4 with a medium roast | Sweetest, most balanced shot |
After that, I barely touched the settings for the rest of the month.
The machine repeated the same drink reliably every morning, which is the whole point of a bean-to-cup machine.
If you change beans, expect to revisit the grind by a step or two.
My own tasting scores for a single espresso.
Our tip: Write your favorite grind, coffee amount and volume on a sticky note inside a cupboard door, so anyone can repeat it.
Milk system and milk drinks
The milk system is simple and quick.
A clear container with a lid sits next to the machine, and a thin tube carries milk to the frother at the spout.
Steam heats and froths the milk on its way into your cup.
Because the container detaches, you can put leftover milk back in the fridge.
How the milk tasted and felt
The steam is strong, and it heats milk quickly.
That's great on a busy morning, and our lattes came out properly hot.
The froth leaned toward a fluffier, airier texture than the silky microfoam✕MicrofoamMilk foam with bubbles so small you can't see them. It feels silky and blends into the coffee instead of sitting on top like froth. you'd get from a hand-steamed latte.
For cappuccinos that suited it well, while lattes had a slightly bubblier top.
Letting the drink sit for twenty or thirty seconds helped the larger bubbles settle, and a gentle swirl of the cup made the top look smoother.
Colder milk also helped noticeably, because it gives the frother more time to work before the milk gets hot.
Milk straight from the fridge foamed finer than milk that had been sitting on the counter for half an hour.
If silky latte art matters to you, this isn't the machine for it.
If you want a hot, creamy latte or a foamy cappuccino at one touch, it does the job well.
| Milk temperature at start | Foam result |
|---|---|
| Straight from the fridge | Finest foam, best texture |
| Out for 15 minutes | Slightly bubblier |
| Room temperature | Large bubbles, thinner body |
My ratings on a 10-point scale for texture and stability.
One thing I noticed: a little steam can escape from the side of the machine while it froths and just after it switches back to coffee.
It's not dangerous in normal use, but keep your hands away from the side while it works.
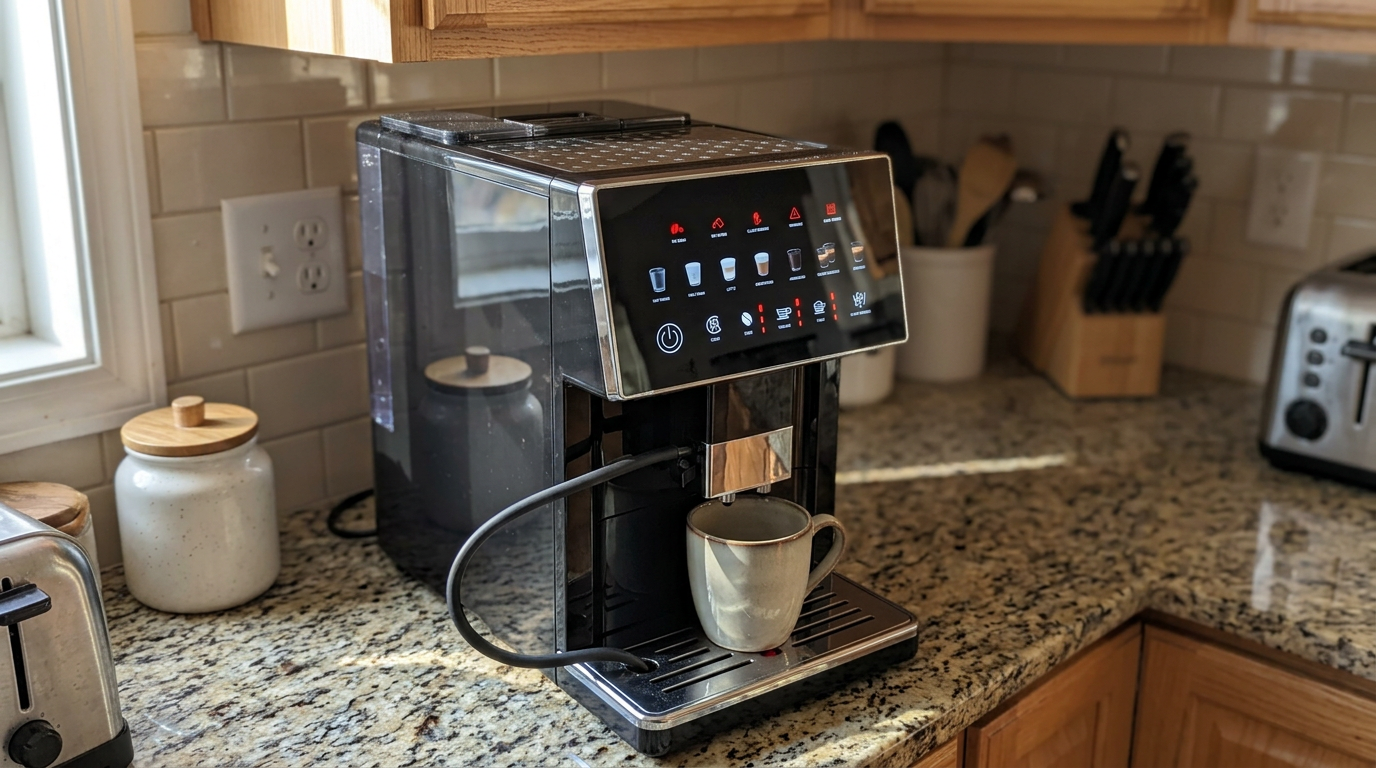
The spout slides up for mugs and down for espresso cups.
Our tip: Keep the milk container in the fridge between drinks, so the milk stays fresh and froths better.
The drinks it makes
The menu is short and covers the basics well.
| Drink | How it's made | My verdict |
|---|---|---|
| Single espresso | Short brew from fresh grounds | Good once the volume is lowered |
| Double espresso | Larger brew, stronger base | My favorite base for milk drinks |
| Americano | Espresso topped up with hot water | Smooth, easy everyday mug |
| Latte | Espresso with frothed milk | Hot, a little bubbly on top |
| Cappuccino | Espresso with more foam | Suits the airy froth well |
| Hot water | Water only | Handy for tea |
The Americano✕AmericanoAn espresso topped up with hot water. It keeps the espresso flavor but gives you a longer, milder drink. button was the one we used most for black coffee.
It tasted noticeably smoother than simply running a very long espresso, which tends to turn bitter.
Keeping the milk system clean
Any machine that draws milk through a tube needs a little discipline.
Milk left in the tube or frother turns sour quickly and can block the narrow passages.
After every milk drink, I ran hot water or steam through the frother and wiped the outside of the spout.
| Part | How often | How I cleaned it |
|---|---|---|
| Frother outlet | After every milk drink | Steam or water flush, then wipe |
| Milk tube | Daily | Rinse with warm water |
| Milk container and lid | Daily or after each use | Wash in warm soapy water |
| Container seal | Weekly | Remove, wash and dry |
It sounds like a lot, but each step takes seconds once it becomes habit.
Skipping it for a day showed up as a faint sour smell, which is a quick lesson.
Our tip: Run a quick water flush through the frother right after each latte, before the milk has a chance to dry.
Cleaning and maintaining the Kismile Automatic
This is where an automatic machine earns its keep.
There's no portafilter to knock out, because the used grounds drop into a container inside.
You empty that container when the machine asks, along with the drip tray.
| When | Task | Why it matters |
|---|---|---|
| After every milk drink | Rinse the frother and tube | Stops milk residue building up |
| Daily | Empty the grounds box and drip tray | Prevents mold and odors |
| Daily | Refill water and check beans | Keeps the alerts away |
| Weekly | Remove and rinse the brew unit | Clears coffee oils |
| Weekly | Wash the milk container | Keeps milk fresh |
| When prompted | Grinder clean and descaling | Keeps flavor and flow consistent |
The removable brew unit
I really like that you can pull the brew unit out by hand.
It slides out, rinses under the tap and clicks back into place.
On machines where the brew unit is sealed inside, coffee oils build up where you can't reach them.
Only rinse the parts the manual says are removable, and let them dry before refitting.
Grinder cleaning
There's a one-touch bean-clearing function that runs leftover beans through to the grounds box.
That's useful when you switch beans, or before a cleaning cycle.
It stops old coffee lingering in the grinder and dulling the flavor of a fresh bag.
My estimate of hands-on cleaning time.
Our tip: Empty the grounds box before it’s full, because wet grounds left overnight start to smell.
What daily use is really like
Mornings with the Kismile were easy.
Switch on, let it rinse, check the beans and tap a drink.
An espresso took under a minute once the machine was warm.
A latte took about a minute and a half.
Timed with the water tank and hopper already filled.
Tank and hopper
The 51-ounce tank lasted two of us about two days of mixed drinks.
The bean hopper needed topping up more often, roughly every few days, because it's on the small side.
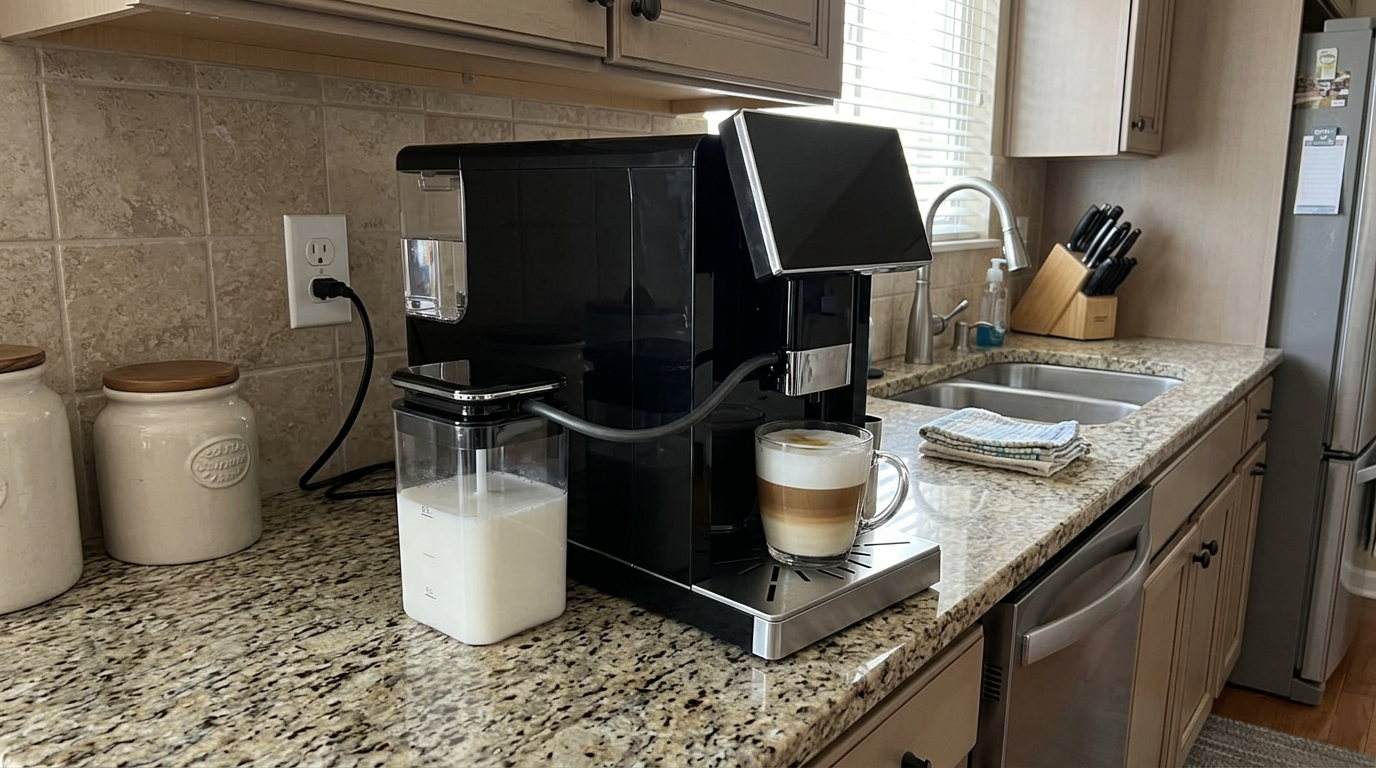
A one-touch latte, with the milk container beside the machine.
Our tip: Top up the beans and water at night, so the machine is ready for the morning rush.
Living with it in a small kitchen
We tested the Kismile Automatic in a kitchen where counter width is precious.
At about 7 inches wide, it took less space than our toaster.
The trade-off is depth, at about 18 inches, so it sits further back than you might expect.
The milk container needs its own spot on the left, so plan for a little extra width on milk days.
When we only drank black coffee, we put the container in the fridge and the machine looked tidier.
Beans, water and milk
Use fresh whole beans, ideally roasted in the last few weeks.
Medium and medium-dark roasts gave the best balance of body and sweetness.
Very oily, shiny beans can stick in automatic grinders, so I'd avoid them.
| Bean type | Grind to start | Notes |
|---|---|---|
| Medium-dark blend | 5 | Easy, chocolatey, good crema |
| Medium roast | 4 | Balanced and sweet |
| Light roast | 3 | Bright, can taste thin |
| Very dark, oily | — | Can clog the grinder |
| Flavored beans | — | Not recommended |
Water and milk
Use fresh, cold water and change it daily.
Filtered water slows scale buildup and helps the coffee taste cleaner.
For milk drinks, cold whole milk froths best, and barista oat milk is the strongest plant option.
Heat and steam: what to watch for
The Kismile Automatic runs hot when it steams, like any machine with a strong frother.
In my testing, a little steam escaped from the side of the machine during frothing, and a small puff appeared when it switched back to coffee.
It never caused a problem, but it's worth knowing where to keep your hands.
Troubleshooting the problems I hit
Over four weeks, a few small problems came up, and each had a simple fix.
| Problem | What I noticed | Fix that worked |
|---|---|---|
| Weak, watery espresso | Default volume and dose | Lower volume, raise coffee amount |
| Machine won't start a drink | Alert icon lit | Check water, beans, grounds box and brew door |
| Milk comes out cool or thin | Milk not cold, tube not seated | Use fridge-cold milk, reseat the tube |
| Big bubbles in the foam | Very fresh or skim milk | Try whole or barista oat milk |
| Sour taste after a bean change | Grind no longer suits the beans | Go one or two settings finer |
| Stale taste after a week | Oils on the brew unit | Remove and rinse the brew unit |
Most of the time, a lit alert simply meant something wasn't seated properly.
The parts-in-place checks are strict, which is annoying for a second and reassuring the rest of the time.
Common mistakes to avoid
A few habits will hold the Kismile back.
| Mistake | What happens | Better habit |
|---|---|---|
| Sticking with the default settings | Long, thin espresso | More coffee, less volume |
| Trying to change a drink mid-brew | Nothing happens | Set everything before you start |
| Leaving milk in the container all day | Milk spoils, froths poorly | Refrigerate between drinks |
| Skipping the brew unit rinse | Stale, oily taste | Rinse it weekly |
| Overfilling the water tank | Spills | Stay below the max line |
| Leaving grounds in the box overnight | Odors and mold | Empty it daily |
What I would change
A bigger bean hopper would mean fewer refills.
Being able to adjust a drink while it brews would be welcome.
And finer, silkier milk foam would make the lattes feel more café-like.
Which households it suits best
Here's how I'd judge the Kismile for different kinds of households.
| Household | Fit | Why |
|---|---|---|
| Single person or couple | Excellent | Compact, quick, one-touch drinks |
| Apartment with little counter width | Excellent | About 7 inches wide |
| Latte and cappuccino drinkers | Good | One-touch milk, airy foam |
| Espresso purists | Fair | Good shots, not the deepest |
| Family of four or more | Fair | Small hopper, frequent refills |
| Small office | Good | Easy for anyone to use |
The sweet spot is a one- or two-person household that wants fresh espresso and lattes without learning barista skills.
Is the Kismile Automatic worth the money?
The Kismile makes a strong case if you want bean-to-cup convenience in a small space.
You get fresh grinding, one-touch espresso and milk drinks, automatic grounds disposal and a removable brew unit, all in a body about 7 inches wide.
Ask yourself three questions before you buy.
Is your counter short on width? Do you want espresso and lattes at one touch? And are you happy to tweak the settings once to get the strength right?
If the answers are yes, it's an easy recommendation.
If you want café-level latte art milk or the deepest espresso, a manual machine or a pricier automatic will suit you better.
A beginner’s first week with it
If this is your first automatic machine, here's roughly how your first week will go, based on ours.
| Day | What we did | What we learned |
|---|---|---|
| Day 1 | Setup, first espressos on defaults | Defaults are mild and long |
| Day 2 | Lowered volume, raised coffee amount | Big jump in body |
| Day 3 | First lattes from the milk container | Use fridge-cold milk |
| Day 4 | Moved the grind from 8 toward 5 | Richer crema, slower flow |
| Day 5 | First brew unit rinse | Takes five minutes |
| Day 6 | Tried oat milk | Barista versions froth best |
| Day 7 | Full routine without thinking | Latte in about 90 seconds |
By the end of the first week, the machine felt completely natural for both of us.
The biggest improvements came from settings, not from technique, which is exactly what you'd hope for from an automatic machine.
After that, it was simply a matter of keeping it clean and topped up.
Our own tasting scores across espresso and milk drinks.
Four weeks in: how it held up
We made around 120 drinks on the Kismile Automatic over four weeks, roughly half black coffee and half milk drinks.
| Area | Week 1 | Week 4 |
|---|---|---|
| Espresso | Thin on defaults | Consistent, rich once dialed in |
| Milk drinks | Hot, airy froth | Same, cleaning became routine |
| Alerts | Helpful, a little frequent | Familiar, rarely surprising |
| Brew unit | Spotless | Light oil film, rinsed weekly |
| Faults | None | None |
No errors beyond the normal refill and cleaning reminders, and no drop in steam or grind consistency.
The weekly brew unit rinse kept the taste steady.
How it compares with other espresso setups
The most useful comparison is with the kinds of machines you're likely choosing between.
The Kismile Automatic stands out for packing bean-to-cup features into a narrow body.
| Feature | Kismile Automatic | Larger automatic machine | Manual machine and grinder |
|---|---|---|---|
| Grinding and brewing | Fully automatic | Fully automatic | You do it |
| Width | About 7 in | Often 9–12 in | Two appliances |
| Espresso quality | Good once dialed in | Good to very good | Excellent, skill-dependent |
| Milk | One-touch from a container | Often one-touch | Manual steam wand |
| Brew unit | Removable | Often removable | None |
| Learning curve | Low | Low | High |
A larger automatic machine often adds more drinks, user profiles and a bigger hopper, but takes far more space.
A manual setup gives the best espresso and milk texture, but asks for skill and time every morning.
The Kismile is for people who want automatic convenience without giving up half the counter.
| You mostly drink | Is it a fit? | Why |
|---|---|---|
| Espresso | Good | Rich once you raise the dose |
| Lattes and cappuccinos | Good | One-touch, hot, slightly airy |
| Americanos | Very good | Smooth, dedicated button |
| Latte art | Poor | Froth is too airy |
| Big family use | Fair | Small hopper needs frequent refills |
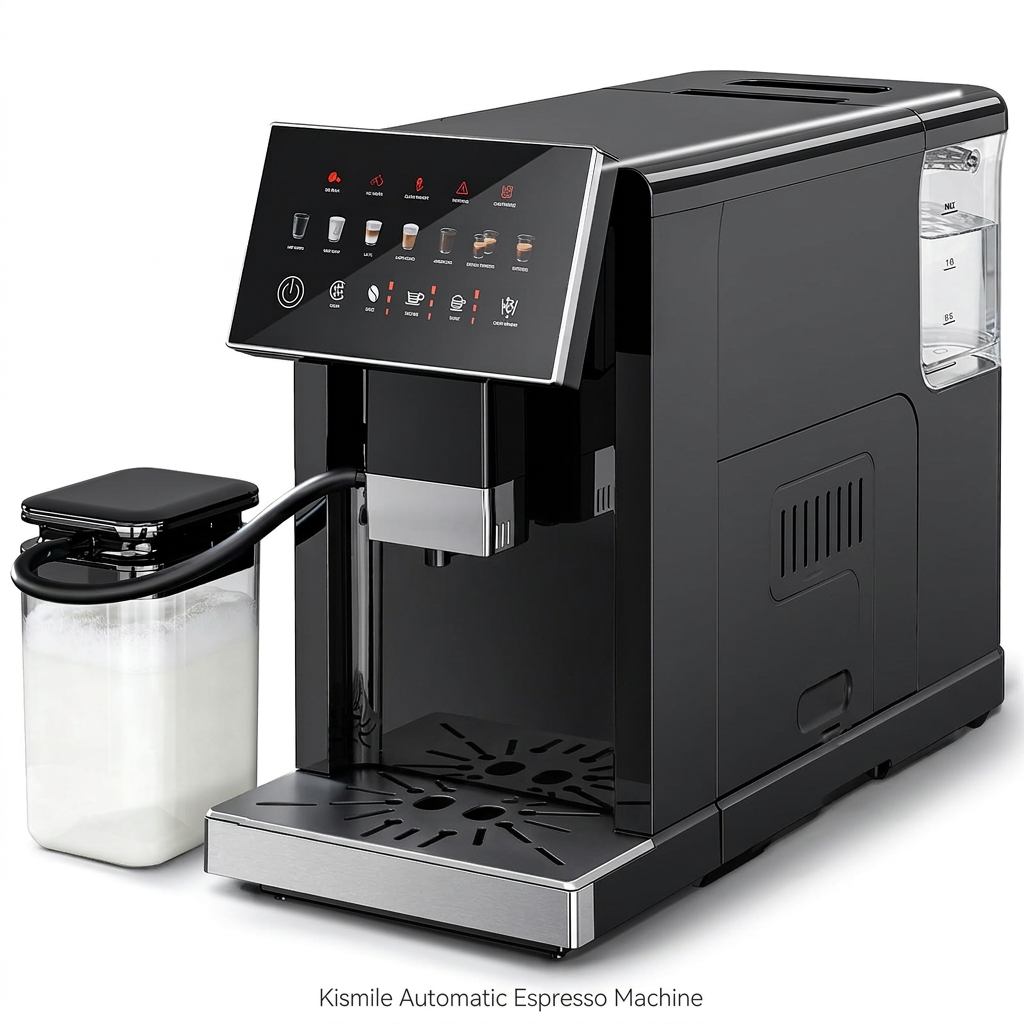
The full package: angled touch panel, adjustable spout and a detachable milk container.
Which one is right for you: is the Kismile Automatic your match?
4 quick questionsKismile Automatic specifications
From manufacturer data and my own testing.
How I tested and scored the Kismile Automatic
For four weeks, Michael Reynolds and I used the Kismile Automatic as our everyday machine for espresso, Americanos, lattes and cappuccinos, roughly 120 drinks in total.
We worked through the grind range with three different beans and adjusted coffee amount and volume for each drink.
We frothed whole, semi-skimmed, skim and oat milk, timed each drink and tracked how often the tank, hopper and grounds box needed attention.
We followed the daily and weekly cleaning routine, including removing the brew unit and using the grinder-clearing function.
We then checked our notes against Kismile's product information and owner documentation.
- Espresso (7.5): body, crema and consistency once the grind, dose and volume were dialed in.
- Milk drinks (7.2): milk temperature, foam texture and the detachable milk container.
- Ease of use (8.2): setup, the touch panel, alerts and the one-touch workflow.
- Cleaning (7.8): grounds container, removable brew unit, grinder clearing and milk system care.
The overall score of 7.6 is an editorial rating that reflects those four areas.
Kismile Automatic FAQ
Is the Kismile Automatic worth it?
Yes, if you want bean-to-cup convenience in a narrow body. It makes good espresso and hot lattes at one touch once you adjust the defaults, though the hopper is small and the milk foam is airy.
How many grind settings does it have?
Fifteen, numbered 1 to 15, where lower is finer. Around 4 or 5 worked best for me with medium and medium-dark beans.
Why is my espresso weak?
The default settings are mild. Lower the volume, raise the coffee amount and grind one or two settings finer.
Can I change the settings while a drink brews?
No. The panel locks once a drink starts, so set coffee amount and volume first.
How does the milk system work?
A detachable milk container connects by a tube to the frother at the spout, which heats and froths the milk with steam as it pours.
Can I put the milk container in the fridge?
Yes. It detaches, so you can store leftover milk in the fridge between drinks.
How big is the water tank?
About 51 ounces, or 1.5 liters, and it's removable from the back.
Is the brew unit removable?
Yes. It slides out for rinsing under the tap and clicks back into place.
How wide is the Kismile Automatic?
About 7.1 inches wide, 12.4 inches tall and 18.3 inches deep.
Does it make Americanos?
Yes. There's a dedicated Americano option that tastes smoother than a very long espresso.
Is it loud?
The grinder is moderate. The first rush of water through the pump is often more noticeable than the grinding.
Why does steam come out of the side?
A little steam can escape from the side while frothing and when switching back to coffee. Keep your hands away from the sides while it works.
Kitchen & coffee tester
Michael spent six years as a line cook in restaurants in Chicago and New York, and he has tested kitchen appliances for HouseholdMe since 2018, from air fryers to coffee makers. He holds an SCA certificate in barista skills and used the Kismile Automatic as his everyday coffee machine for four weeks for this review.
- Four weeks of hands-on testing of the Kismile Automatic Espresso Machine
- Kismile product information and owner documentation
- General espresso brewing, milk frothing and maintenance guidance