Gemilai G3028A review: a real brew boiler, hands-free milk and pressure you control
The Gemilai G3028A Espresso Machine pairs a 550 ml brew boiler with a separate steam block, an adjustable OPV and a milk probe that stops steaming on its own. It pulled consistent, chocolatey shots in my kitchen, though the 120V version makes you brew and steam one after the other.
In this review
Yes, if you want boiler-level temperature stability, real control over pressure and a milk wand that knows when to stop. The Gemilai G3028A held steady through every shot I pulled, and its auto-cutoff milk probe made lattes far less of a guessing game. On 120V power you can’t brew and steam at the same moment, and there’s no hot water spout. For a home barista who wants to learn espresso properly without fighting the machine, it’s one of the most well-rounded semi-automatics I’ve used.
Gemilai G3028A at a glance
Gemilai G3028A pros and cons
- 550 ml brew boiler and heated group keep shot temperature steady
- Adjustable OPV lets you set peak pressure from the front
- Milk probe stops steaming automatically at your chosen temperature
- 120V models can’t brew and steam simultaneously
- No hot water spout for Americanos or tea
- Vibration pump hum carries through hard backsplashes
Who should buy the Gemilai G3028A?
- Home baristas stepping up from a basic thermoblock machine
- Latte and cappuccino drinkers who want consistent milk temperature
- People who want to experiment with pressure and pre-infusion
- Anyone who wants one-touch, bean-to-cup convenience
- Households that make several milk drinks back to back every morning
- Buyers without a separate espresso-capable grinder
First impressions of the Gemilai G3028A
Machines in this part of the market usually make you choose.
You get fast heat-up from a thermoblock, or you get stable temperatures from a boiler, but rarely both in a body that fits under a kitchen cabinet.
The Gemilai G3028A tries to give you both, and that’s what made me curious enough to put it on my counter.
The first thing I noticed out of the box was the weight.
There’s real mass in the chassis, and the rubber feet grip properly.
I could lock the portafilter in with one hand without bracing the top of the machine, which is not something I can say about every compact espresso machine I’ve used.
The second thing was the accessory set.
Two full 58 mm portafilters with wooden handles, one spouted and one bottomless, plus a heavy ridged tamper, a cleaning disc and a silicone top mat.
That’s a kit that lets you start properly on day one instead of ordering extras before your first shot.
The third thing was the front panel.
A pressure gauge on the left, three buttons in the middle and a temperature display on the right.
It looks simple, but there’s a surprising amount of control hiding behind those buttons, and I’ll walk through all of it below.
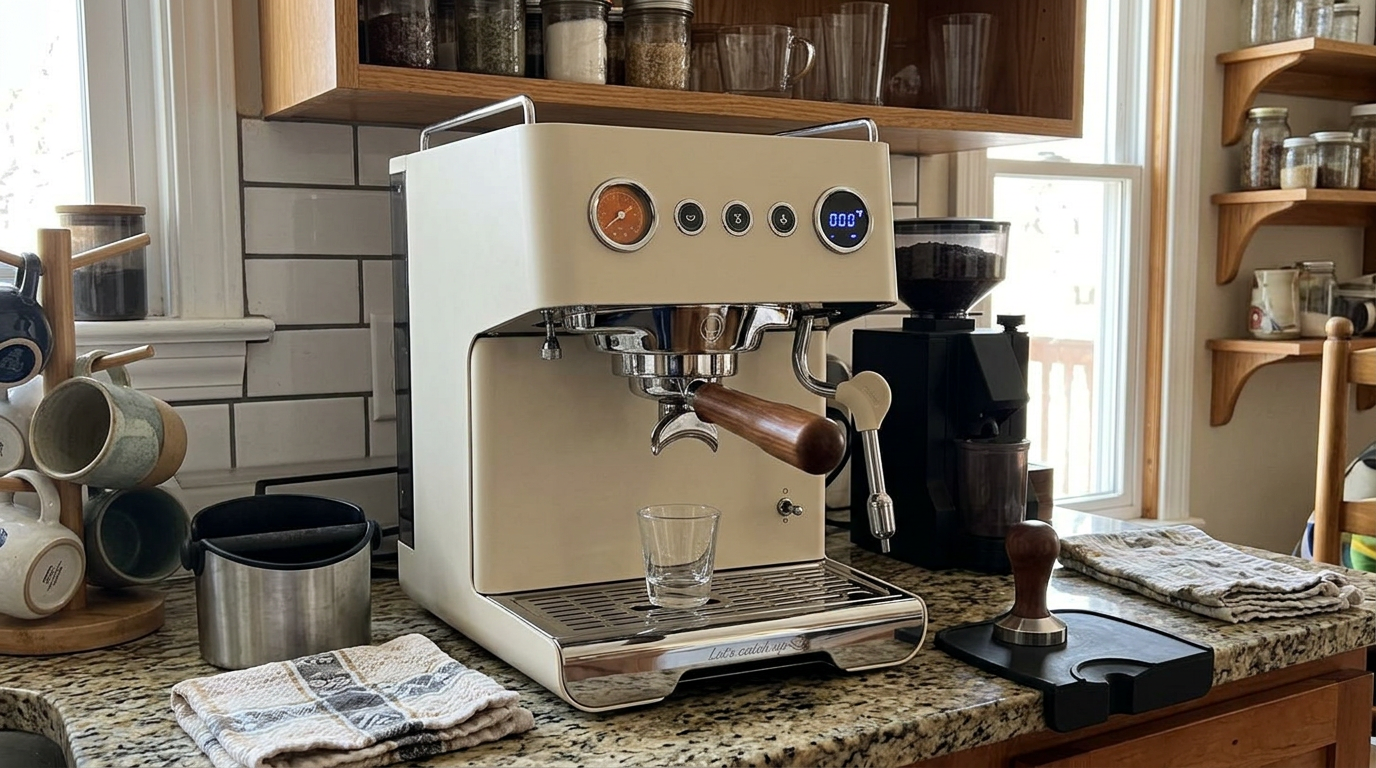
The cream finish, pressure gauge and wooden handles give the G3028A a warm, retro look on the counter.
What the Gemilai G3028A actually is
The G3028A is a semi-automatic espresso machine.
You grind, dose and tamp the coffee yourself, and the machine handles water temperature, pressure and timing.
There is no built-in grinder, so you’ll need a grinder that can go fine enough for espresso.
Its heating layout is the most interesting part.
Brewing water comes from a dedicated 550 ml stainless steel boiler that’s built together with the group head.
Steam comes from a separate thermoblock fed by its own pump, so the two jobs don’t share one heating element.
Gemilai calls this a dual heating system with dual PID control.
In practice, there are three temperature sensing points: the brew boiler, the steam block and a probe in the tip of the steam wand.
That last one is what turns milk steaming into a set-and-forget step.
Manufacturer capacities. The 57 oz tank covers a week of two to four shots a day in my use.
What’s in the box
Gemilai doesn’t skimp on the accessories here, and that matters more than it sounds.
A good accessory set saves you a second order and gets you brewing sooner.
| Item | What it’s for | My take |
|---|---|---|
| Spouted 58 mm portafilter | Splitting a double into two cups | Solid everyday choice |
| Bottomless 58 mm portafilter | Seeing exactly how the shot flows | The best learning tool in the box |
| Ridged stainless tamper | Compressing the puck evenly | Heavy, with adjustable handle height |
| Single and double baskets | Different dose sizes | I lived in the double |
| Cleaning disc and brush | Backflushing and group cleaning | Also used to set the OPV |
| Silicone top mat | Cup storage and vibration damping | Keeps cups from rattling |
| Screwdriver | Removing the shower screen | Handy for descaling |
The tamper deserves a quick mention.
Its base has a concentric ridged pattern that leaves shallow grooves across the top of the puck.
The handle height adjusts with spacer washers, so you can set it to suit your grip instead of putting up with a tamper that feels too short.
How the heating system works
Espresso and milk steaming want very different temperatures.
Brewing water should sit around 200°F, while steam needs to be well above boiling, often close to 290°F.
On a single-circuit machine, one heater has to swing between those two targets, and you end up waiting or flushing water to cool things down.
The G3028A splits the jobs.
The brew boiler holds its temperature for coffee, while the steam thermoblock heats up on demand when you press the steam button.
There’s no cooling flush between steaming and brewing, and no long recovery period after a latte.
Separate heaters mean the machine never has to swing across that gap between drinks.
The 120V catch
Here is the part I’d want to know before buying.
On a standard 15-amp, 120V household circuit, running the brew boiler and the steam block at full power together would draw more current than the circuit allows.
So the North American version won’t let you pull a shot and steam milk at the exact same time.
International versions running on 230V have enough headroom to do both together.
In daily use on 120V, it means you work in sequence: shot first, then milk.
Because the steam block is ready almost instantly, the delay is small, but it’s not the same as true simultaneous brewing.
The heated group head
The group head has its own heating, and it’s integrated with the boiler.
That matters because a cold brass or steel group can soak up heat from the water just as it reaches the coffee.
Keeping that metal warm narrows the temperature drop between boiler and puck, which shows up as more consistent shots from the first cup of the morning.
Our tip: Run a two-second blank flush through the group before every shot to clear stale water and even out the temperature.
Gemilai G3028A design and setup
The G3028A is compact for a boiler machine, but it’s wide rather than deep.
That’s good news for shallow counters, and slightly less good news if your space is narrow.
Measure the width before you order, and leave room above it to lift the tank out.
| Measurement | Imperial | Metric |
|---|---|---|
| Width | 14.8 in | 376 mm |
| Depth | 10.4 in | 265 mm |
| Height | 13.2 in | 335 mm |
| Water tank | 57 fl oz | 1.7 L |
| Rated power (US) | 1,450 W | 120 V |
The tank sits at the back and lifts out from the top.
It’s made of opaque ABS plastic with a stainless steel lid, and it has a float sensor that warns you before it runs dry.
The downside of an opaque tank is that you can’t glance at the water level, so I got into the habit of lifting the lid each morning.
Setup itself is quick.
Fill the tank with filtered water, flip the toggle switch on, and wait for the display to stop flashing.
Then run water through the group and the steam wand to flush the system before your first shot.
Warm-up times I measured
From a cold start, my machine was ready to brew in about 5 minutes.
After 20 minutes of sitting idle, it slipped into an economy mode that lowers the internal temperature to save energy.
Waking it back up to brewing temperature took about 3 minutes.
Five minutes is quick for a machine with a real brew boiler.
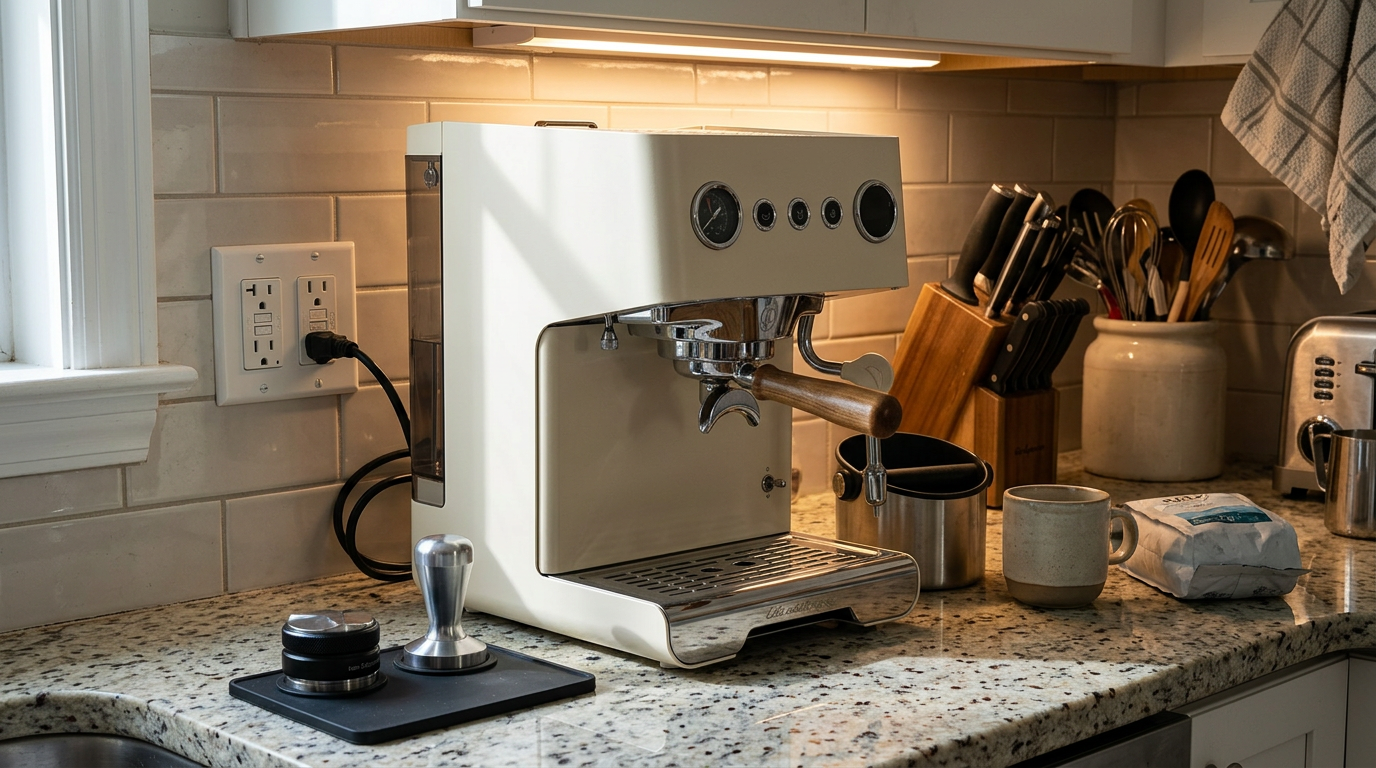
The wide, shallow footprint fits neatly under open shelving with room for a grinder alongside.
Top deck and drip tray
The removable silicone mat on top keeps cups from sliding and protects the metal finish.
It also dampens some of the rattle from the pump, which I appreciated once I’d stacked a few cups up there.
The drip tray has a polished metal grate and is easy to slide out.
More importantly, it fills slowly, and I’ll explain why in the cleaning section.
Controls, settings and the PID
The front panel looks almost too simple at first.
There’s an automatic brew button, a manual brew button, a steam button and a small touch display with plus and minus controls.
The depth comes from a settings menu you enter by holding the plus button for three seconds.
| Setting | What it controls | Range | Default |
|---|---|---|---|
| H-1 | Brew temperature | 176–215°F | 199°F |
| H-2 | Steam temperature | Adjustable | Factory set |
| H-3 | Milk cutoff temperature | 104–194°F | 140°F |
| P-1 | Pre-wetting time | 0–10 sec | 2 sec |
| P-2 | Pre-infusion soak time | 0–10 sec | 2 sec |
| Auto brew time | Timed shot length | 10–120 sec | 25 sec |
| S-0 / S-1 | Manual or auto steam | Two modes | — |
Ranges and defaults from the Gemilai owner documentation.
Timed versus manual shots
The automatic button runs a timed shot.
There’s no flow meter inside, so the machine stops by time rather than by volume.
That’s fine once your grind is dialed in, but while you’re learning, I found manual mode far more useful.
Manual mode runs until you press the button again.
I used it with a scale under the cup and stopped by weight, which is the most reliable way to repeat a recipe.
It’s also the mode you need for longer drinks like a lungo or a café crema that run well past 30 seconds.
Two small quirks
The plus button sits to the left of the minus button.
Most digital controls put the plus on the right, so I pressed the wrong one more than once in the first week.
It’s a habit you adjust to, but it’s worth knowing.
The second quirk is a temperature offset.
The water that actually reaches the puck runs a little cooler than the number on the display, and it drifts slightly lower over the course of a shot.
For light roasts, I set the display a few degrees higher than my target brew temperature to compensate.
Our tip: For light roasts, set H-1 three to four degrees above your target to make up for the small drop between display and puck.
The adjustable OPV and brew pressure
The knob next to the group head is the headline feature for a lot of buyers.
It adjusts the over-pressure valve, or OPV, which sets the maximum pressure the pump can push through the coffee.
Gemilai lists a range of roughly 6 to 11 bar, and the gauge on the front shows you exactly where you are.
Vibration pumps on home machines can push well past 9 bar if nothing reins them in.
Too much pressure can compact the puck, encourage channeling and pull harsh flavors from the coffee.
An OPV bleeds off the excess so the puck sees a steadier, more sensible maximum.
What the OPV does and doesn’t do
It’s important to understand what this valve can’t do.
It sets a ceiling, not a curve.
During the first seconds of a shot, while pressure is still building below your limit, the valve is completely passive.
So turning the dial early in a shot won’t create a soft ramp-up or a gentle pre-infusion.
It only starts to matter once the pressure reaches the limit you set.
If you want a gentle start, the P-1 and P-2 pre-infusion settings are the tool for that job.
The 15-bar pump rating is a maximum, not what you want at the puck.
How I set my pressure
- Fit the blind disc: put the cleaning disc in the portafilter and lock it in.
- Run the pump: start a manual shot and watch the needle climb.
- Turn the knob: clockwise lowers pressure, counterclockwise raises it.
- Aim a touch high: I set about 10 bar with the disc, because a real puck lets some water through.
- Check with coffee: pull a real shot and confirm the gauge settles near 9 bar.
One nice touch is that the adjustment is on the outside.
On many machines, changing the OPV means removing the casing and reaching inside with a screwdriver.
Here you can change it in seconds, which makes experimenting with lower pressure for light roasts genuinely practical.
| Roast | Peak pressure I started with | Why |
|---|---|---|
| Dark | 8–9 bar | Softer extraction, less bitterness |
| Medium | 9 bar | Classic balance of body and sweetness |
| Light | 6–8 bar | Less channeling in dense, hard beans |
My own starting points. Your beans and grinder will move these.
Gemilai G3028A espresso performance
This is where the G3028A earned most of its score.
My standard recipe was 17.5 grams of freshly ground coffee in the double basket.
I stirred the grounds with a needle tool, tamped level with the included tamper and locked in the bottomless portafilter so I could watch the flow.
Using manual mode, I aimed for 35 grams of espresso in the cup, a classic 1:2 ratio.
The stream came together quickly into a steady, centered pour without spurts.
That’s a good sign that both the shower screen and the pressure are doing their jobs.
The post-shot drip
There’s one number you’ll want to plan around.
When I stopped the pump exactly at 35 grams, the cup kept filling as the last espresso drained out of the basket and spouts.
My final cup weight landed around 41 grams.
About 6 grams of drip after the pump stops, so stop a little early if you want an exact 1:2.
If you want a true 1:2 in the cup, stop the pump a few grams early.
After a couple of days I simply stopped at around 30 grams and let the drip finish the job.
Our tip: Stop the pump about 5 grams before your target weight, because the basket keeps dripping after the shot ends.
How the shots tasted
With a well-dialed medium roast, the shots had real clarity.
The crema was thick, and the flavor leaned toward cocoa with balanced acidity and a light spice note in the finish.
Between a 1:2 and 1:2.3 ratio, I got my best results, and they repeated from day to day once the grind was set.
The 3-way solenoid valve also helps here.
It releases pressure from the group when the shot ends, so the puck came out dry and firm instead of soupy.
That makes the knock-out cleaner and tells you more about how evenly the shot ran.
| Roast | Dose | Yield in cup | Time | H-1 display setting |
|---|---|---|---|---|
| Dark | 17.5 g | 35 g | 25–30 sec | 196°F / 91°C |
| Medium | 17.5 g | 35–40 g | 25–30 sec | 199°F / 93°C |
| Light | 17.5 g | 40–44 g | 28–34 sec | 204°F / 96°C |
Starting points from my testing and common espresso guidance. The light-roast setting includes my offset for the display.
Using pre-infusion
P-1 controls how long water flows onto the puck, and P-2 controls how long it then soaks before full pressure.
The defaults are 2 seconds each, and I settled on 2 seconds of flow and 3 seconds of soak for most coffees.
That gentle start fully wets the puck and noticeably reduced spurting from the bottomless portafilter.
For very dark roasts, I sometimes turned pre-infusion off entirely.
They extract easily, and the extra soak could push them toward bitterness.
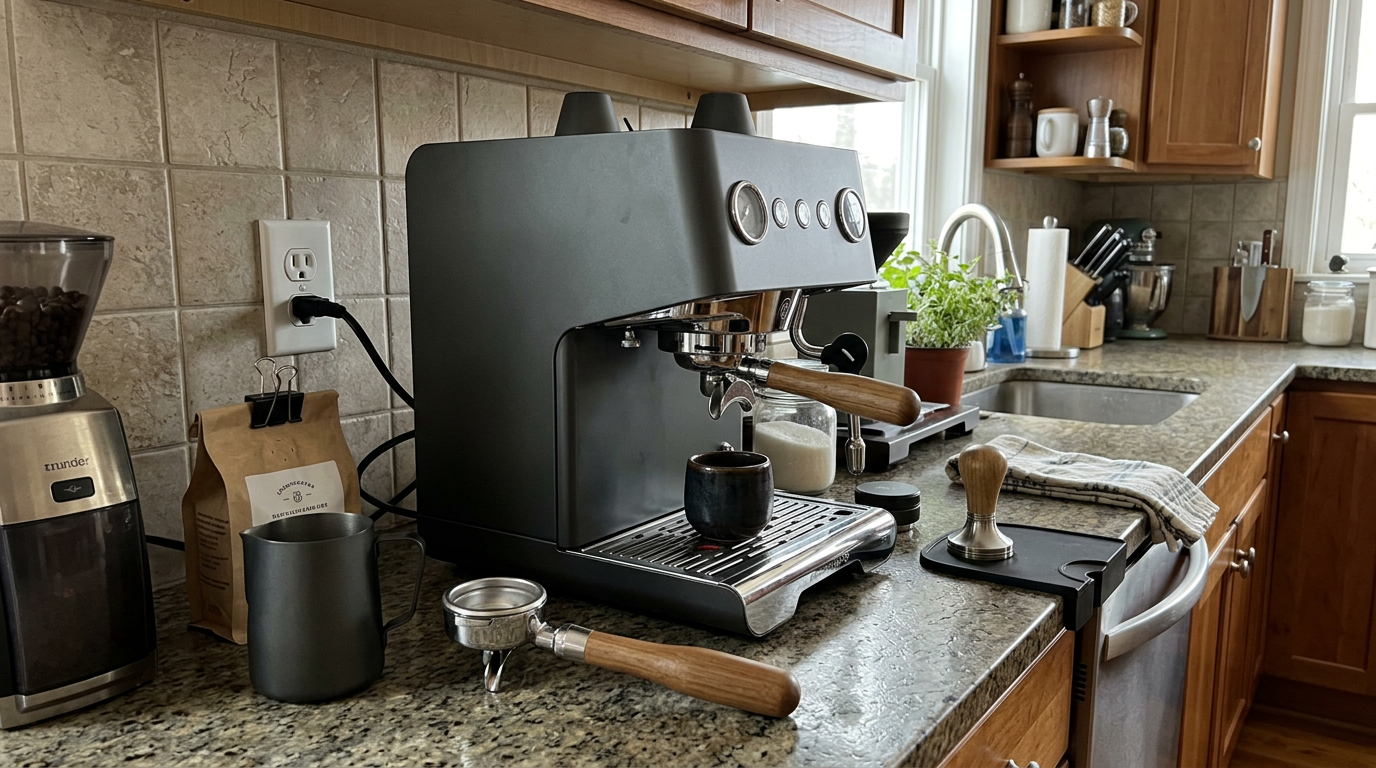
The bottomless portafilter shows every flaw in your puck prep, which makes it a brilliant teacher.
Steaming milk on the G3028A
The milk side impressed me more than I expected.
Press the steam button and the thermoblock is ready almost immediately, with no long wait for pressure to build.
The two-hole tip produces a strong, steady jet that makes it easy to get the milk spinning.
The auto-stop probe
The wand has a temperature sensor built into its tip.
In S-1 mode, it watches the milk temperature in real time and cuts the steam once it hits your H-3 setting.
I set mine to 142°F, which is hot enough to drink straight away and still sweet.
For 5 to 6 ounces of milk, a full steaming cycle took about 40 seconds.
That’s a calm, workable pace, especially for newer baristas who need time to adjust the pitcher angle.
How much water ends up in your milk
Every steam wand adds a little condensed water to the milk.
I weighed the pitcher before and after, and a standard 40-second cycle added about 23 grams.
That’s squarely in the normal range for a thermoblock steam system.
Less added water means richer, less diluted milk.
In the cup, I couldn’t taste any dilution in a latte.
If you drink small cortados with very little milk, you might notice it slightly more.
My steaming technique
- Purge: open the steam for a second to clear condensed water.
- Position: put the tip just under the surface at about the three o’clock position.
- Stretch: let the tip draw in small sips of air for the first few seconds.
- Roll: lower the tip slightly to create a vortex that folds the foam in.
- Hold still: keep the pitcher steady until the probe stops the steam.
- Clean: wipe the wand and purge it again right away.
Milk choice makes a real difference.
Whole milk with roughly 3.5 to 3.8% fat gave me the glossiest, most stable microfoam.
Keep the pitcher still during the rolling phase, because moving it around tends to break the vortex and create bigger bubbles.
Our tip: Keep the probe submerged throughout, or the auto-stop will read the air instead of the milk.
A wand that’s easier to keep clean
Inside the stainless steel arm is a thick PTFE lining.
That keeps the outside of the wand cooler, so milk is less likely to bake onto it.
It also reduces condensation inside the tube, which helps the steam stay dry and strong.
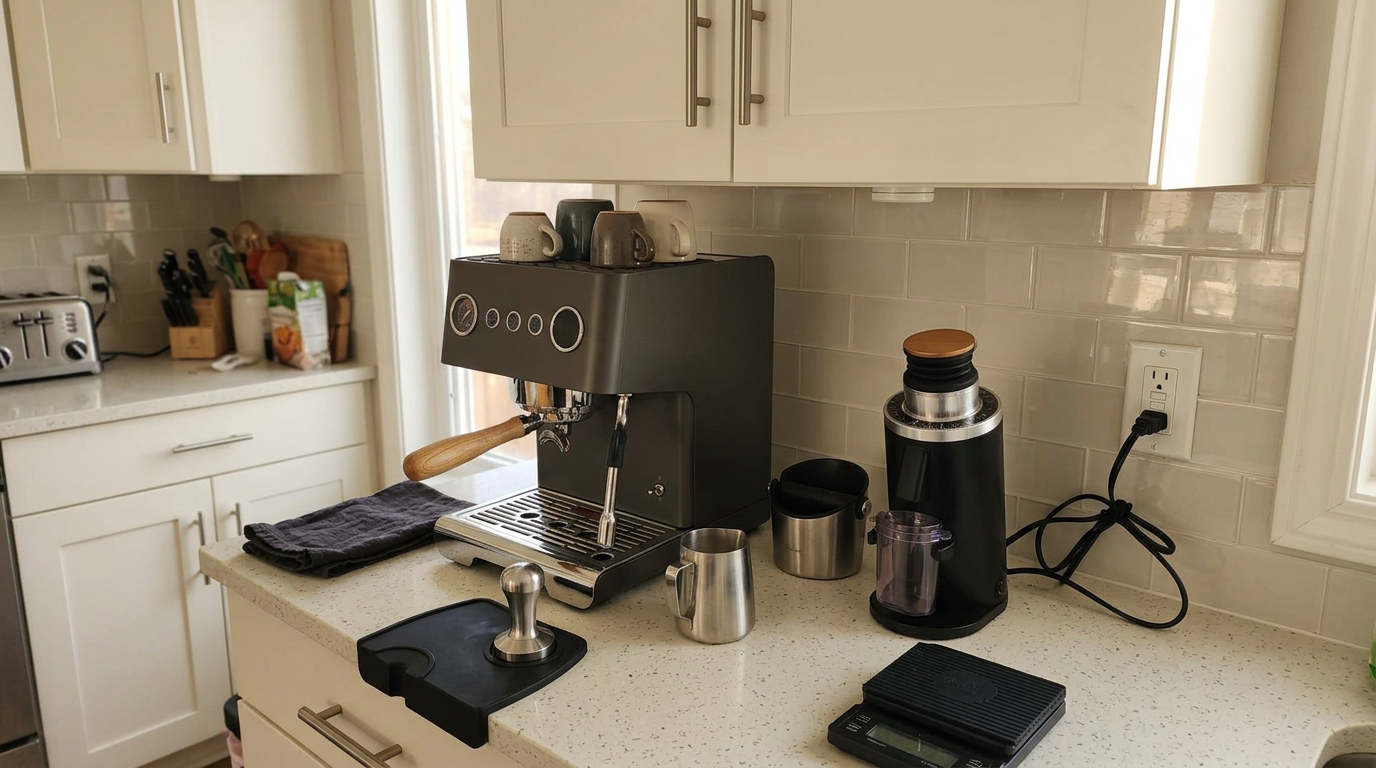
A scale and pitcher are the only extras I’d add for milk drinks.
Noise and vibration
Under pump load, I measured the G3028A at roughly 75 decibels.
That’s about what you’d expect from a vibration pump, and it’s in the same neighborhood as a running vacuum cleaner.
Typical reference levels for common household sounds.
The pump’s vibration travels through the chassis.
Against a hard tiled backsplash or tucked under low cabinets, I found the sound echoed and felt harsher.
Pulling the machine forward a few inches made a clear difference.
Our tip: Leave a hand’s width between the machine and the wall to cut down on pump rattle and echo.
Cleaning and maintaining the G3028A
This is one of the machine’s quiet strengths.
Single-circuit thermoblock machines often need to flush cold water to bring the temperature down from steam to brew levels.
All of that water goes into the drip tray, which fills up fast.
The G3028A doesn’t need those cooling flushes, because brewing and steaming are already separate.
At two to four shots a day, I only needed to empty the drip tray about once every five days.
Based on two to four shots a day with milk drinks.
The body is also easy to wipe down.
The front shell is a smooth, rounded piece without deep grooves for grounds to hide in.
| When | Task | Why it matters |
|---|---|---|
| After each milk drink | Purge and wipe the steam wand | Stops milk drying on the tip and probe |
| After each shot | Flush the group briefly | Rinses grounds from the shower screen |
| Every few days | Empty and rinse the drip tray | Prevents odors |
| Weekly | Backflush with the cleaning disc | Removes coffee oils from the group |
| When CLn appears | Full descale | Controls scale in the boiler and steam path |
Descaling made simple
The machine counts your shots and shows “CLn” on the display after 500 brews.
That’s your cue to descale, and there are guided modes for each part of the system.
Gemilai recommends mixing water and descaler at a 4:1 ratio in the tank.
Holding the steam button for three seconds runs the steam path, and holding the manual brew button runs a backflush cycle with the cleaning disc.
For the boiler, you run hot water through, let the solution sit for at least 15 minutes, then rinse thoroughly.
The shower screen and steam tip unscrew so you can soak them separately.
With hard water, I’d descale sooner than the reminder.
Error codes worth knowing
| Code | Meaning | What to do |
|---|---|---|
| F-3 | Water tank is low | Refill between MIN and MAX |
| CLn | Descale reminder | Run the descaling routine |
| E-1 | Brew boiler sensor fault | Check room temperature, then contact support |
| E-3 | Steam thermocouple fault | Contact support |
| E-4 | Steam block sensor fault | Check room temperature, then contact support |
From the Gemilai owner documentation.
What daily use is really like
My mornings with the Gemilai G3028A fell into an easy rhythm.
I switched it on first thing, filled the kettle for the rest of the house, and by the time I’d ground my beans, it was ready.
A quick blank flush, then puck prep, then the shot.
On the 120V version, the milk comes next.
The steam block is ready the moment the shot finishes, and with auto-stop enabled I could set the pitcher down and stir my espresso while the milk heated.
| Step | Who does the work | Time |
|---|---|---|
| Warm-up | Machine | ~5 min |
| Grind and puck prep | You | ~1 min |
| Shot | Machine, you stop it | ~30 sec |
| Milk | Machine stops at temperature | ~40 sec |
| Pour and clean up | You | ~1 min |
From switch-on to finished latte, my first drink took about eight minutes, most of it warm-up.
The second drink took closer to three.
Making drinks for two
This is where the 120V limitation shows most.
Making two lattes means shot, milk, shot, milk, rather than overlapping the tasks.
It’s still faster than a single-circuit machine because nothing has to cool down or reheat, but it isn’t as fluid as a machine that does both at once.
For one or two drinks a morning, I didn’t mind.
If you regularly make four or five milk drinks in a row, it’s worth considering.
The missing hot water spout
There’s no dedicated hot water outlet.
For an Americano, I ran hot water through the group head into a separate cup, which works but is less tidy.
If you drink a lot of Americanos or tea, a kettle beside the machine solves it.
Grinder, beans and water
The G3028A doesn’t have a built-in grinder, and that’s both a cost and a freedom.
You’ll need a grinder that can grind finely and adjust in small steps, because espresso is sensitive to tiny changes.
The upside is that you can upgrade the grinder later without replacing the machine.
Honestly, the grinder will have as much influence on your shots as the machine itself.
A blade grinder or a coarse-only burr grinder won’t do the G3028A justice.
Picking your beans
Start with fresh whole beans roasted within the last few weeks.
Coffee that has rested for several days after roasting tends to behave better than coffee straight from the roaster.
Very old beans run fast and taste flat, and no amount of pressure tuning can fix that.
A medium roast is the easiest place to learn the machine.
Once you’re comfortable, light roasts are where the adjustable OPV and higher brew temperatures really pay off.
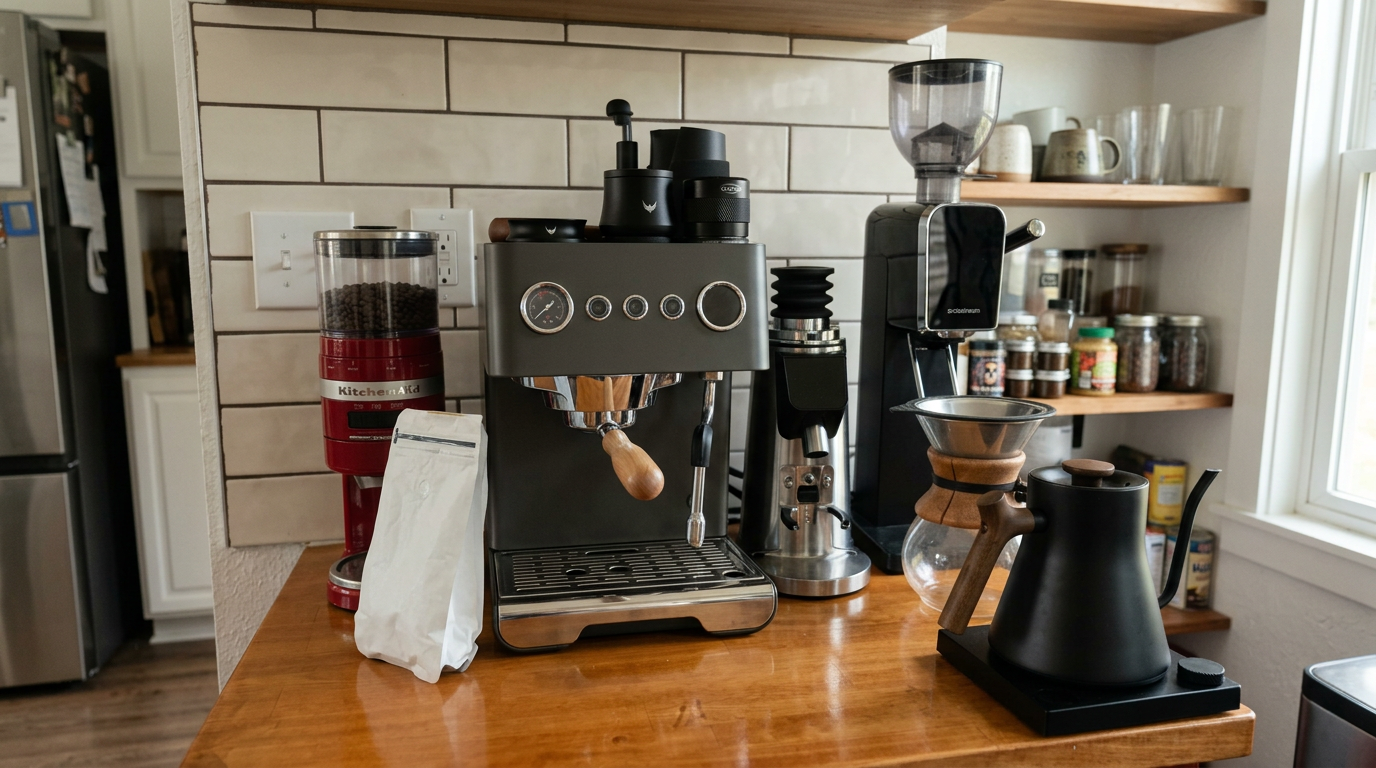
The G3028A fits easily into a coffee corner next to a good grinder and a kettle for other brews.
Water matters more than most people think
Espresso is mostly water, so what you put in the tank shapes both the taste and the life of the boiler.
Hard water speeds up scale formation, while very pure water can make coffee taste flat.
Filtered or softened water is the sensible middle ground, and Gemilai recommends softened water too.
| Water type | Taste | Effect on the machine |
|---|---|---|
| Hard tap water | Can taste chalky | Fast scale buildup |
| Filtered or softened | Balanced | Slower scaling |
| Distilled only | Flat and hollow | Can confuse level sensors |
Our tip: Test your tap water hardness with a cheap strip before you fill the tank for the first time.
Accessories I’d actually add
A small coffee scale is the single most useful addition, since the machine doesn’t weigh the shot for you.
A needle tool for stirring the grounds is the second, because it directly improves distribution.
A larger milk pitcher makes sense if you regularly steam for two.
Common mistakes to avoid
The G3028A is forgiving in many ways, but a few habits can still trip you up in the first weeks.
| Mistake | What happens | Better habit |
|---|---|---|
| Brewing right after the display stops flashing | First shot runs cool | Flush the group and wait a minute |
| Setting the OPV to 9 bar with the blind disc | Real shots run below 9 bar | Set slightly higher, then check with coffee |
| Turning the OPV knob to “profile” early in a shot | Nothing changes | Use P-1 and P-2 for a gentle start |
| Relying on timed shots while dialing in | Yield varies by grind | Use manual mode and a scale |
| Lifting the probe out of the milk | Auto-stop misreads | Keep the tip submerged |
| Ignoring hard water | Scale builds faster | Filter and descale on time |
Dialing in is the part people worry about most.
In practice, I usually needed three or four shots to get close with a new bag.
Change one thing at a time, and grind size is almost always the first thing to adjust.
| What you taste or see | Likely cause | First change |
|---|---|---|
| Sour, sharp, thin | Under-extraction | Grind finer or raise temperature |
| Bitter, harsh, drying | Over-extraction | Grind coarser or lower temperature |
| Spurts from the bottomless portafilter | Channeling | Stir the grounds and add pre-infusion |
| Gauge stuck low, fast shot | Grind too coarse | Grind finer |
| Gauge maxed, barely drips | Grind too fine | Grind coarser |
Our tip: Watch the pressure gauge during every shot, because a needle that never climbs tells you to grind finer before you even taste it.
What I would change
My wish list is short.
A hot water spout would make the machine far more versatile for Americano drinkers.
A clear water tank, or at least a level window, would save lifting the lid.
And I’d swap the plus and minus buttons around so they match every other control I use.
Is the Gemilai G3028A worth the money?
The real question is what you’d otherwise have to accept.
Many machines in this class use a single thermoblock for everything.
They heat fast, but temperature can wander during a shot, and switching between brewing and steaming means waiting or flushing.
The G3028A gives you a proper 550 ml brew boiler, a heated group, a separate steam block, an adjustable OPV, a live gauge and an auto-stop milk probe.
That’s a feature set usually found higher up the market.
It also ships with two good portafilters and a quality tamper, so you won’t be buying the basics twice.
The trade-offs are real but specific.
On 120V, you won’t brew and steam together, and there’s no hot water spout.
If neither of those affects your routine, the value case is strong.
Versatility loses points for the missing hot water spout and sequential brew-and-steam on 120V.
Ask yourself three questions before you buy.
How many milk drinks do you make in a row, do you already own a capable grinder, and do you want to learn the craft or skip it?
If the answers are one or two, yes, and learn it, this machine fits you very well.
For me, the steady shots and hands-free milk outweighed the small workflow compromises.
That balance is what earns it an 8.4.
How it compares with other espresso setups
The most useful comparison isn’t with one specific model.
It’s with the types of machine you’re most likely choosing between at this level.
The Gemilai G3028A sits between a basic single-thermoblock machine and a full dual-boiler setup.
| Feature | Gemilai G3028A | Single thermoblock machine | Full dual boiler |
|---|---|---|---|
| Brew temperature stability | High (550 ml boiler) | Moderate | High |
| Steam ready time | Near instant | Wait to heat up | Always ready |
| Brew and steam together | 230V only | No | Yes |
| Cooling flush after steaming | Not needed | Usually needed | Not needed |
| Adjustable peak pressure | Front knob with gauge | Rarely | Often internal |
| Auto-stop milk temperature | Yes | Sometimes | Rarely |
| Warm-up time | ~5 min | Under 1 min | 15–30 min |
| Counter footprint | Wide but shallow | Small | Large and heavy |
A single thermoblock machine heats faster and takes up less space.
But it asks you to manage temperature swings, and it fills the drip tray quickly with cooling flushes.
A full dual boiler can brew and steam together at any voltage and holds a large volume of steam.
It also takes much longer to warm up, uses more energy and needs a lot more counter space.
The G3028A lands in a smart middle ground.
It gives you boiler-quality shots and quick steam, in a footprint and warm-up time that suit a normal kitchen.
General figures for each machine type, with my own measurement for the G3028A.
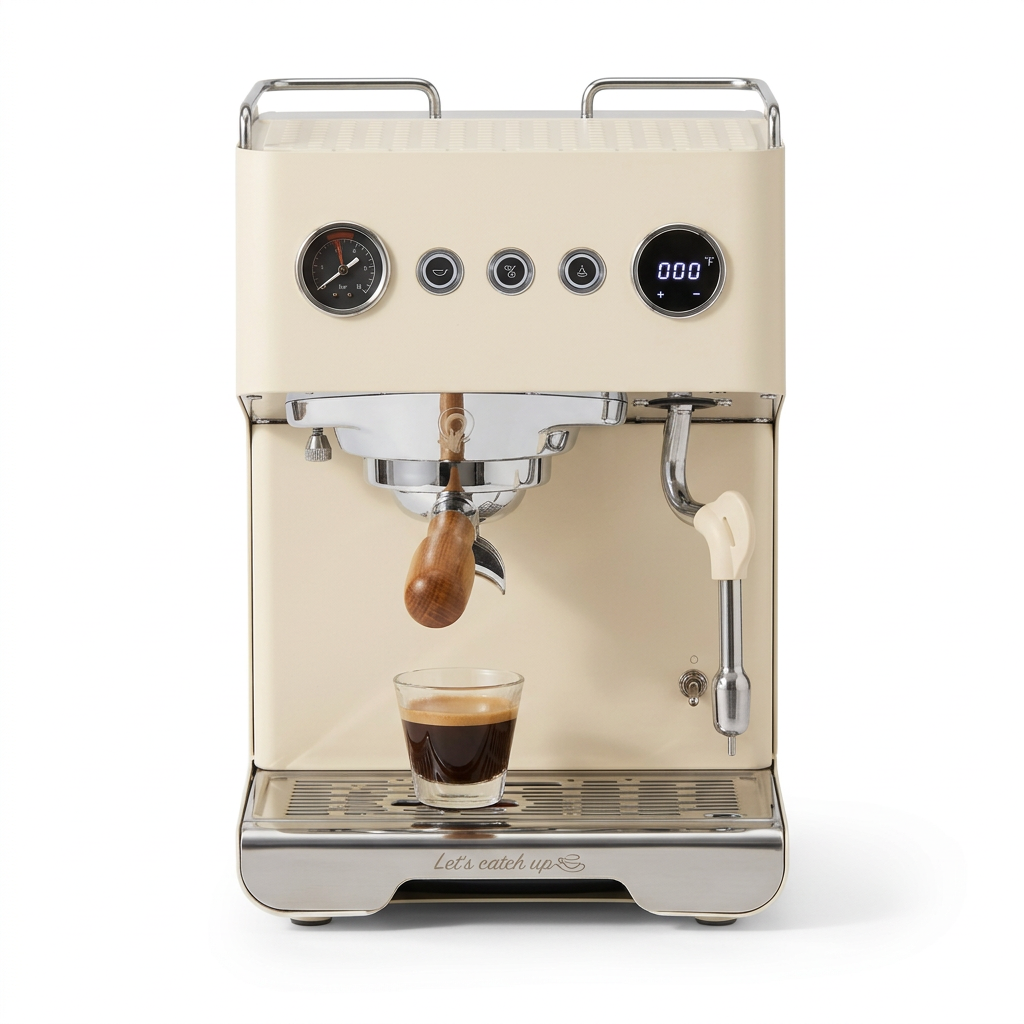
Pressure gauge on the left, three buttons in the middle and the temperature display on the right.
Gemilai G3028A specifications
From manufacturer data and my own notes on the machine.
How I tested and scored the Gemilai G3028A
I used the Gemilai G3028A as my daily machine, pulling two to four shots a day and making lattes and cappuccinos with whole milk.
I weighed doses and yields on a separate scale, measured the milk pitcher before and after steaming and timed warm-up and recovery from cold and from economy mode.
I also set the OPV with the blind disc, compared the gauge with real shots and tracked how often the drip tray needed emptying.
I then compared those notes with Gemilai’s specifications and general espresso brewing guidance.
- Espresso (8.7): temperature stability, pressure control and shot consistency.
- Milk (8.5): steam power, auto-stop accuracy and added water.
- Workflow (8.0): warm-up, controls and the sequential 120V routine.
- Cleaning (8.6): drip tray load, wipe-down and descaling guidance.
The overall score of 8.4 is an editorial rating that reflects those four areas.
Gemilai G3028A FAQ
Is the Gemilai G3028A worth it?
Yes, if you want stable boiler shots, adjustable pressure and automatic milk temperature control. It’s less suited to people who make many milk drinks back to back on 120V power.
Can you brew and steam at the same time?
Not on the 120V North American version, because of circuit power limits. The 230V international versions can do both together.
How long does it take to warm up?
About 5 minutes from cold in my testing. It goes into economy mode after a period of inactivity and takes about 3 minutes to recover.
Does the OPV allow pressure profiling?
Not really. The OPV sets a maximum pressure and only acts once that limit is reached. Use the two pre-infusion settings for a gentler start.
What pressure should I set?
Set about 10 bar with the blind disc so real shots settle near 9 bar. Try lower pressure for light roasts.
What dose should I start with?
I used 17.5 grams in the double basket and aimed for about 35 grams out, stopping a few grams early because of the post-shot drip.
Does it have a hot water spout?
No. You can run hot water through the group head, but a kettle is easier for Americanos and tea.
Does it include a grinder?
No. You’ll need a separate grinder that can grind finely enough for espresso.
How often does it need descaling?
The machine reminds you after 500 brews. Descale sooner if your water is hard.
- Hands-on testing of the Gemilai G3028A
- Gemilai product specifications and owner documentation
- General espresso brewing and maintenance guidance